> ## Documentation Index
> Fetch the complete documentation index at: https://docs.dfns.co/llms.txt
> Use this file to discover all available pages before exploring further.
# Manage users and roles
> Manage team members and their roles within your DFNS organization, including inviting users, assigning permissions, and removing access.
**Key Takeaways:**
* **Users** are individuals invited to your DFNS organization.
* **Roles** are collections of permissions that define what a user can see and do.
* **Best Practice:** Grant users the minimum permissions necessary for their job (principle of least privilege).
## Manage users
You can easily invite new team members to your DFNS organization and manage their access directly from the dashboard.
### Invite a new user
To add a new member to your team:
1. Navigate to **Users**.
2. Click the **Invite User** button in the top-right corner.
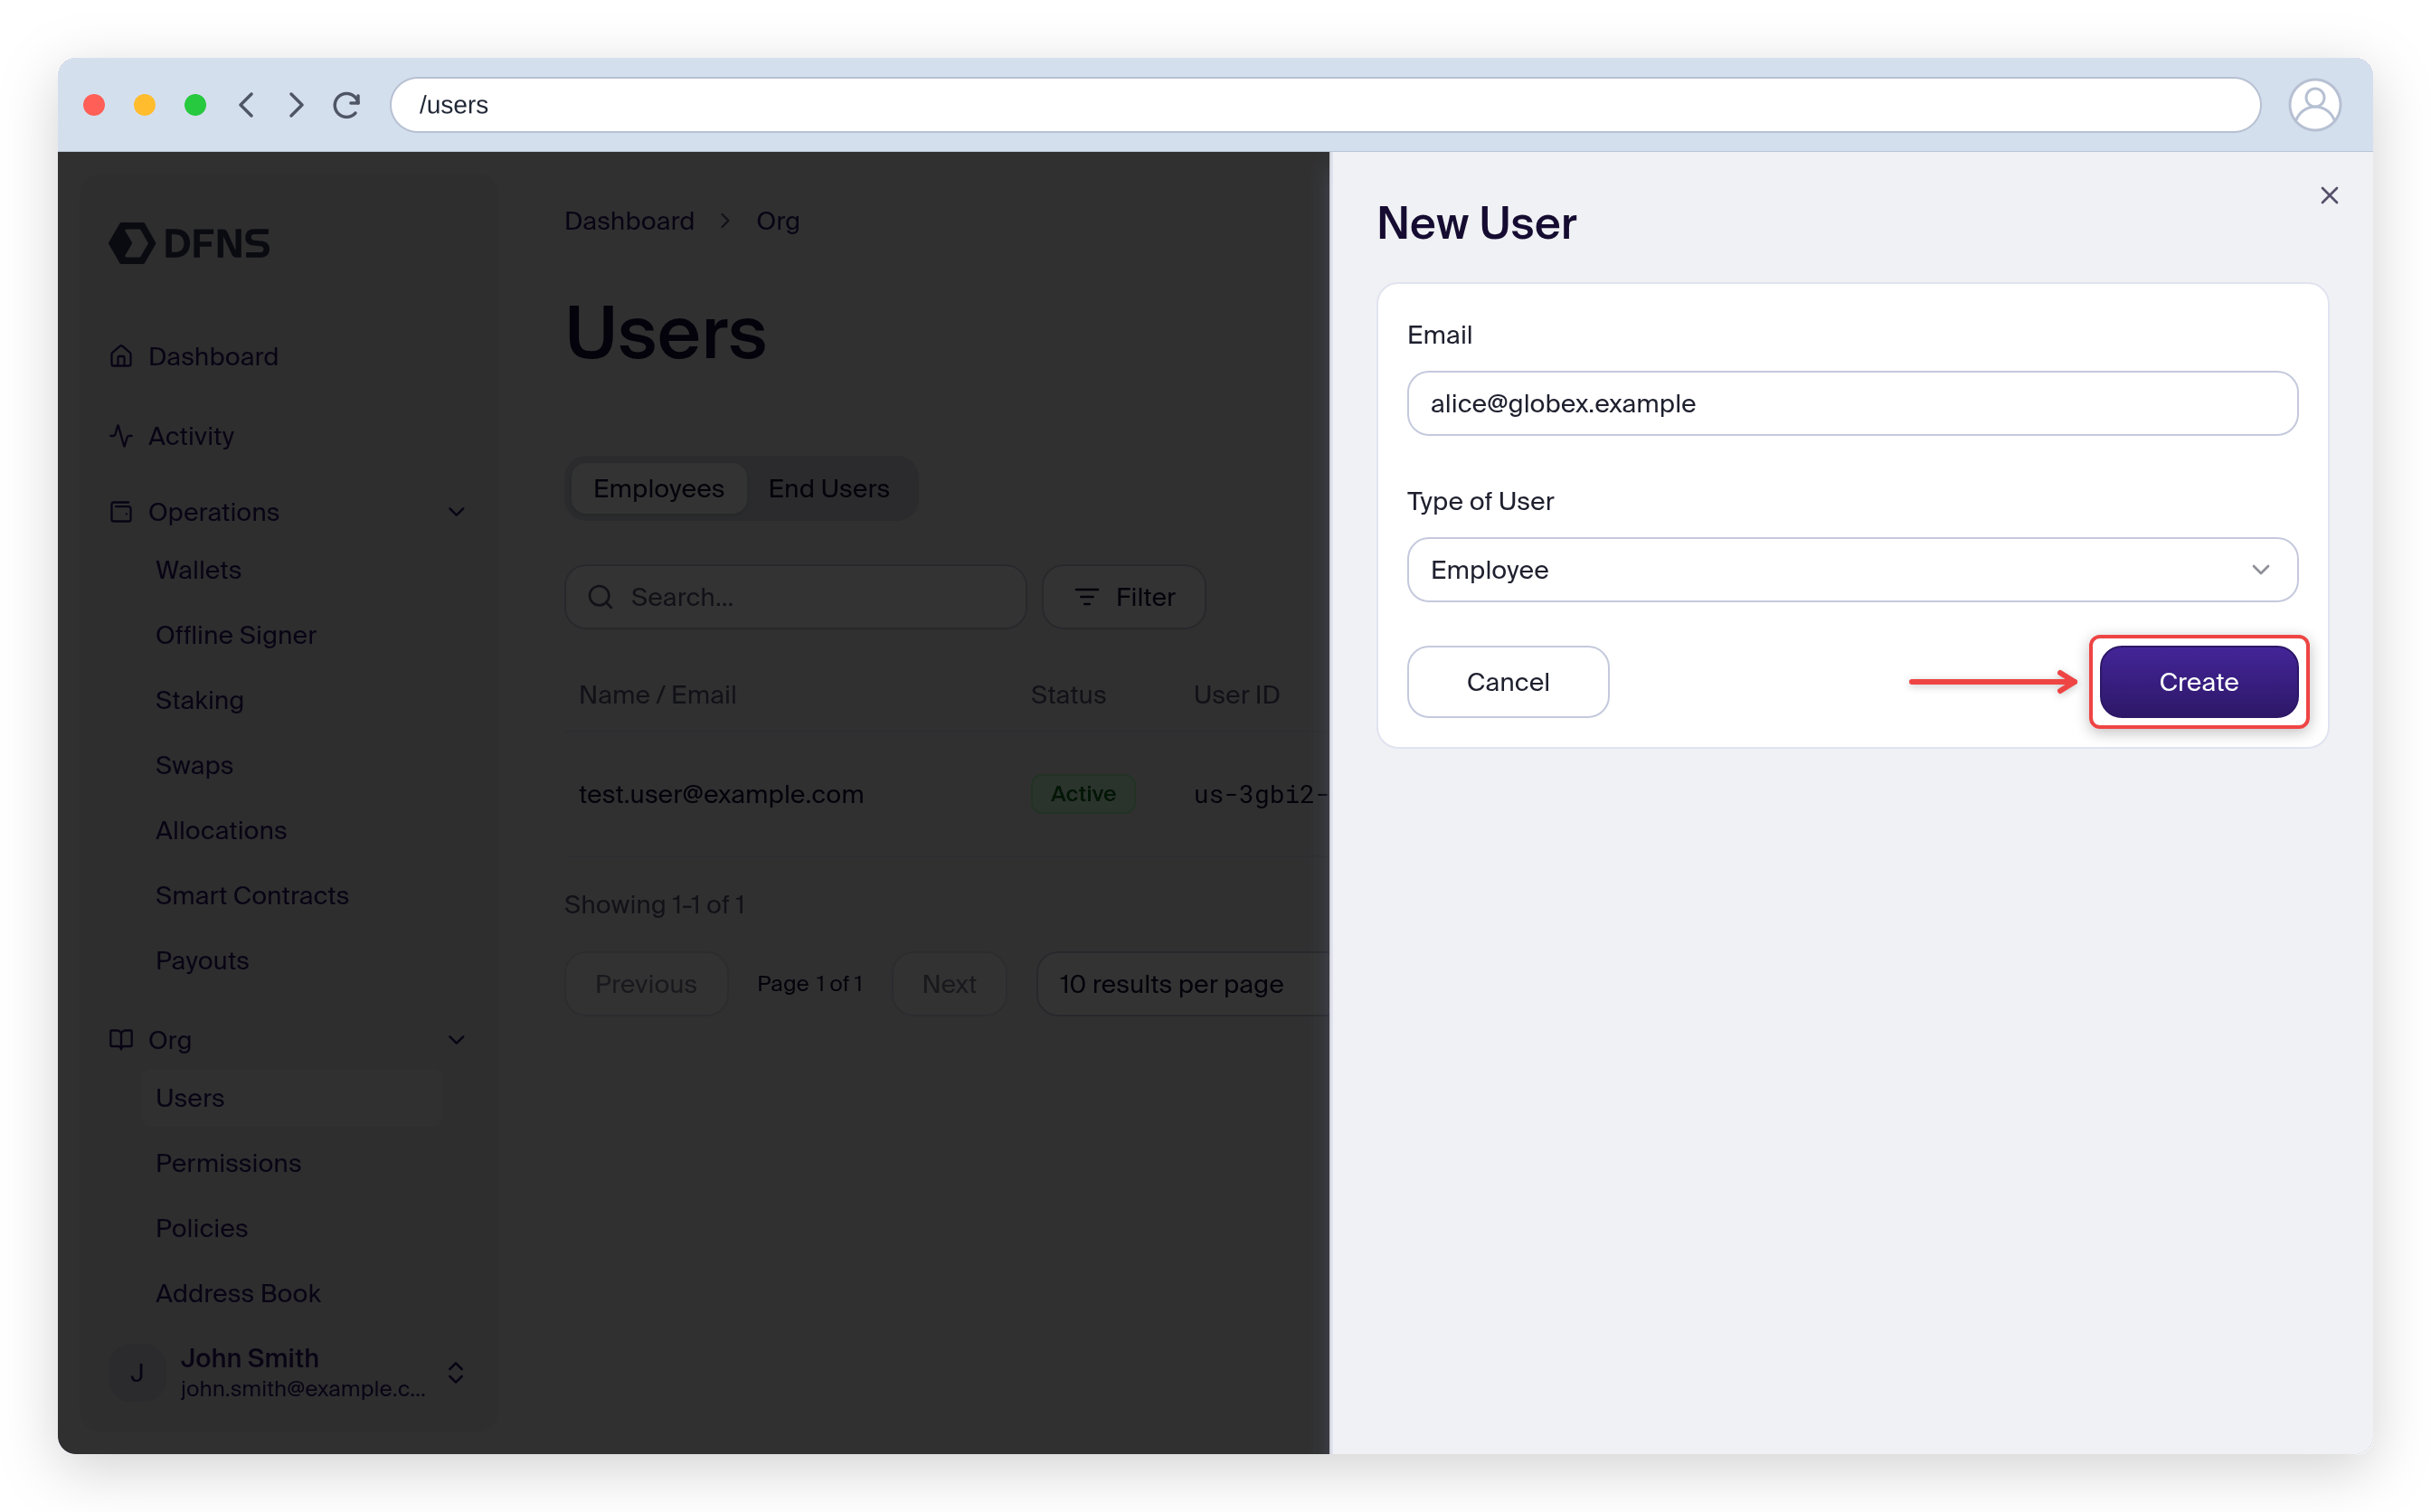
3. Enter the user's **email address**.
4. Click **Create**.
The user will receive an email invitation to join your DFNS organization.
They are created without any role or permission, so they cannot see or do anything. You should then assign roles to them to grant them permissions.
 ### Deactivate a user
If a team member no longer requires access, you can deactivate their account. Deactivating a user immediately revokes their access to the DFNS dashboard and API. Any [Personal Access Tokens](/guides/developers/personal-access-token) or other credentials linked to the user will also stop working. Reactivating the user restores access, including their PATs.
1. Navigate to **Users**.
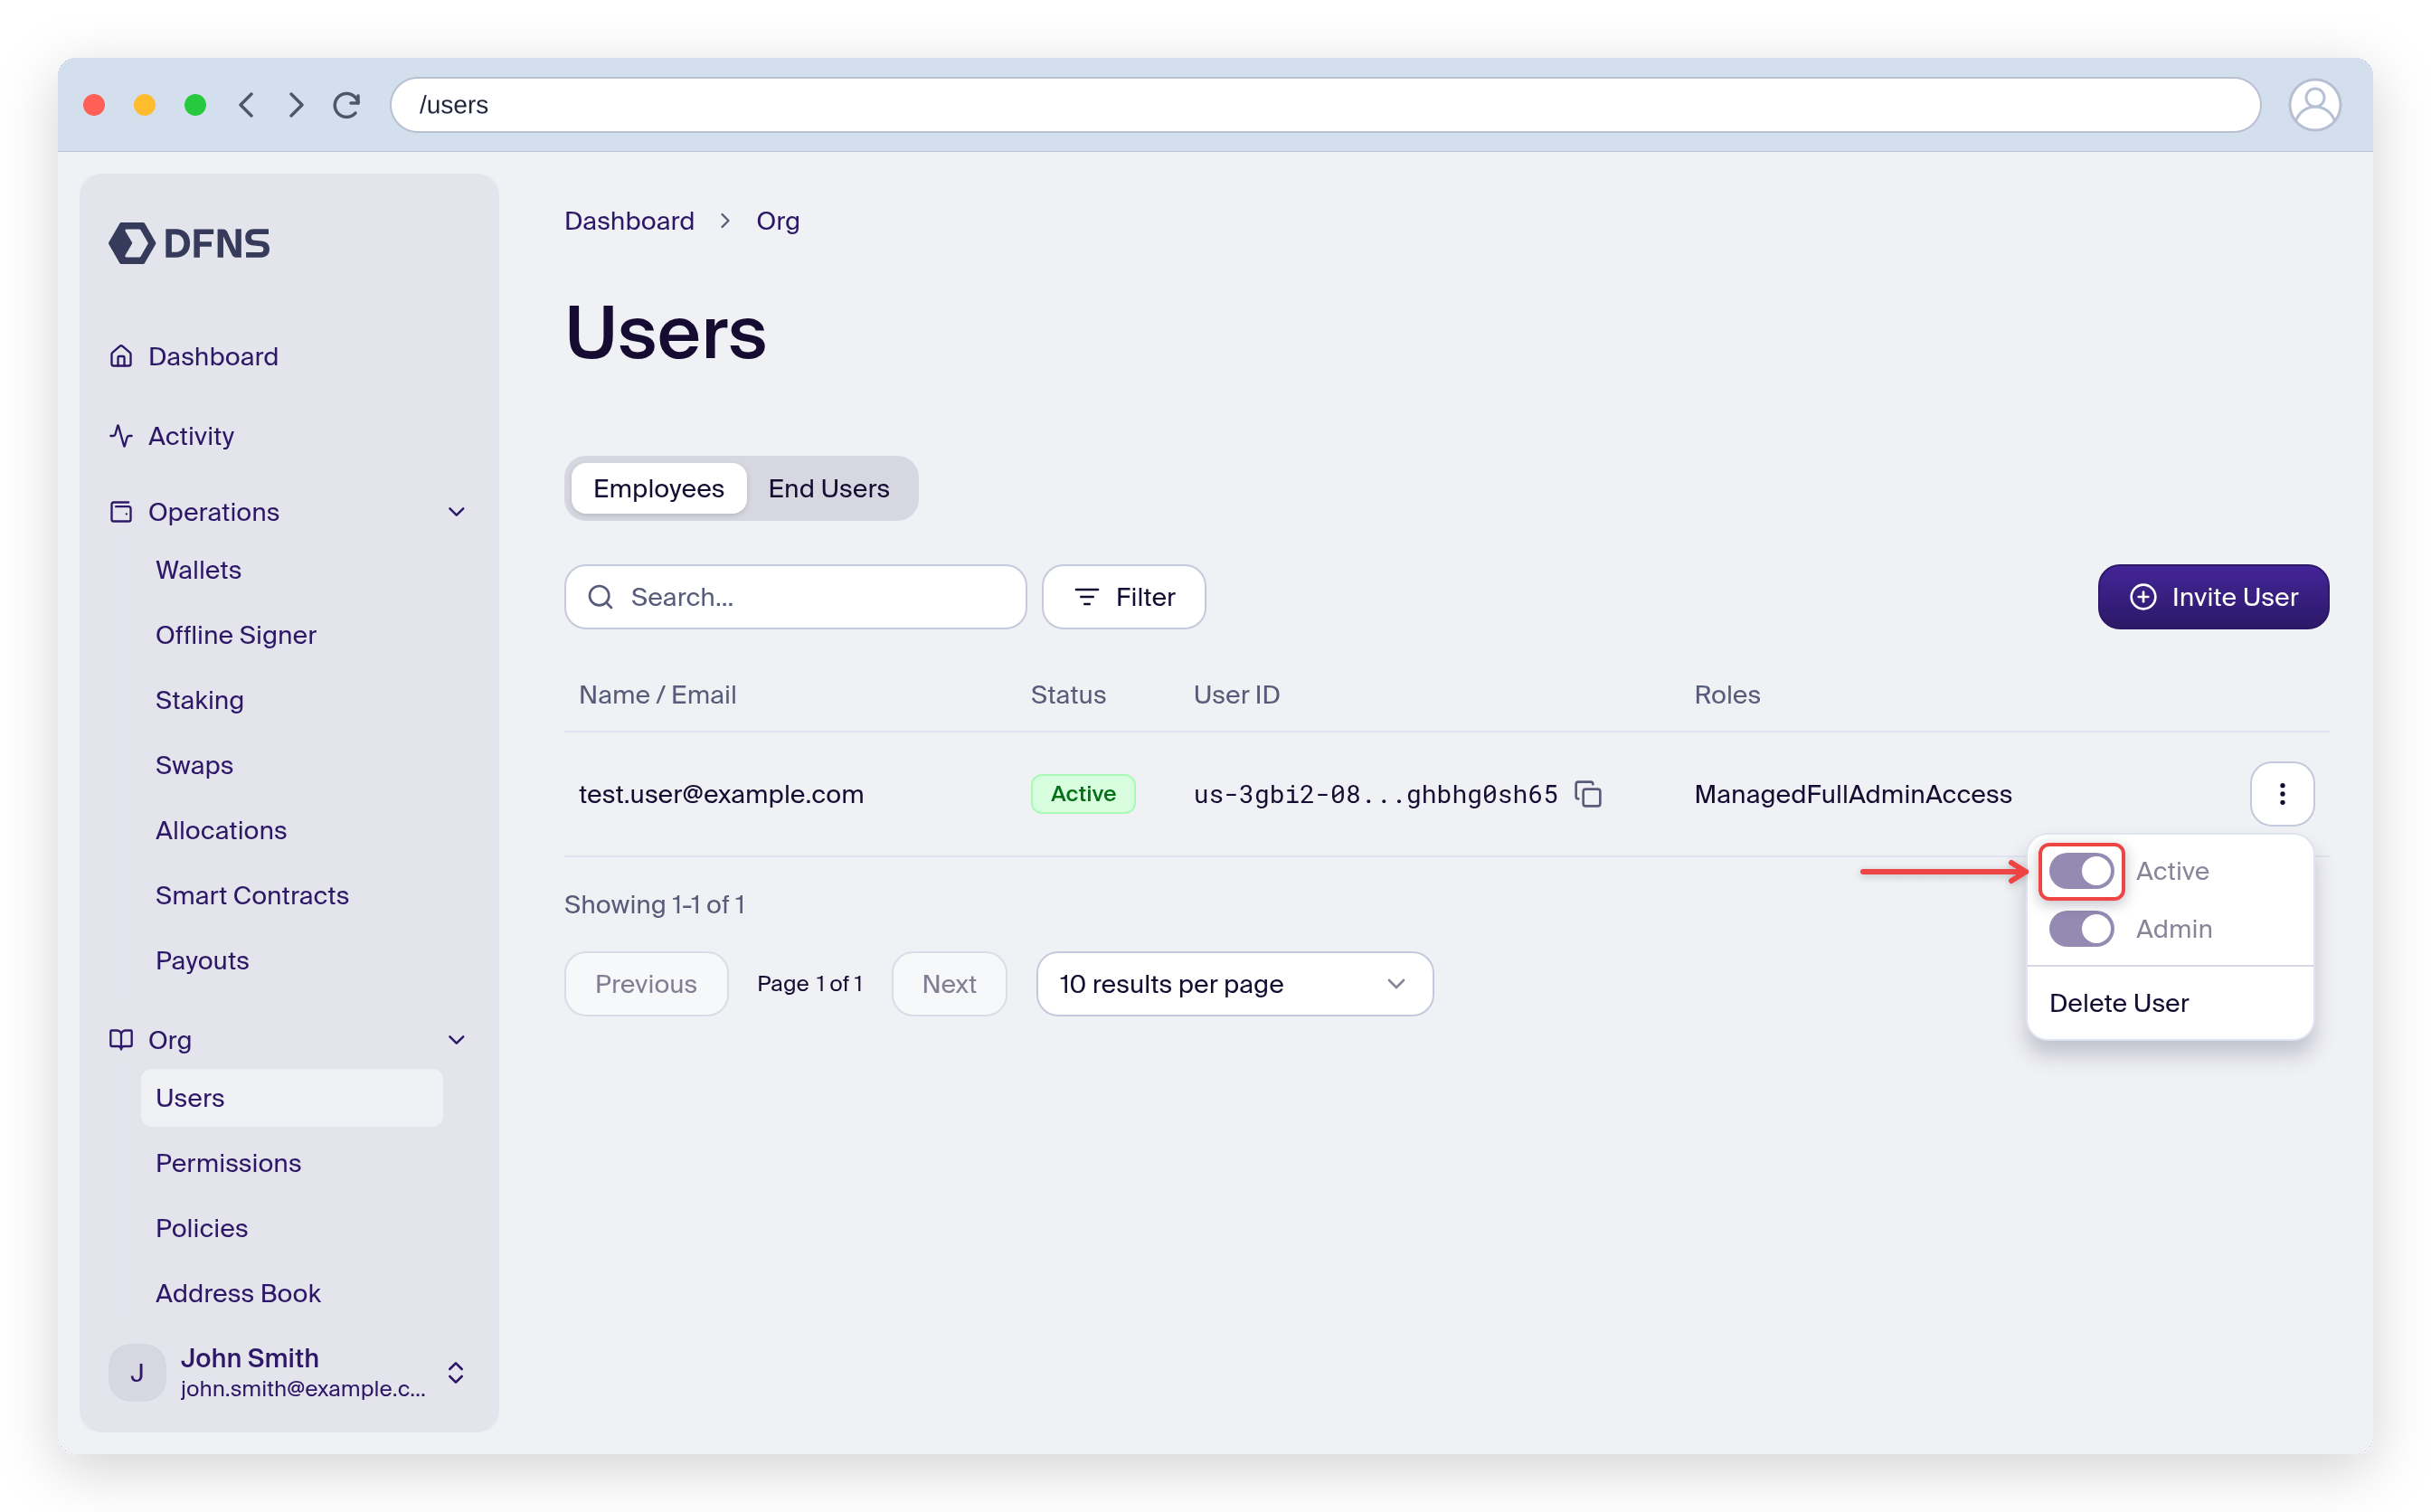
2. Find the user in the list and open its action menu.
3. Toggle off **Active** to deactivate the user (or click **Delete User** to remove them entirely).
### Deactivate a user
If a team member no longer requires access, you can deactivate their account. Deactivating a user immediately revokes their access to the DFNS dashboard and API. Any [Personal Access Tokens](/guides/developers/personal-access-token) or other credentials linked to the user will also stop working. Reactivating the user restores access, including their PATs.
1. Navigate to **Users**.
2. Find the user in the list and open its action menu.
3. Toggle off **Active** to deactivate the user (or click **Delete User** to remove them entirely).
 ## Manage roles
Roles allow you to define granular permissions and apply them consistently to different users. This approach simplifies access management and enhances security.
### Creating a custom role
DFNS provides default roles like `ManagedFullAdminAccess` (which is applied when you set someone as an Admin), but we highly recommend creating custom roles tailored to your team's specific responsibilities.
1. Navigate to **Org** > **Permissions**.
2. Click **Create Role**.
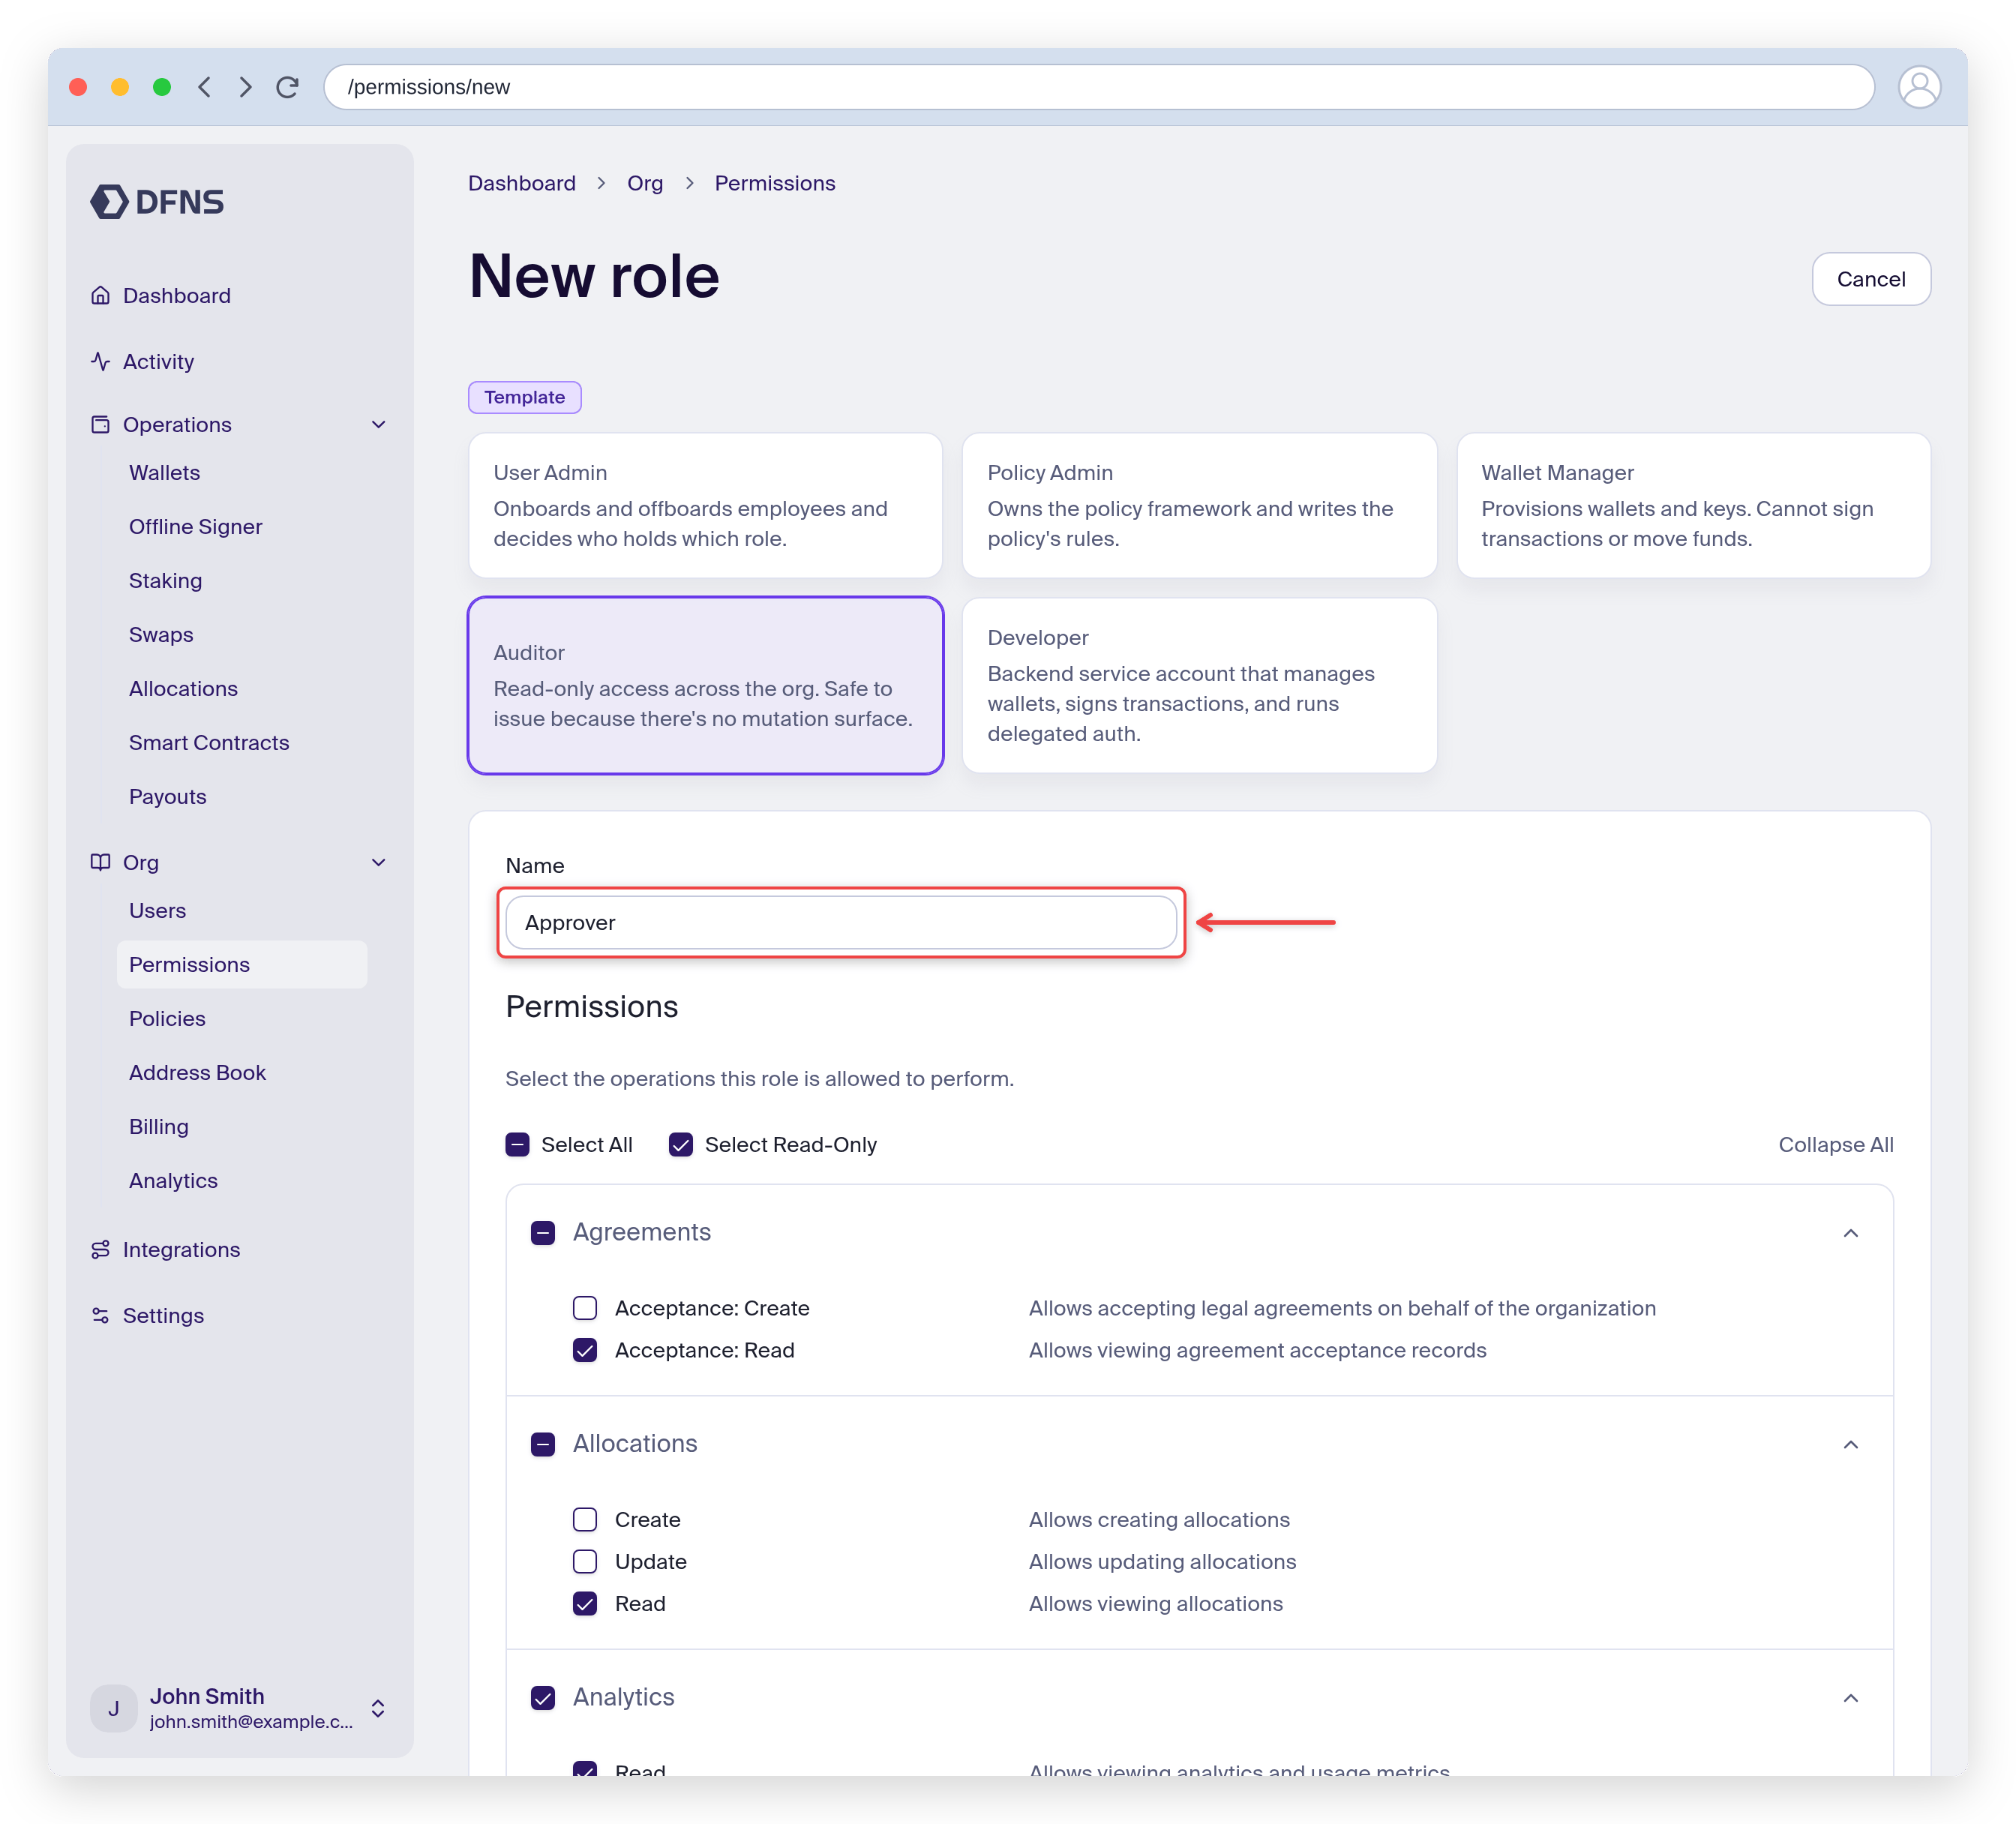
3. Give the role a descriptive **Name** (e.g., "Approver", "Auditor", "Transaction Operator").
4. Select the specific **Permissions** you want to include. Each permission is broken down by action (`Create`, `Read`, `Update`) and resource (`Wallets`, `Policies`, etc.).
5. Click **Create** to save the new role.
## Manage roles
Roles allow you to define granular permissions and apply them consistently to different users. This approach simplifies access management and enhances security.
### Creating a custom role
DFNS provides default roles like `ManagedFullAdminAccess` (which is applied when you set someone as an Admin), but we highly recommend creating custom roles tailored to your team's specific responsibilities.
1. Navigate to **Org** > **Permissions**.
2. Click **Create Role**.
3. Give the role a descriptive **Name** (e.g., "Approver", "Auditor", "Transaction Operator").
4. Select the specific **Permissions** you want to include. Each permission is broken down by action (`Create`, `Read`, `Update`) and resource (`Wallets`, `Policies`, etc.).
5. Click **Create** to save the new role.
 ### Assigning roles to users
You can assign or change a user's roles at any time.
1. Navigate to **Users**.
2. Click on the user you wish to edit.
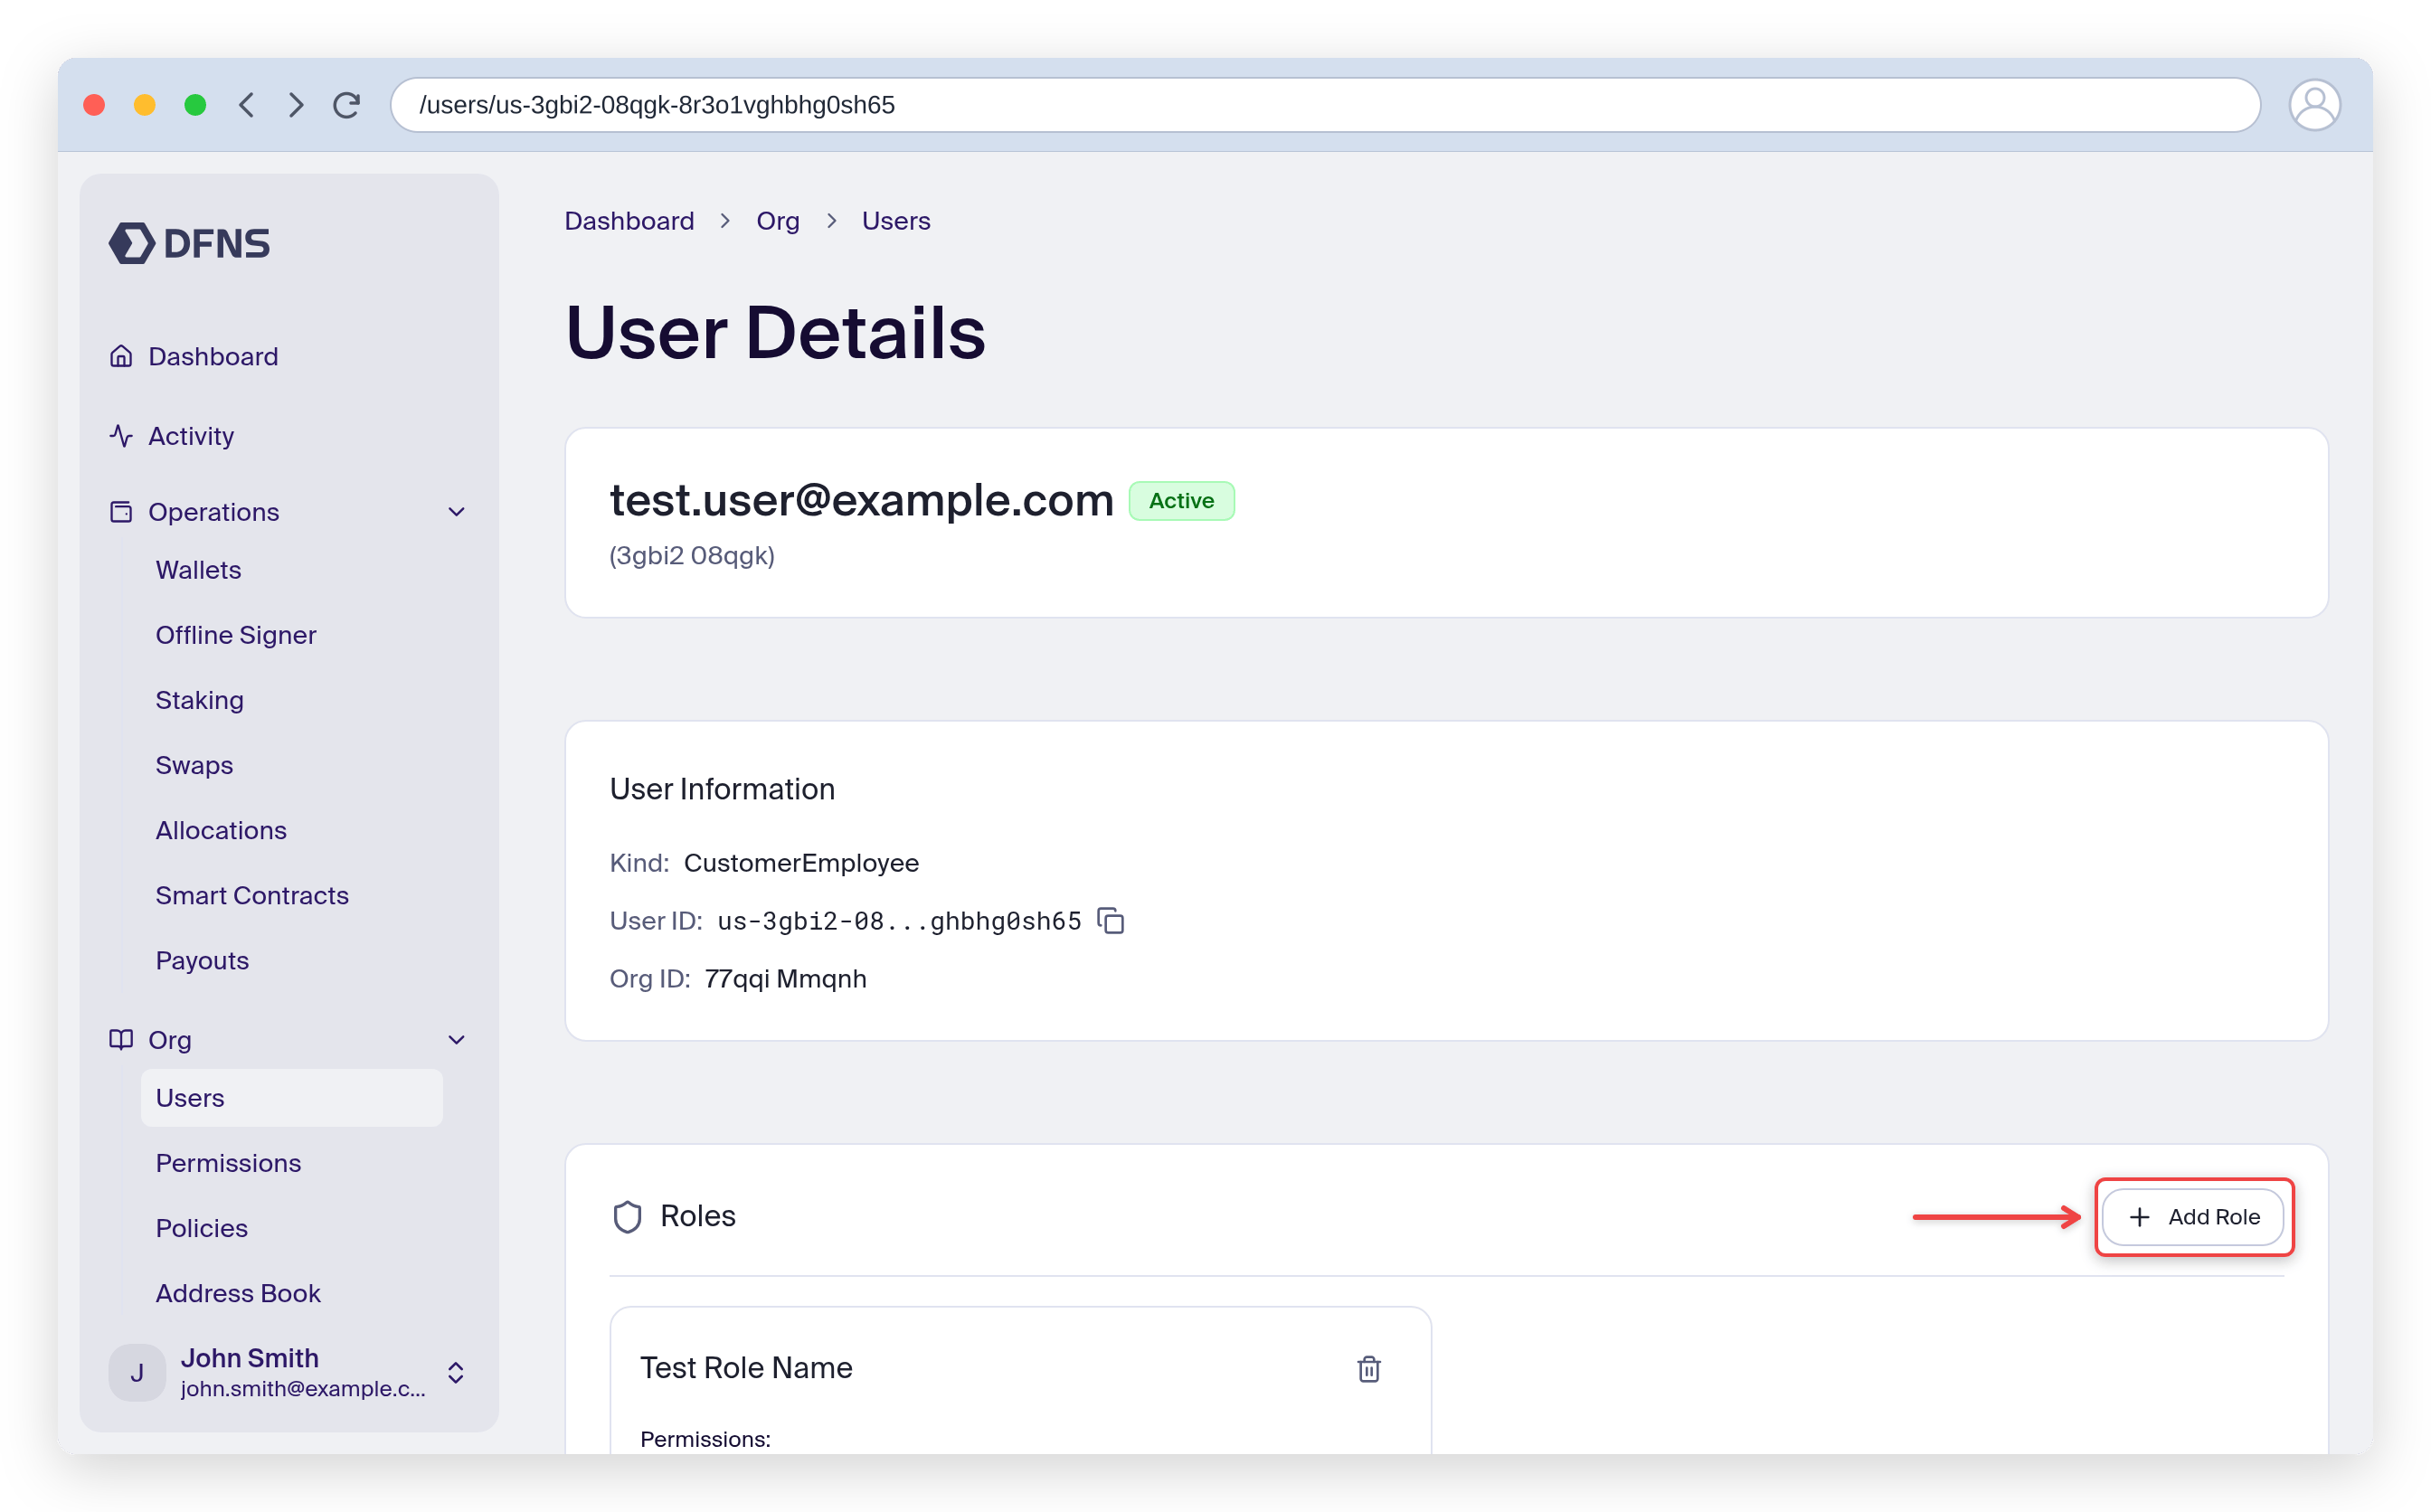
3. In the **Roles** section, click **Add Role** to assign a role, or remove existing ones.
4. Changes are saved automatically.
### Assigning roles to users
You can assign or change a user's roles at any time.
1. Navigate to **Users**.
2. Click on the user you wish to edit.
3. In the **Roles** section, click **Add Role** to assign a role, or remove existing ones.
4. Changes are saved automatically.
 ## Recommendations and best practices
Adhering to the **principle of least privilege** is crucial for security. Each user should only have the roles essential to perform their duties. Avoid using the broad `Admin` role for daily operations.
See an example with an "Approver" role in the [Permission-Based Access Control](/guides/permission-based-access-control) tutorial.
## Recommendations and best practices
Adhering to the **principle of least privilege** is crucial for security. Each user should only have the roles essential to perform their duties. Avoid using the broad `Admin` role for daily operations.
See an example with an "Approver" role in the [Permission-Based Access Control](/guides/permission-based-access-control) tutorial.