> ## Documentation Index
> Fetch the complete documentation index at: https://docs.dfns.co/llms.txt
> Use this file to discover all available pages before exploring further.
# Define and assign roles
> Give your users the right level of access to the DFNS features and secure your organization by defining a clear set of reusable roles.
Roles are a whitelist of permissions that a user will be allowed to use. Please refer to the complete documentation for more details, including the full list of permissions: [permissions overview](/core-concepts/roles-and-permissions#list-of-permissions)
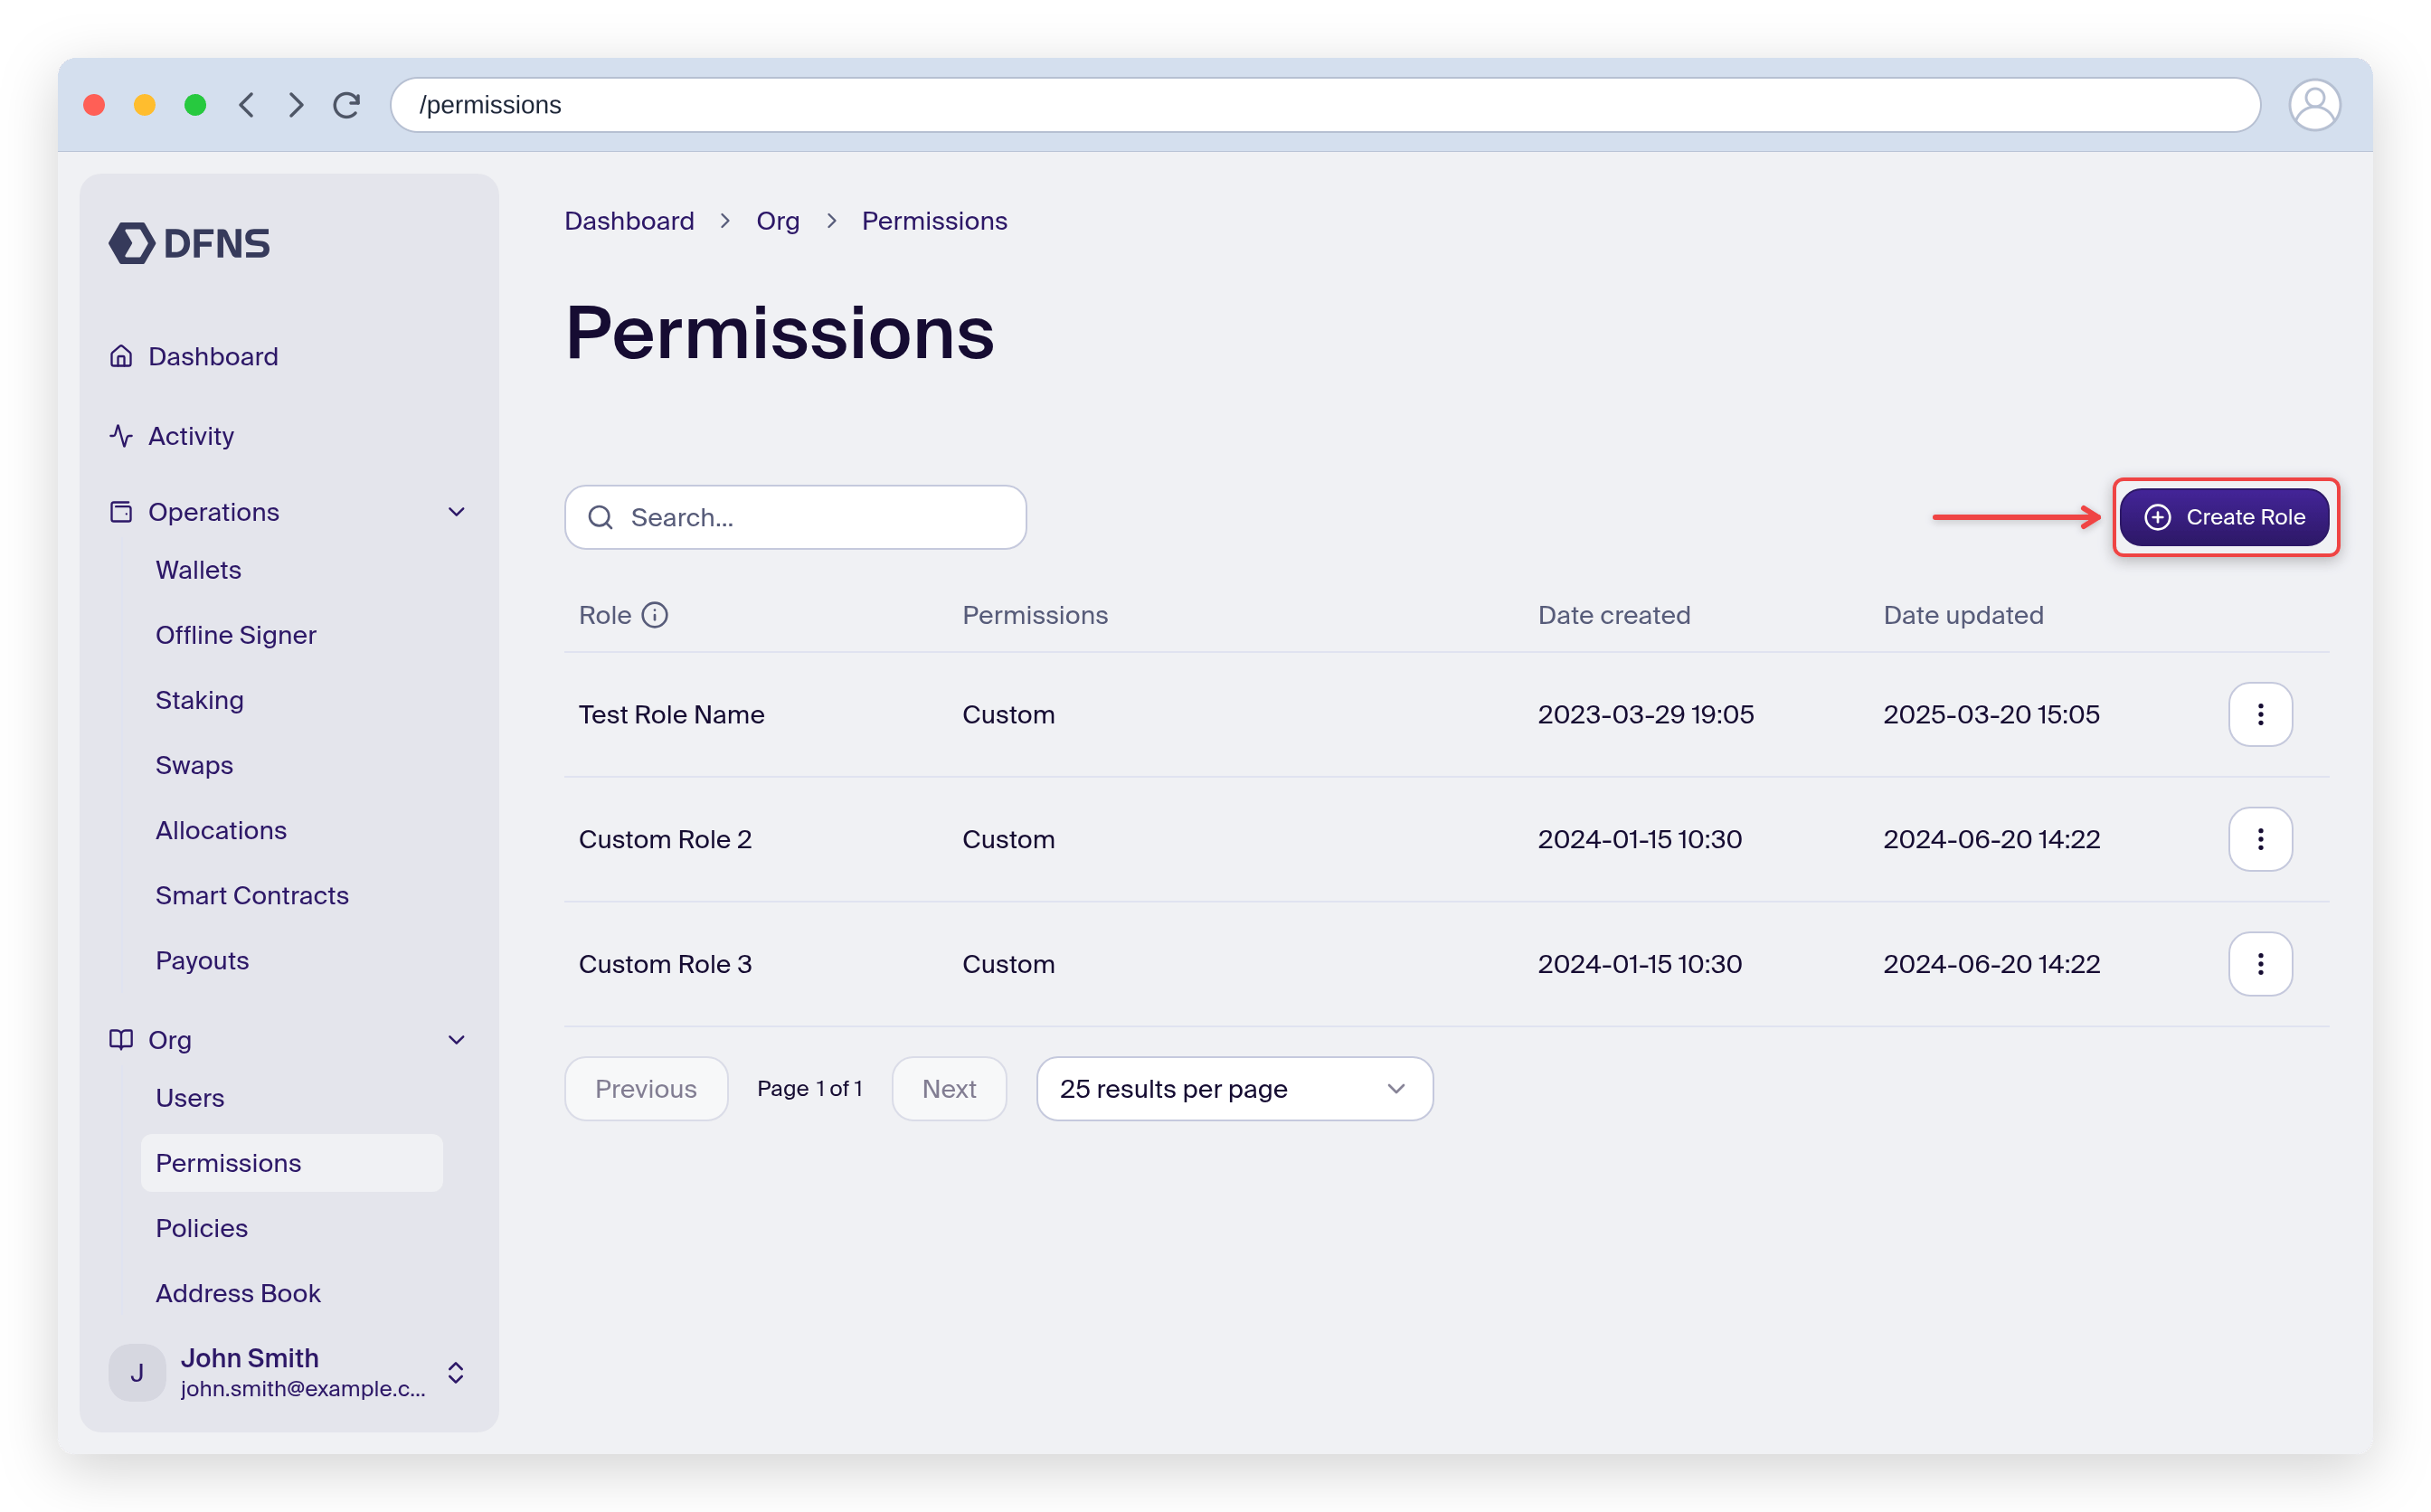
Head to the Permissions page: `Settings > Permissions` (direct link: [https://app.dfns.io/permissions](https://app.dfns.io/permissions)). Then click "Create Role".
 Give a name to your role, in our example: "Approver", a user whose only job will be to validate transactions. Select the permissions as shown below:
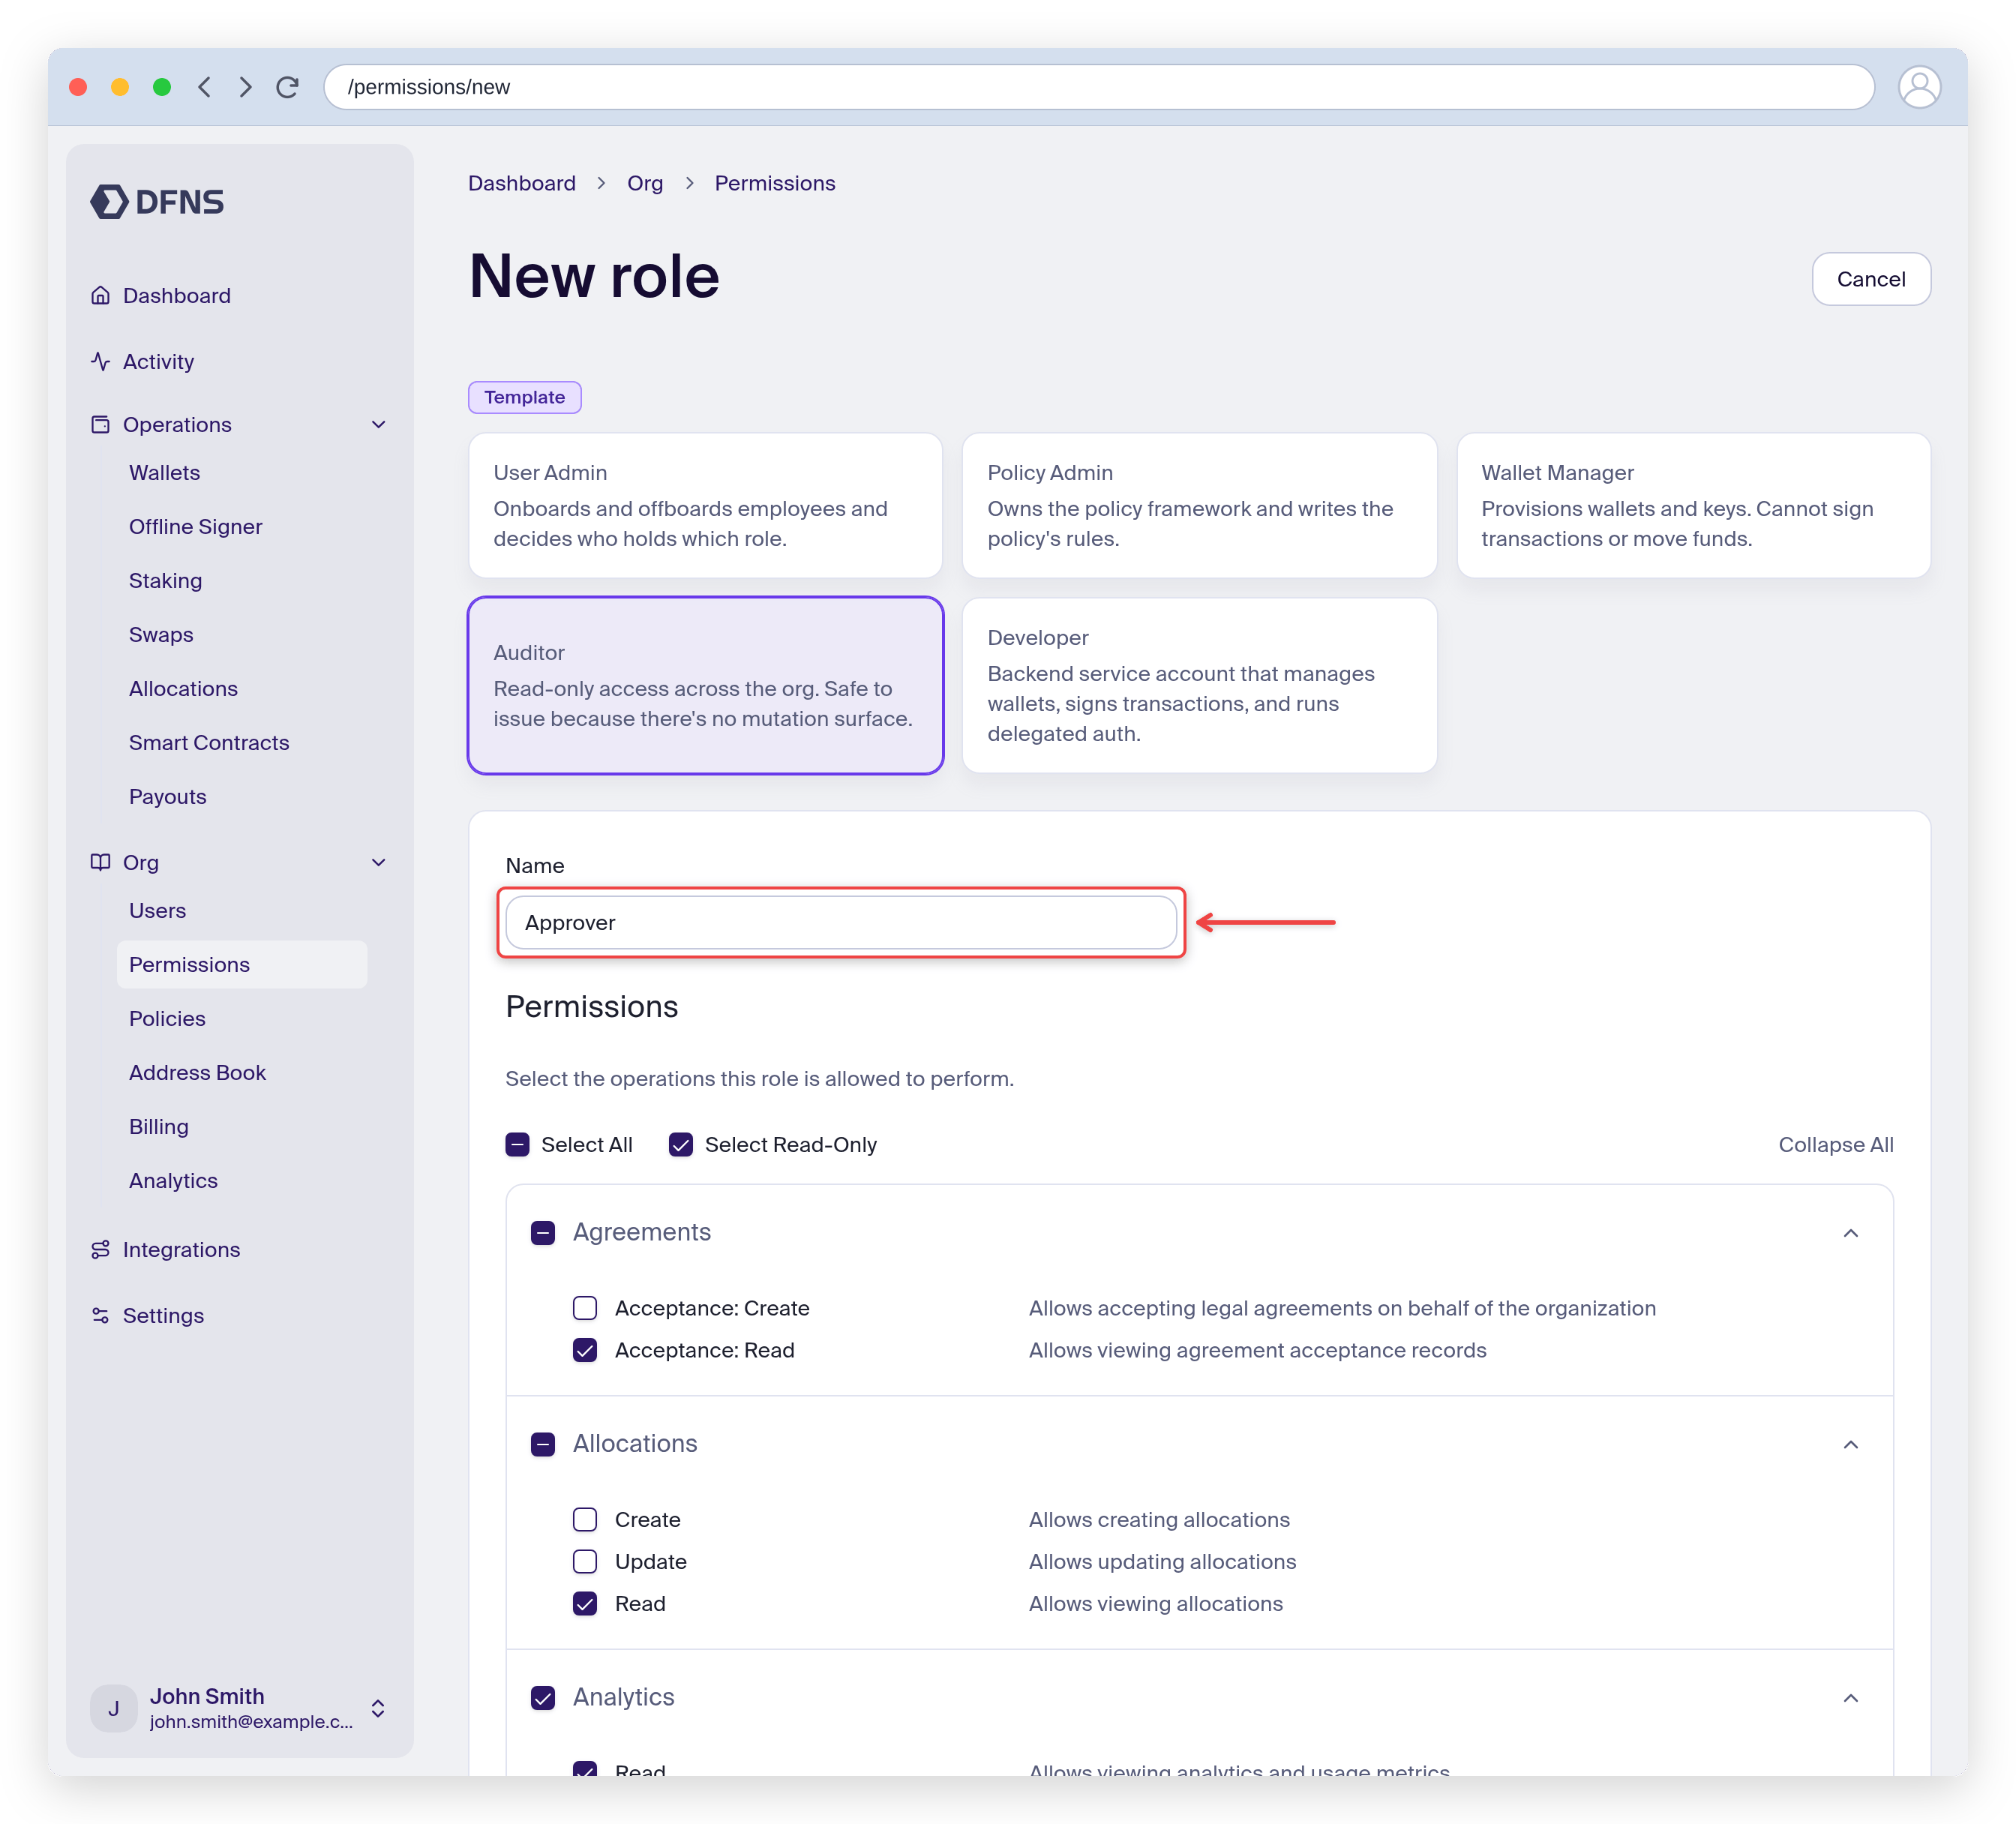 Some permissions here are not directly related to approving transactions, but are required to use the dashboard.
Then create and 🔑 sign the operation with your passkey.
You have successfully created a new role! It's now usable with any user (employees, service accounts, etc).
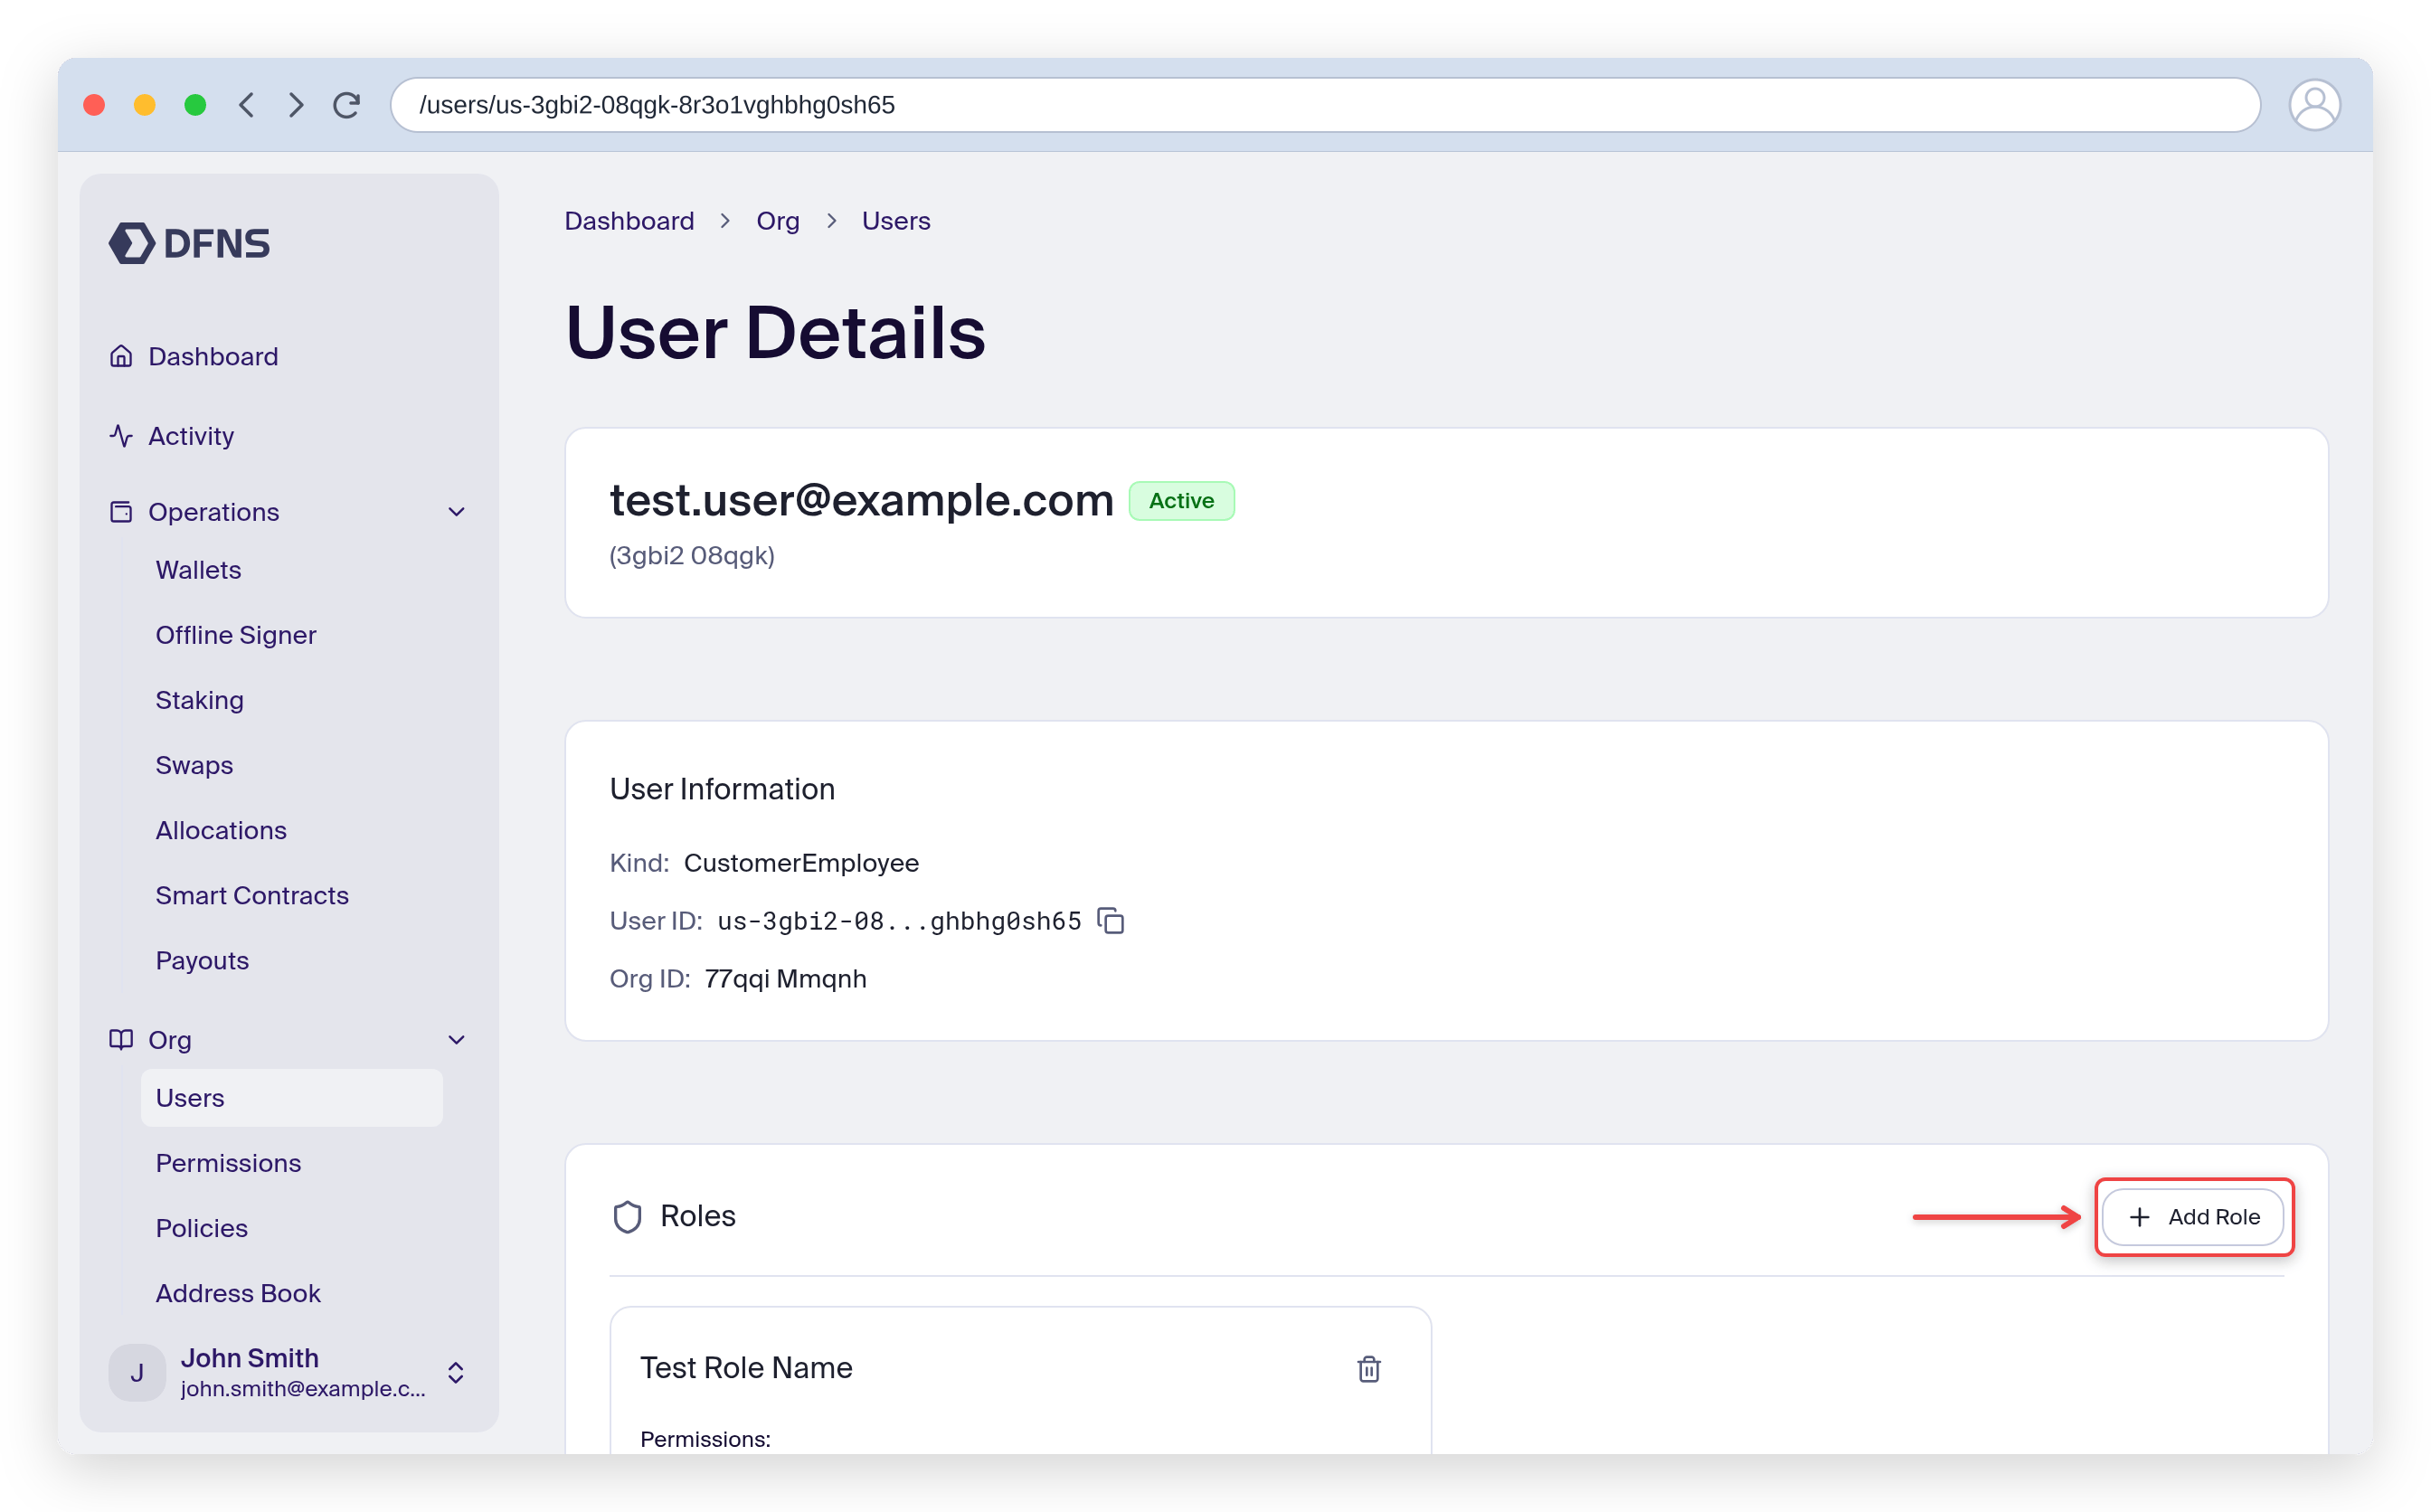
Head back to the users list Org > Users (direct link: [https://app.dfns.io/users](https://app.dfns.io/users)) and select the user you need to assign the role to. Click "Add Role" and select your newly created role. Confirm and 🔑 sign the operation with your passkey.
Some permissions here are not directly related to approving transactions, but are required to use the dashboard.
Then create and 🔑 sign the operation with your passkey.
You have successfully created a new role! It's now usable with any user (employees, service accounts, etc).
Head back to the users list Org > Users (direct link: [https://app.dfns.io/users](https://app.dfns.io/users)) and select the user you need to assign the role to. Click "Add Role" and select your newly created role. Confirm and 🔑 sign the operation with your passkey.
 Your user is now able to approve transactions!
You can now create as many roles as you need to enforce the least privilege principle in your organization.
You can now head to the next step: [Create Policies](/introduction/quickstart/3-create-policies)
Your user is now able to approve transactions!
You can now create as many roles as you need to enforce the least privilege principle in your organization.
You can now head to the next step: [Create Policies](/introduction/quickstart/3-create-policies)