> ## Documentation Index
> Fetch the complete documentation index at: https://docs.dfns.co/llms.txt
> Use this file to discover all available pages before exploring further.
# Delegated 1/2: DFNS API using a service account
> Building your own app? Learn how to consume the DFNS APIs using a service account for server-to-server access without a human user.
Once you have registered in your DFNS org and invited your Users, the next step is to create a Service Account, which you can think of as a machine user. For more details on what service accounts are and when to use them, please refer to [service-account-management](/api-reference/auth/service-accounts).
Your service account will need its own key pair to sign its requests. The easiest way to create a Public / Private Key pair is from the command line. You can use the commands shown below or see our [documentation on key generation](/guides/developers/generate-a-key-pair):
```sh theme={null}
# Generate RSA Private Key
openssl genrsa -out rsa2048.pem 2048
# Generate the Public Key
openssl pkey -in rsa2048.pem -pubout -out rsa2048.public.pem
```
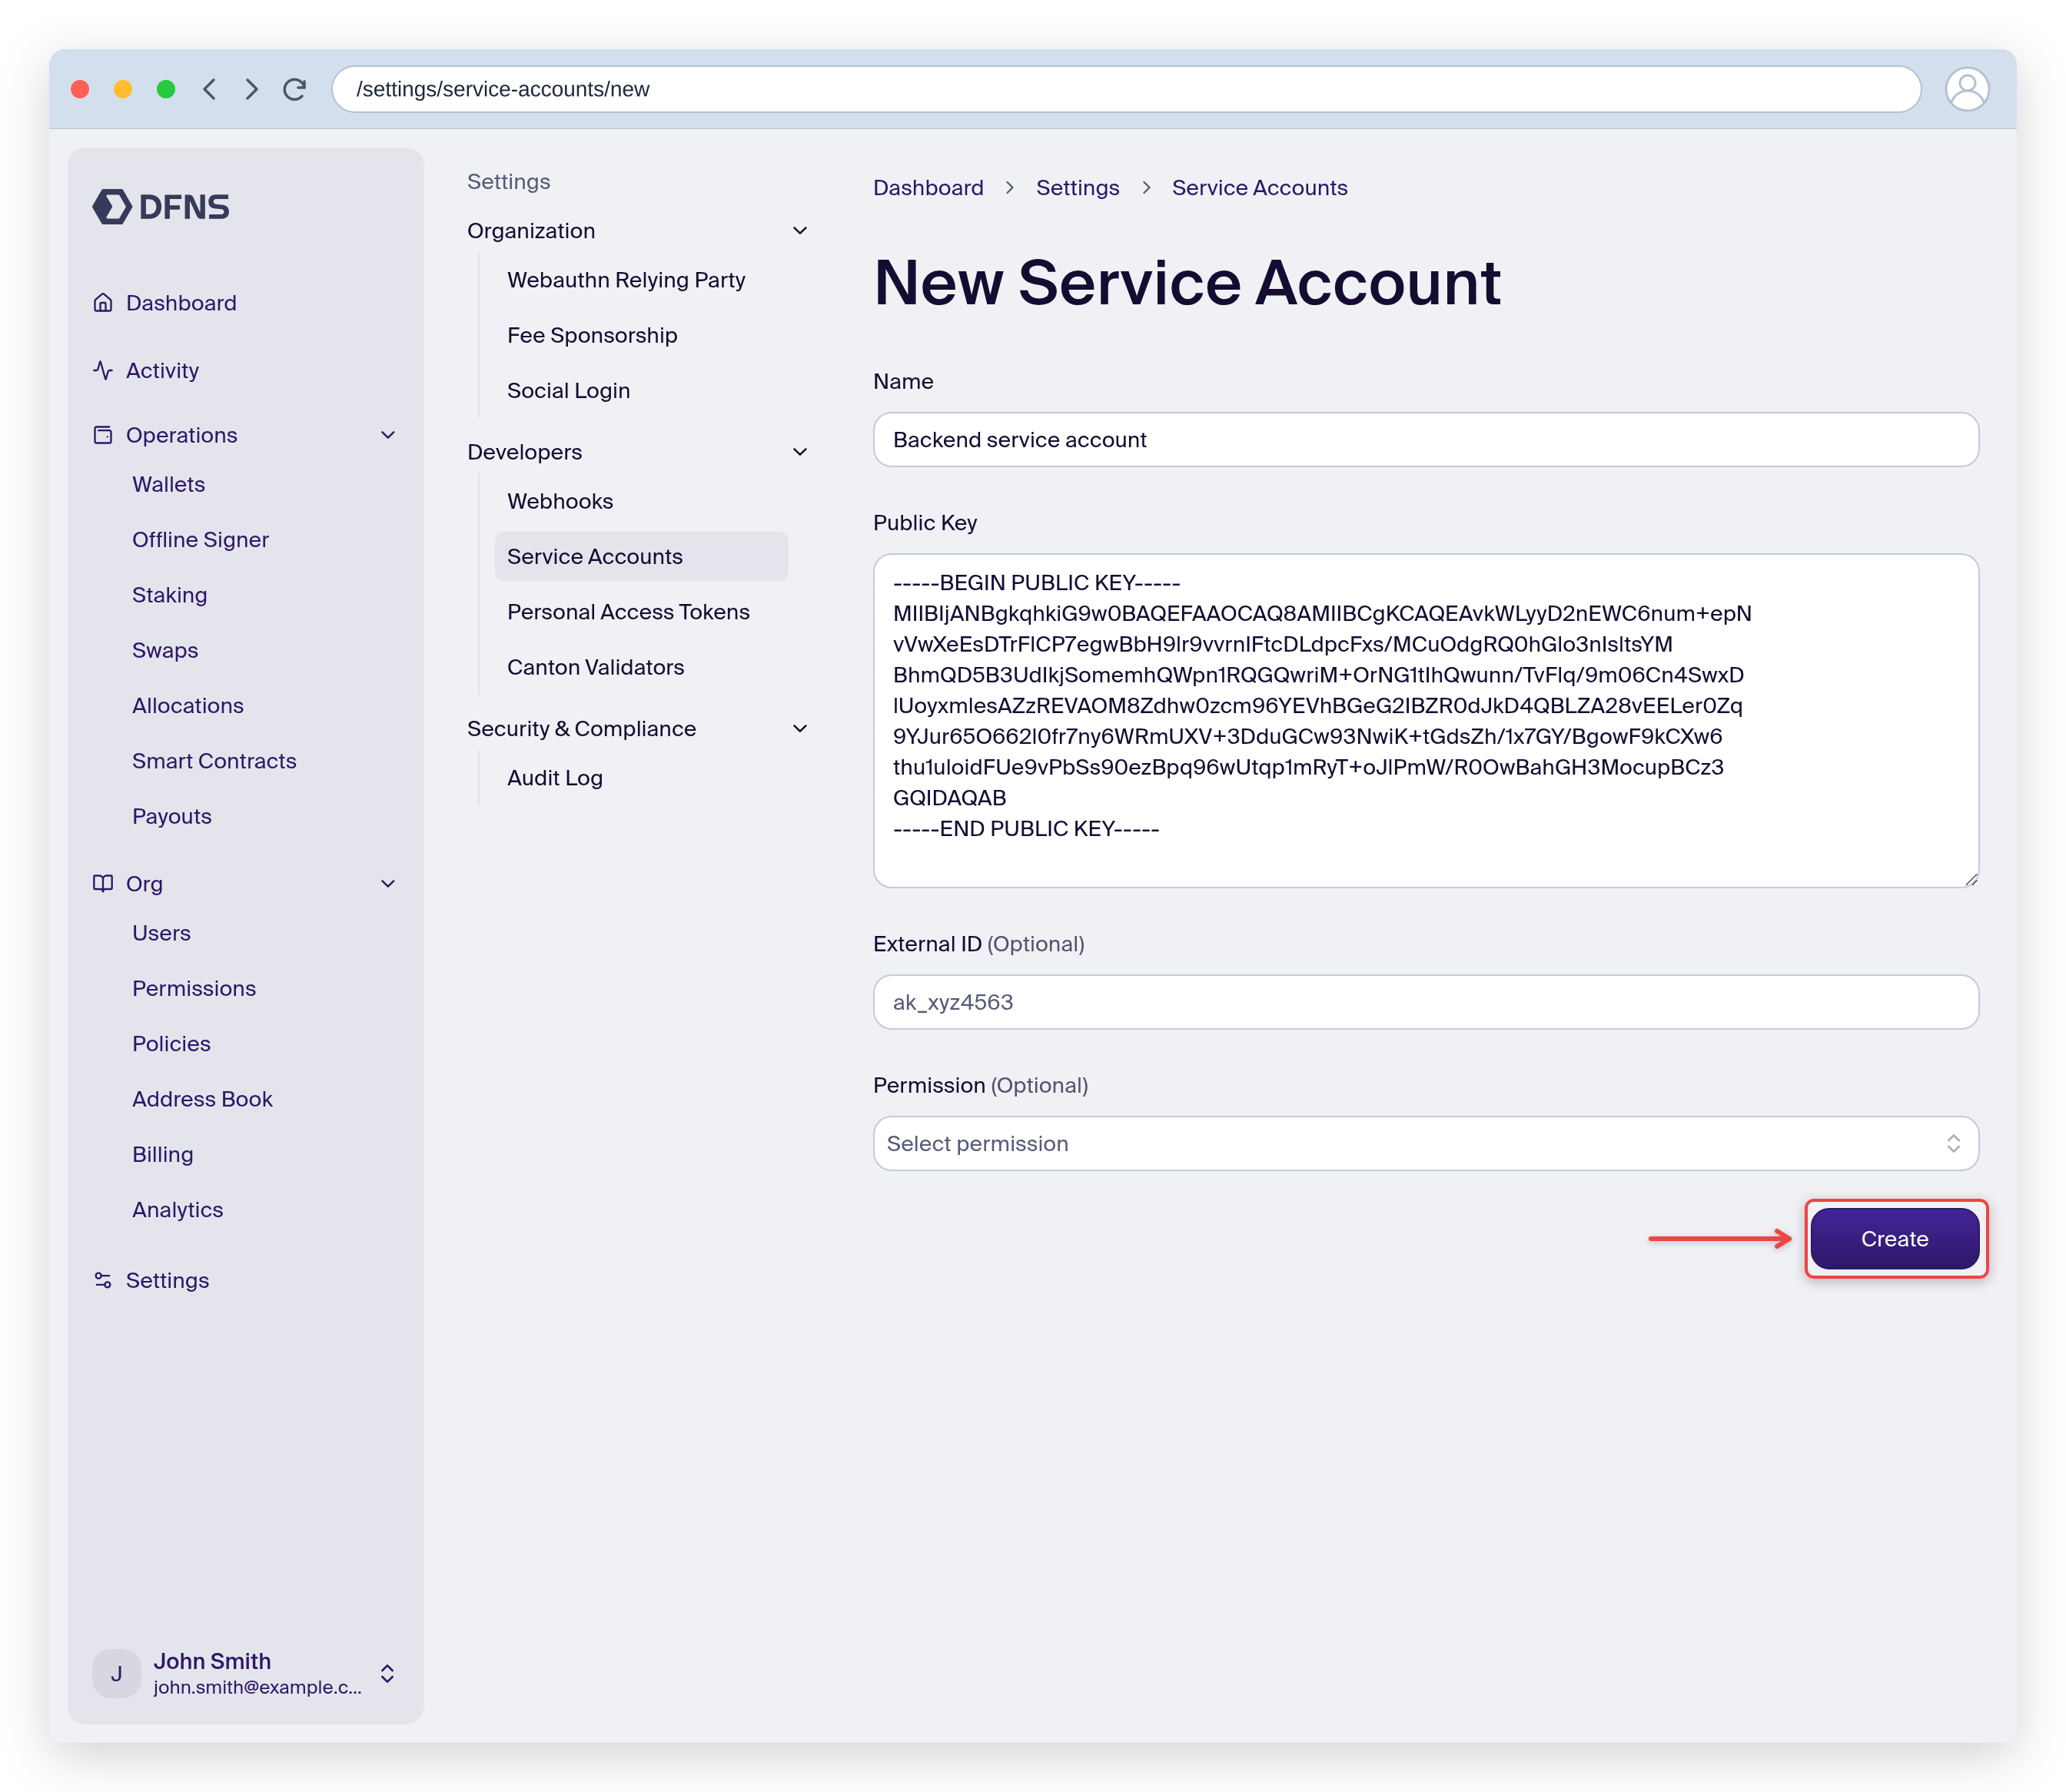
Navigate to Settings > Developers > Service Accounts and click "New Service Account". Name the Service Account, copy in the public key (including begin/end lines like `-----BEGIN PUBLIC KEY-----`), click “Create” and 🔑 sign the action with your passkey.
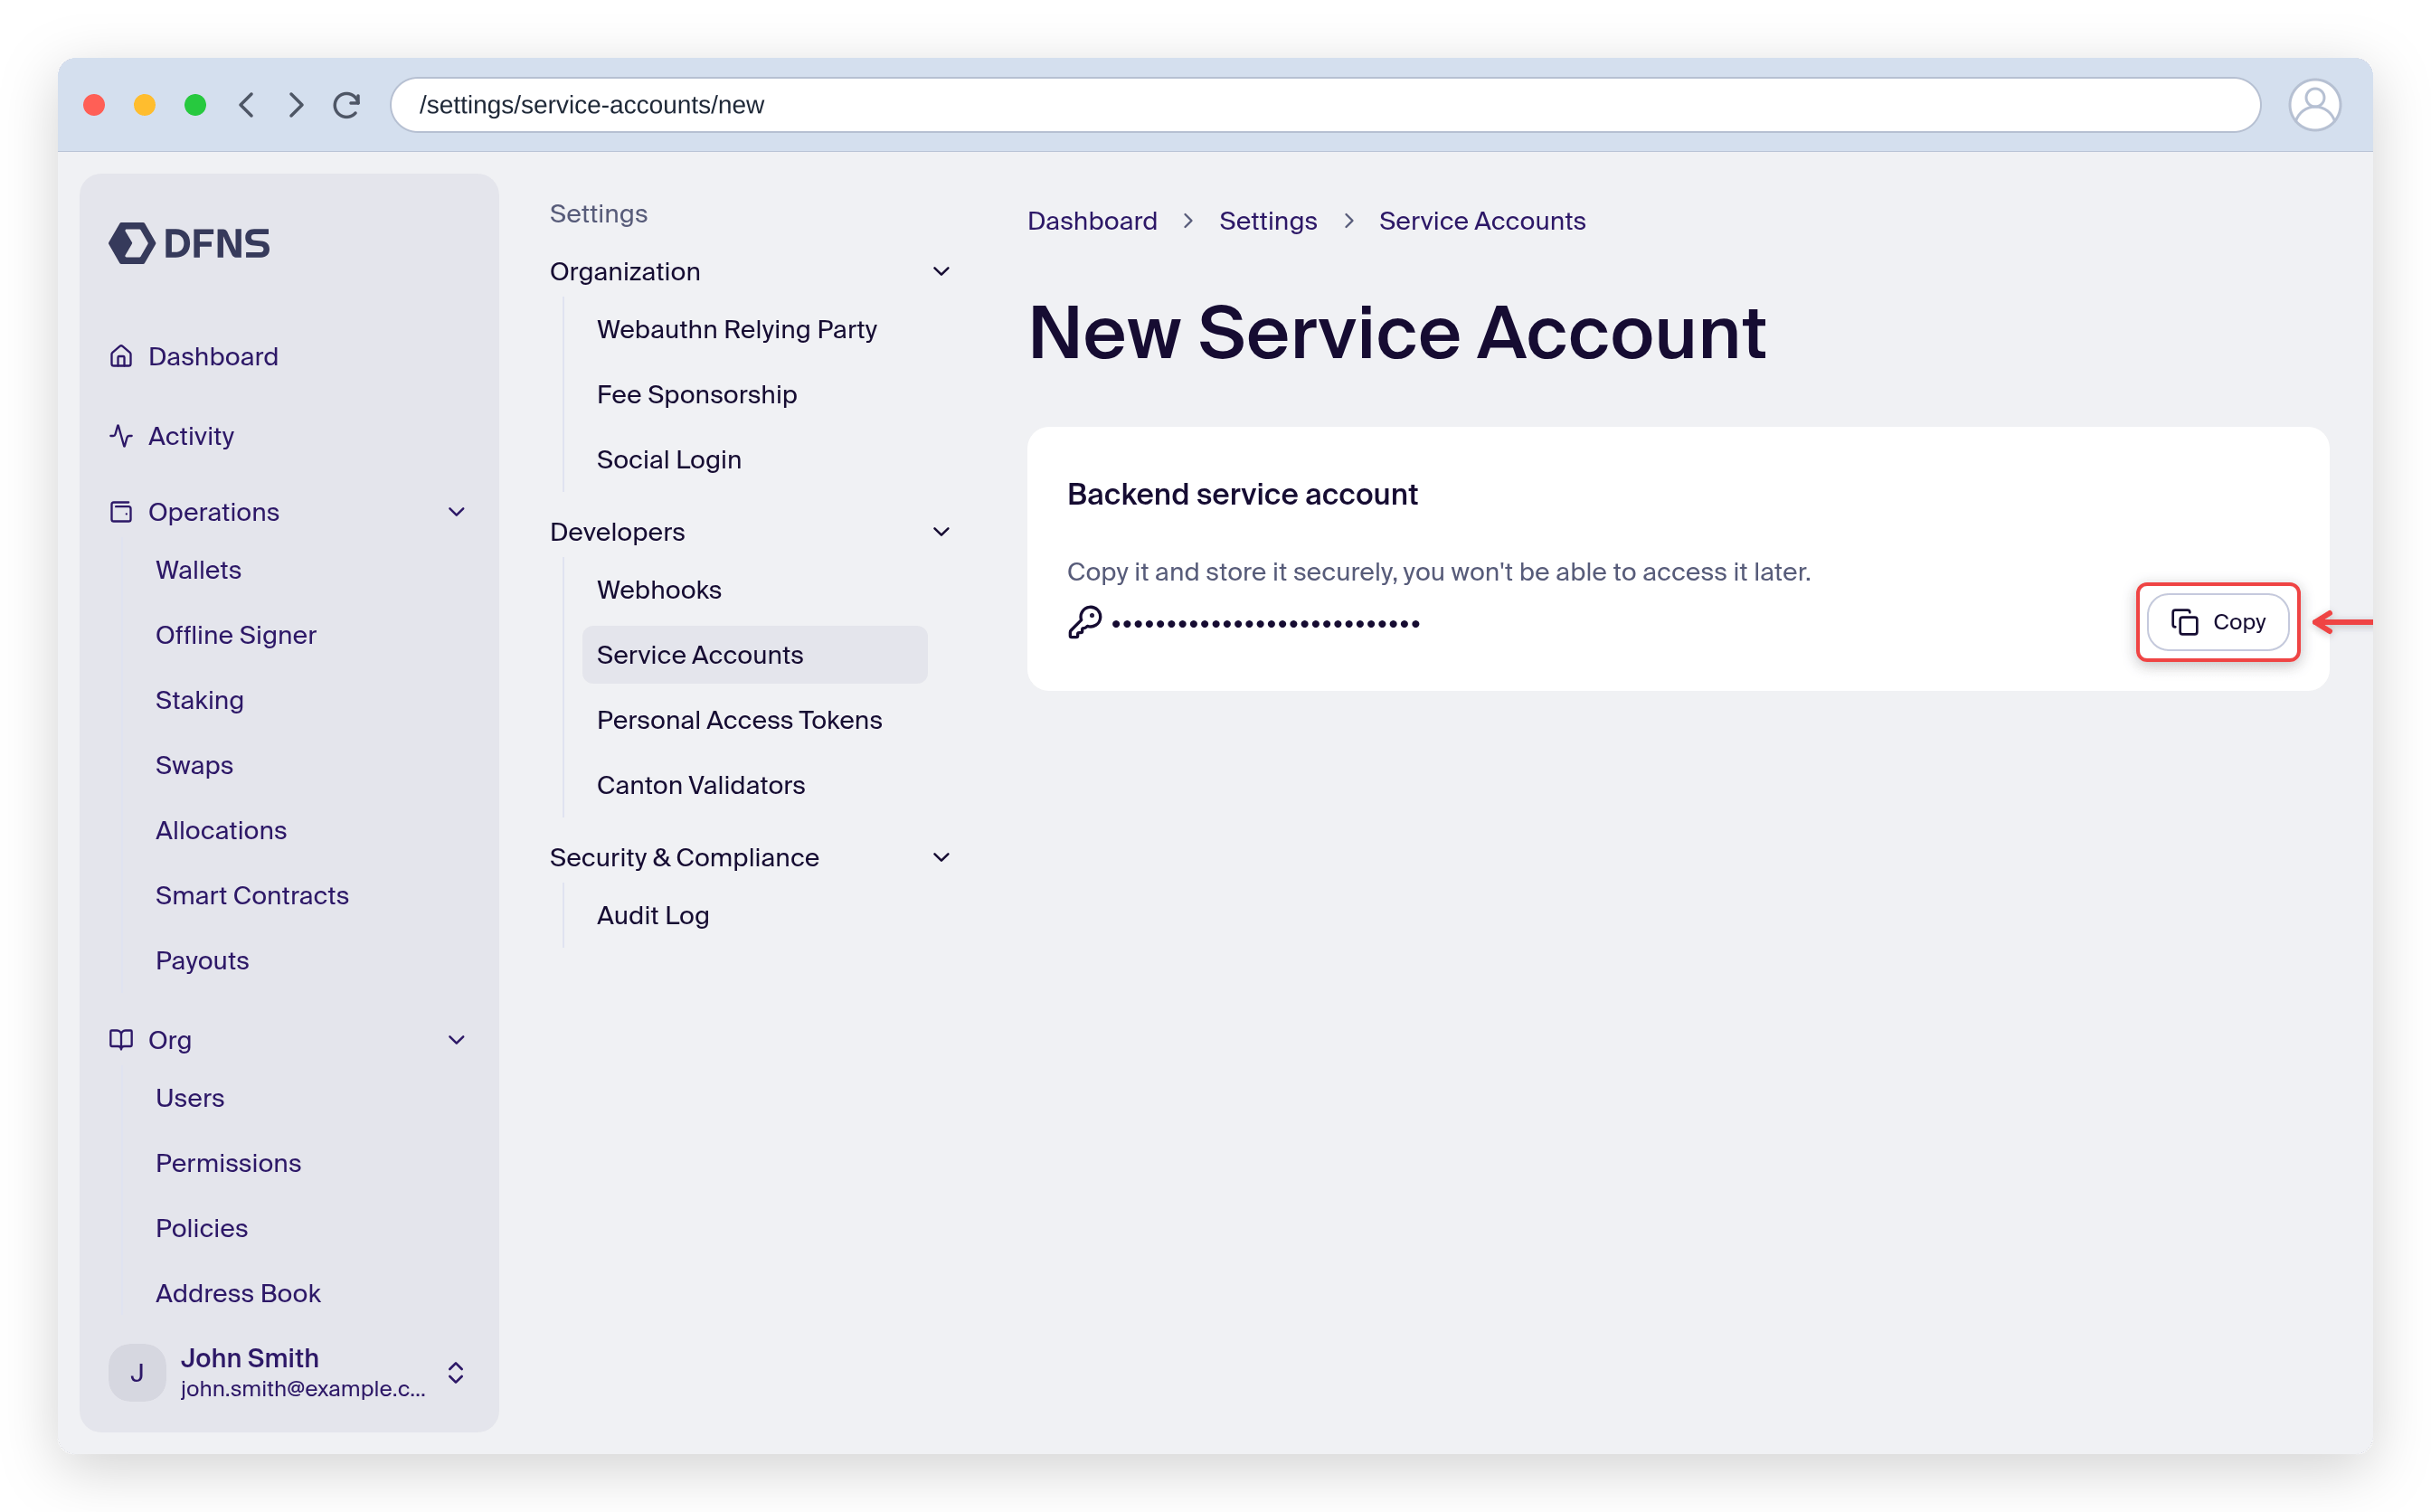
 The last page shows the masked Service Account JWT. Copy it to a secure location before leaving the page.
The token will not be shown later!
The last page shows the masked Service Account JWT. Copy it to a secure location before leaving the page.
The token will not be shown later!
 You now have:
* A Service Account Token: use it for [authentication](/api-reference/auth/) in all your API requests.
* A Private/Public key pair: use it to [sign your action](/api-reference/auth/signing-flows) requests.
Congratulations! You can now make server-side API calls using your service account. Now start building your app using [our TypeScript SDK](/sdks/backend/typescript) or [Python SDK](/sdks/backend/python). For a complete example, see [the Service Account sample app](https://github.com/dfns/dfns-sdk-ts/tree/m/examples/sdk/service-account).
This service account will next be used to log your customers (end-users) in and let them create their own wallets on your organization in [Delegated 2/2: customer login and delegated wallets](/introduction/quickstart/7-non-custody-2-2-customer-login-and-delegated-wallets)
You now have:
* A Service Account Token: use it for [authentication](/api-reference/auth/) in all your API requests.
* A Private/Public key pair: use it to [sign your action](/api-reference/auth/signing-flows) requests.
Congratulations! You can now make server-side API calls using your service account. Now start building your app using [our TypeScript SDK](/sdks/backend/typescript) or [Python SDK](/sdks/backend/python). For a complete example, see [the Service Account sample app](https://github.com/dfns/dfns-sdk-ts/tree/m/examples/sdk/service-account).
This service account will next be used to log your customers (end-users) in and let them create their own wallets on your organization in [Delegated 2/2: customer login and delegated wallets](/introduction/quickstart/7-non-custody-2-2-customer-login-and-delegated-wallets)