1
Create a new Policy
On the dashboard, head to 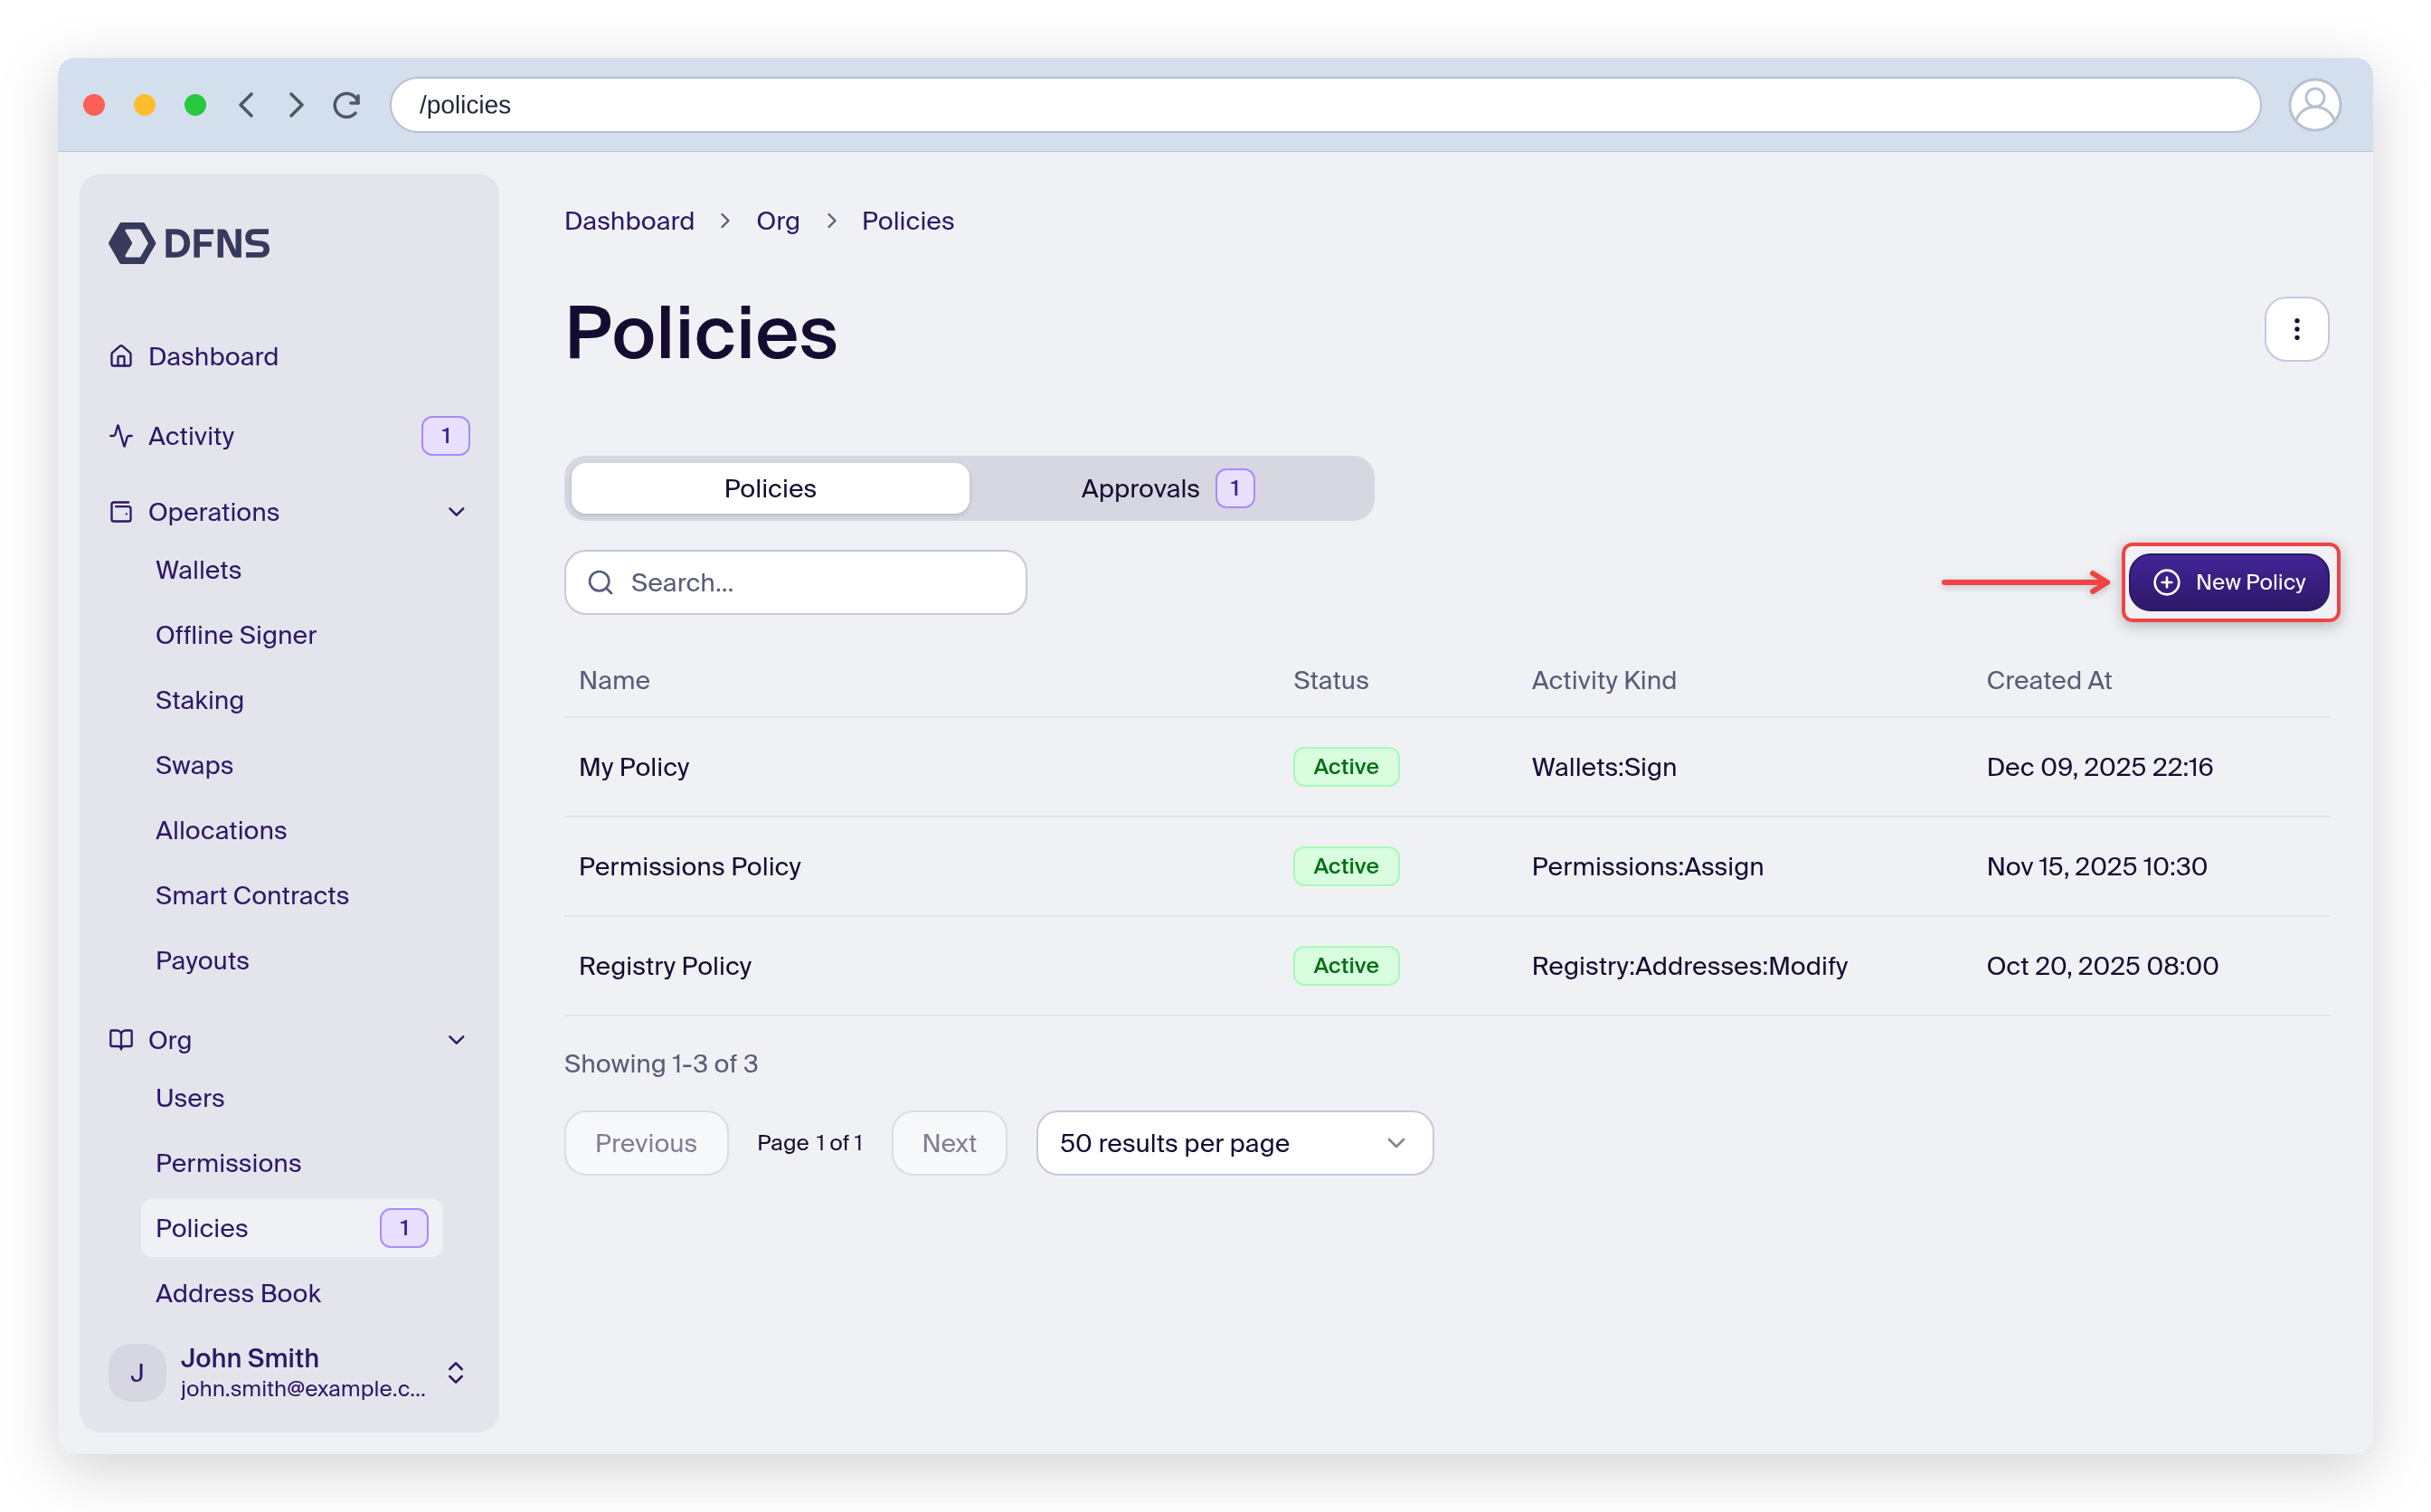
Org > Policies (direct link: https://app.dfns.io/policies) and click ➕ Create Policy. The wizard opens on the Name step: give your policy a descriptive name, then click “Continue”.2
Select the targeted activity
What should the policy apply on? For our example, select “Wallet usage (transfer, transaction, signature)”. You can leave the optional “Entity Filter” step empty to apply the policy to all wallets.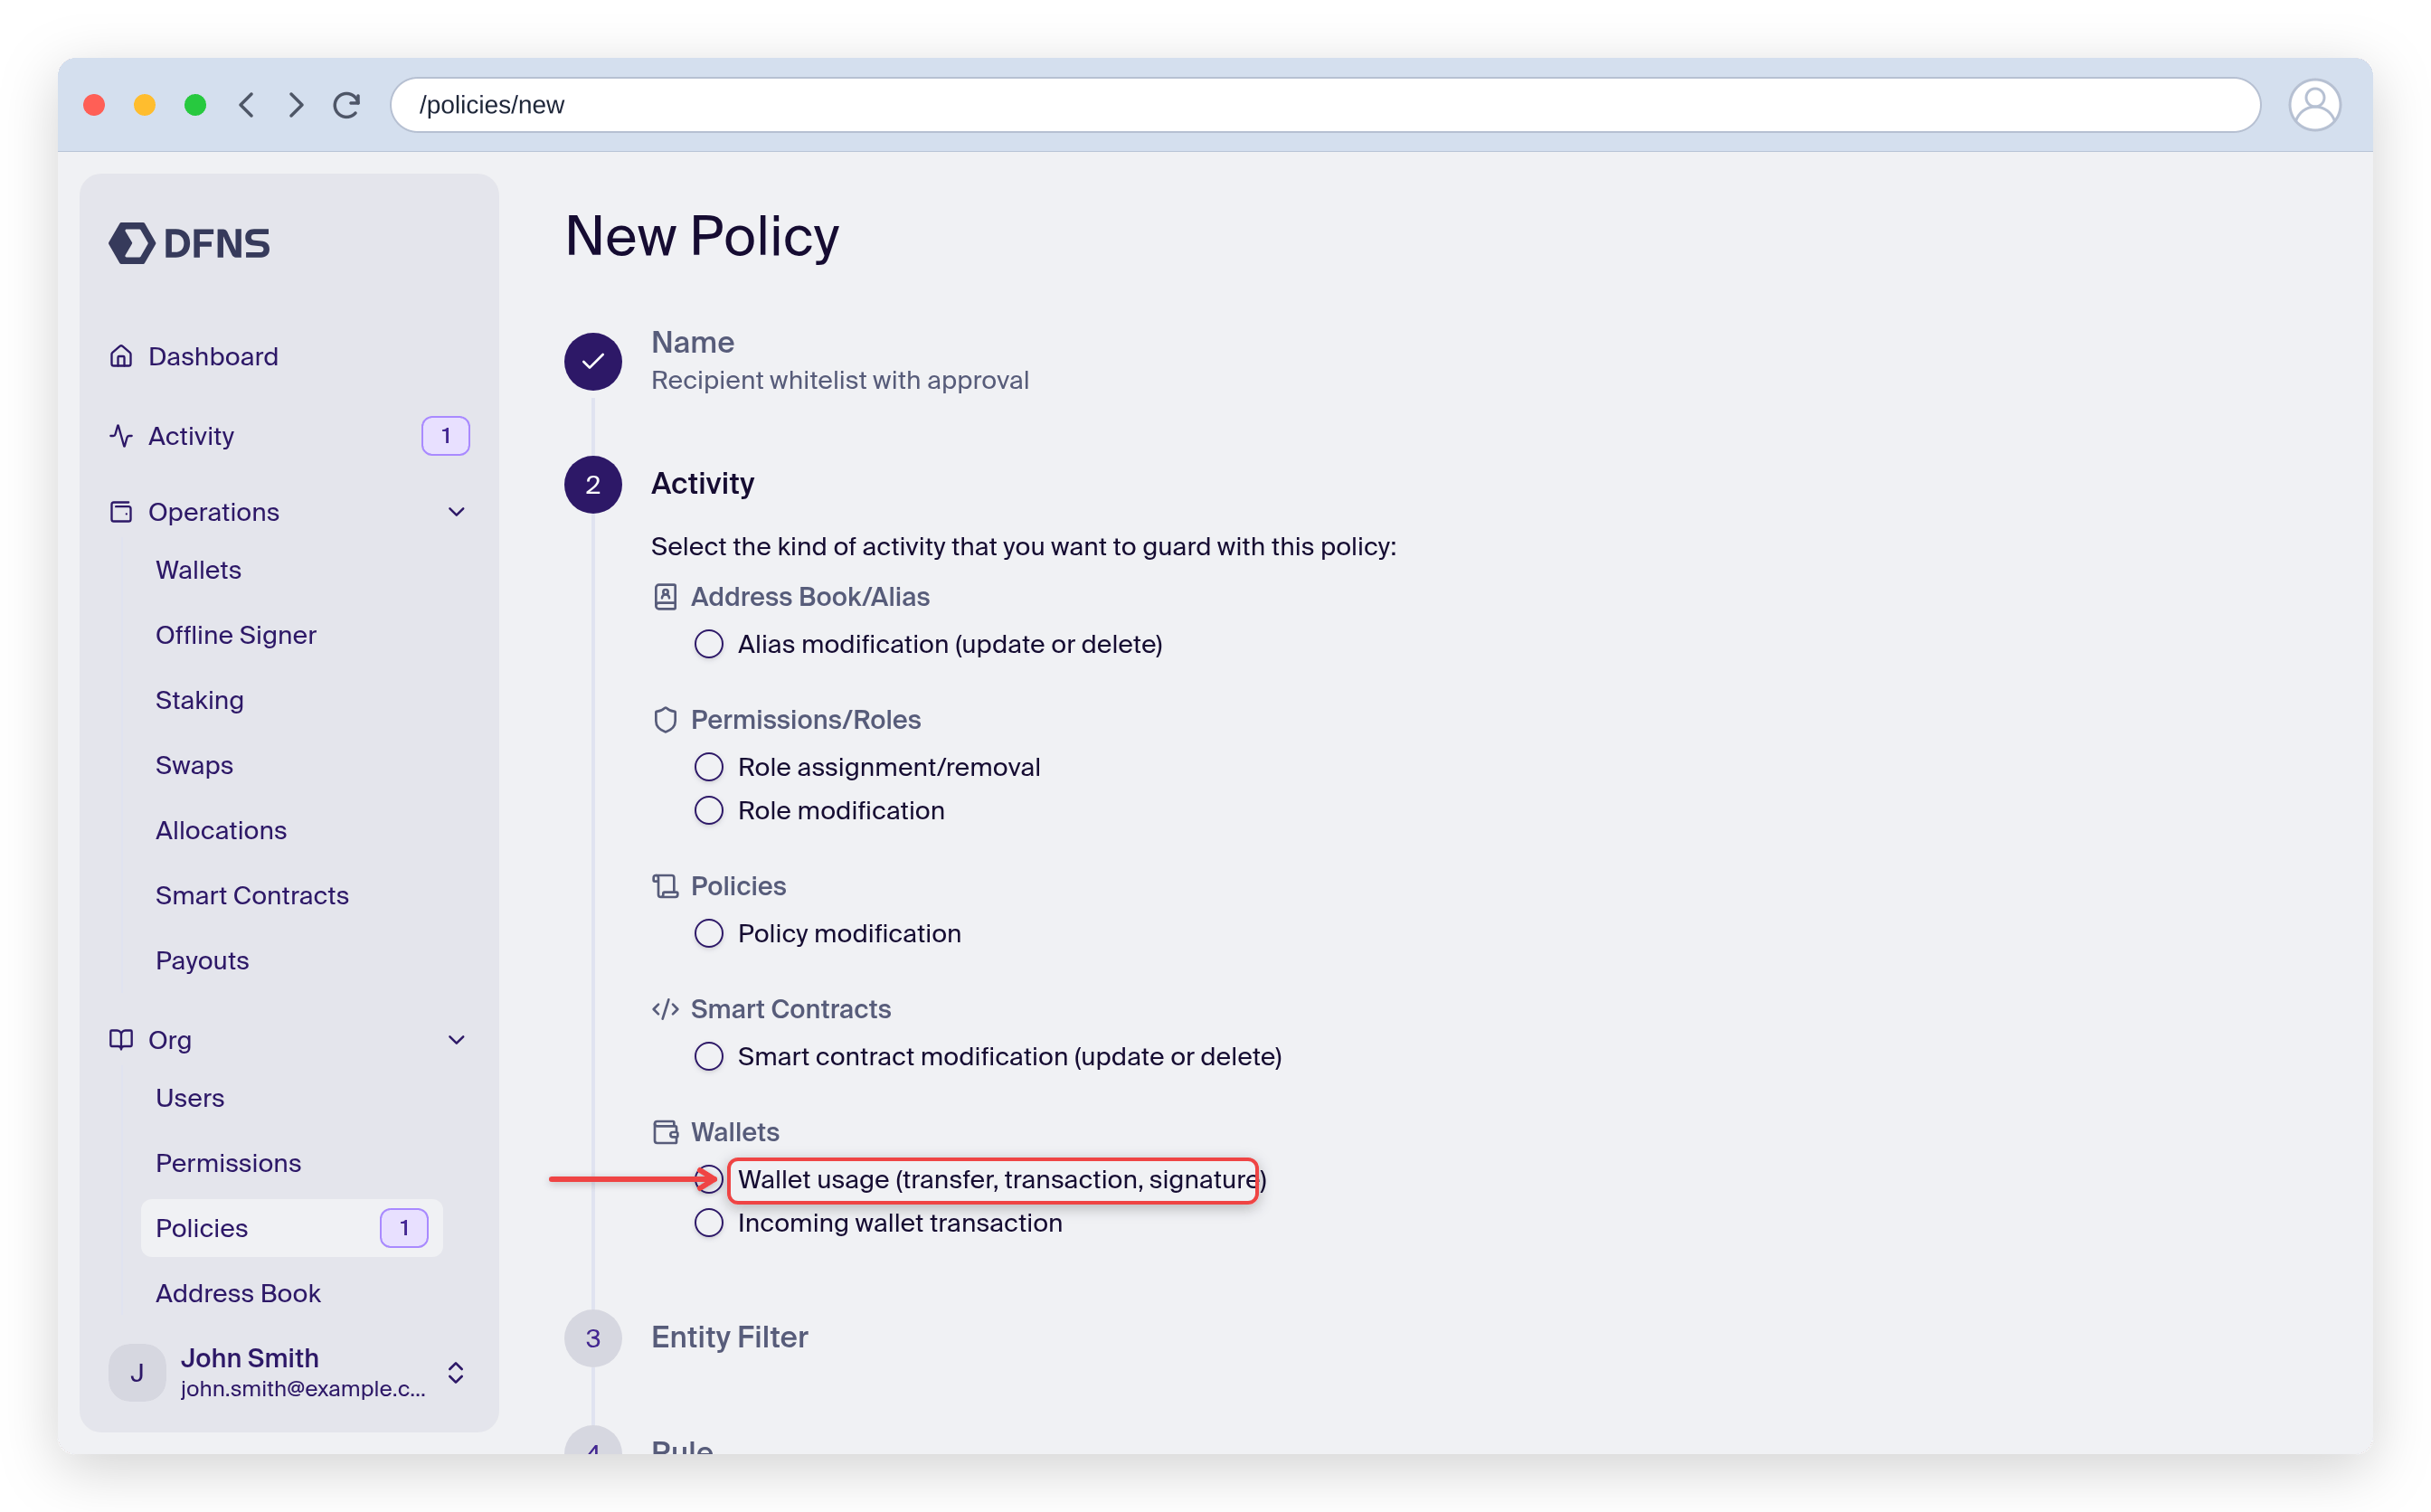
3
Select the criteria to evaluate
In which case should the policy trigger? For our example, select “Transaction recipient whitelist”, then click “Add Addresses” and paste the whitelisted destination wallet address. All transactions to this wallet address will go through, while all others will trigger the policy.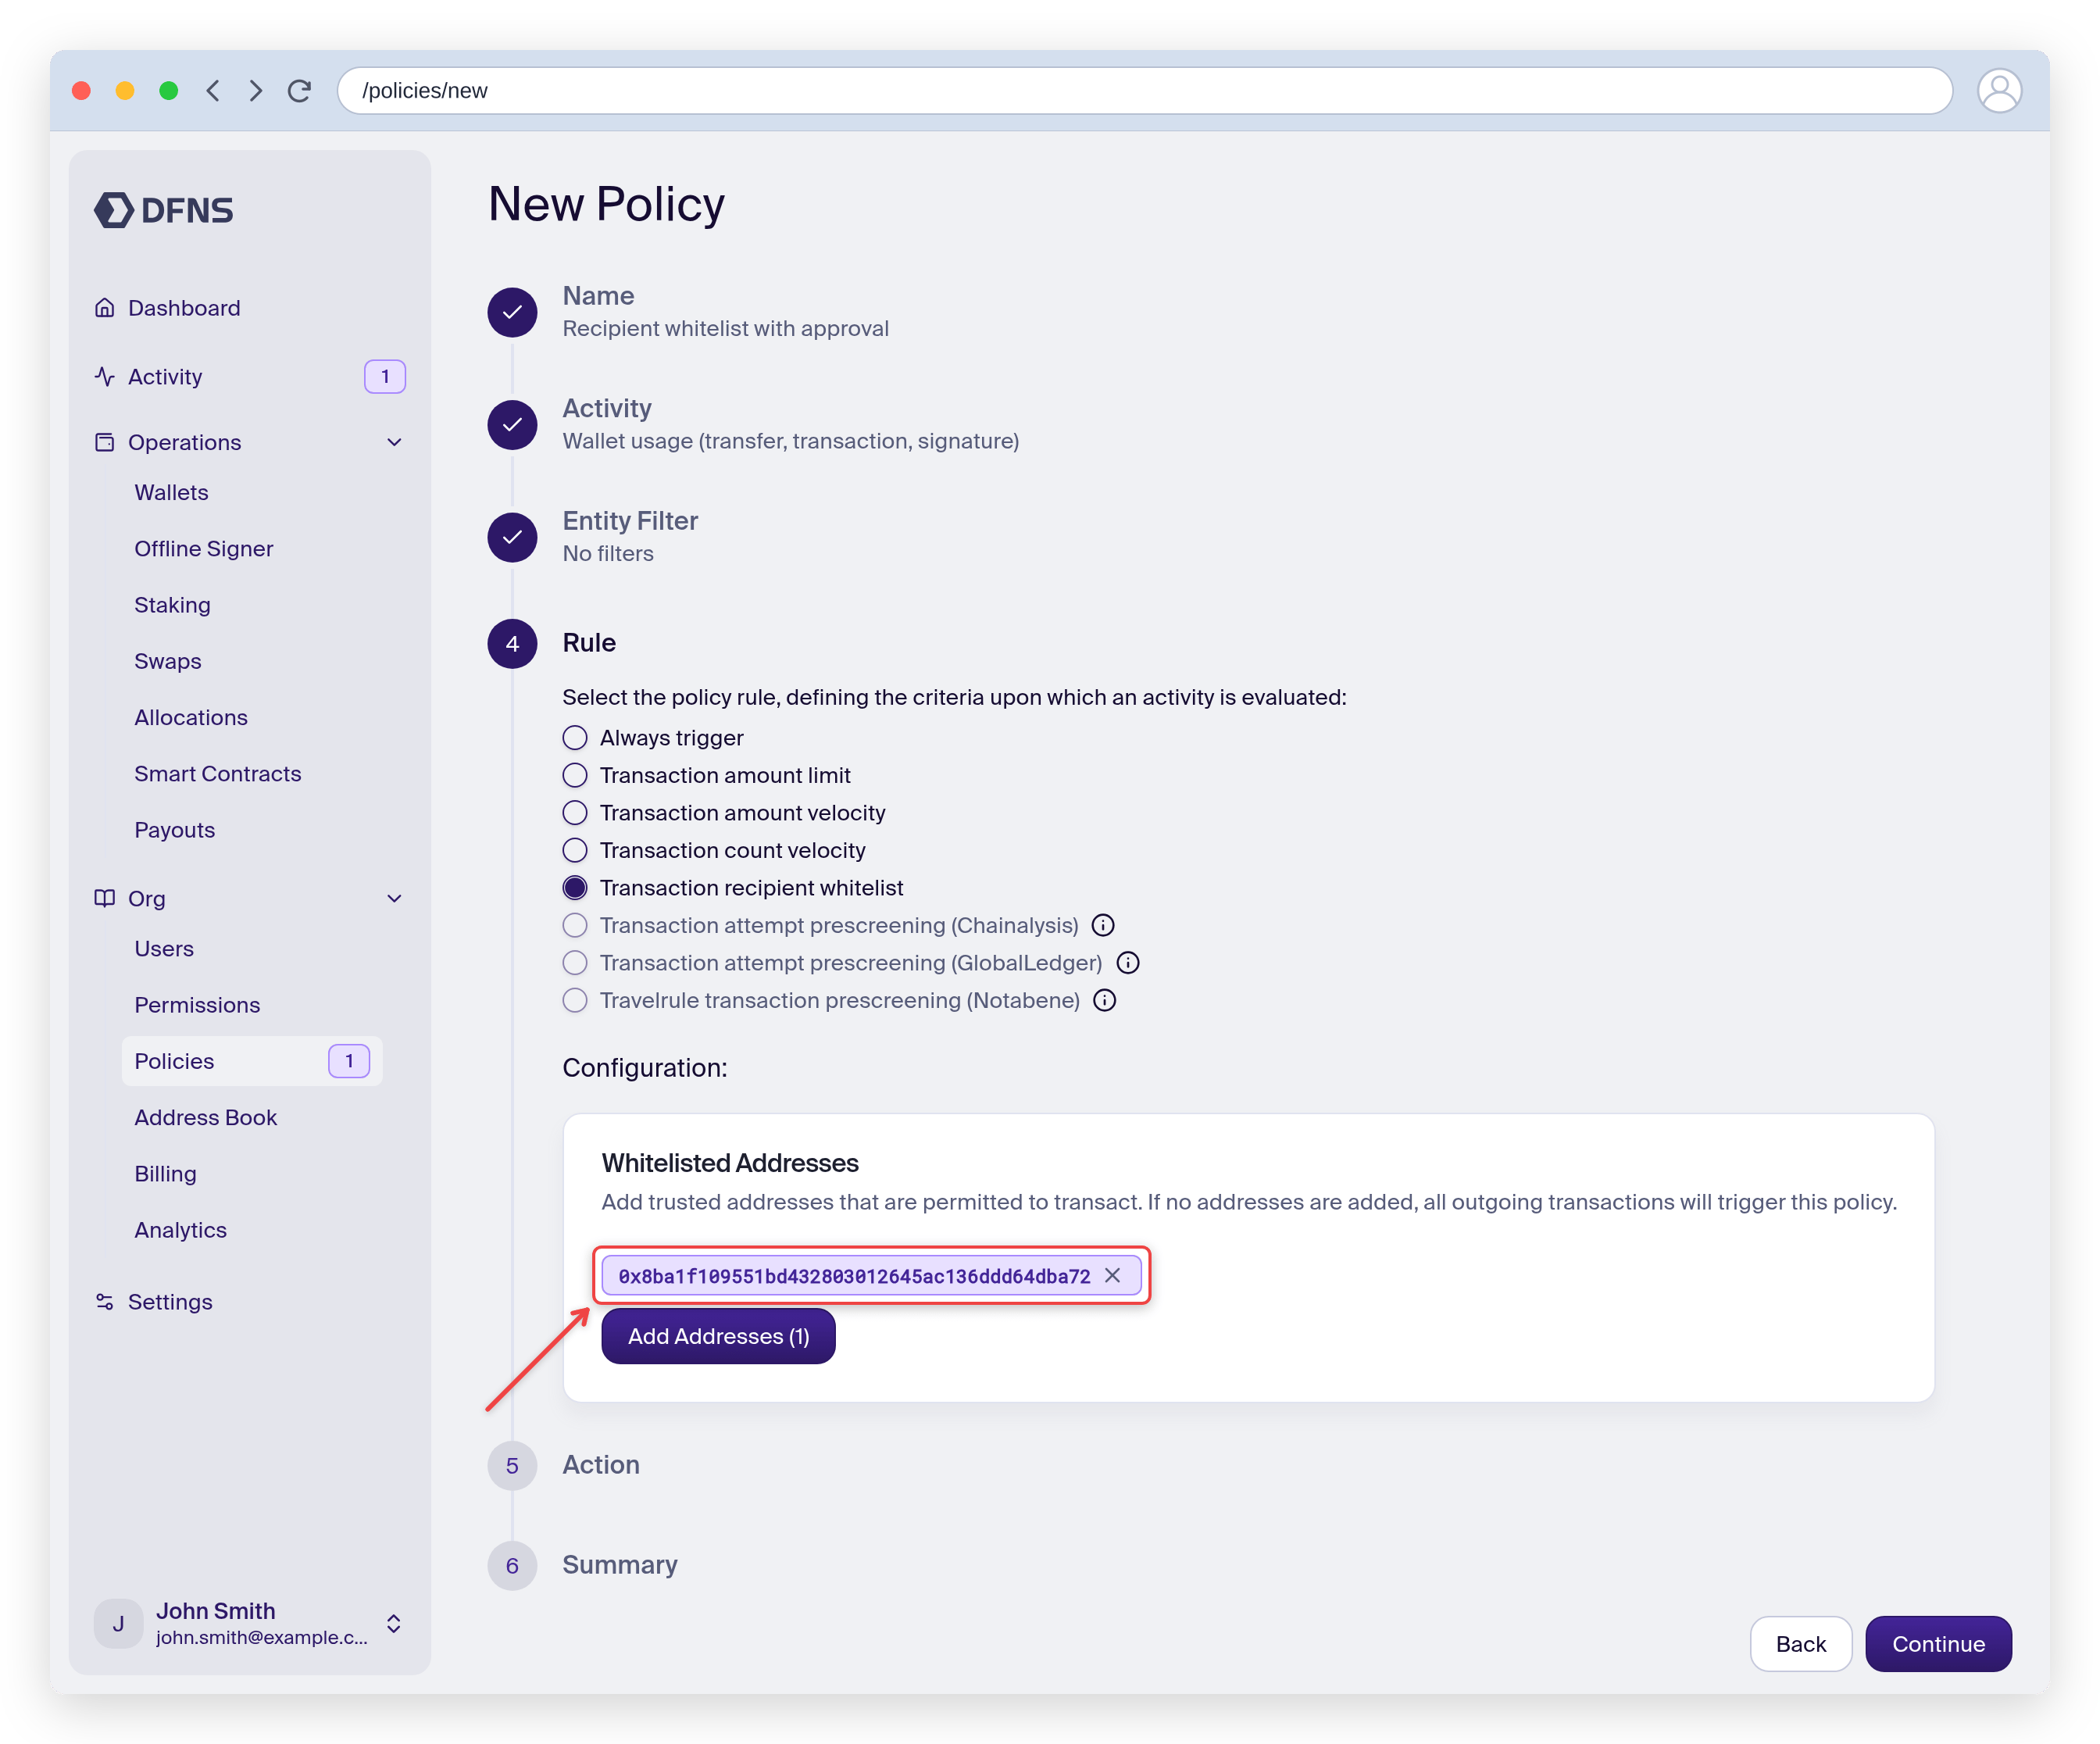
4
Select the action to take
When a transaction triggers the policy filters, then there are different actions you can take. In our case, we’ll request approval from another employee. Select “Request Approval”, name the approval group, and set the quorum (the number of approvals required, here 1). By default all employees can approve; you can narrow this to specific employees in the “Add Employee” field.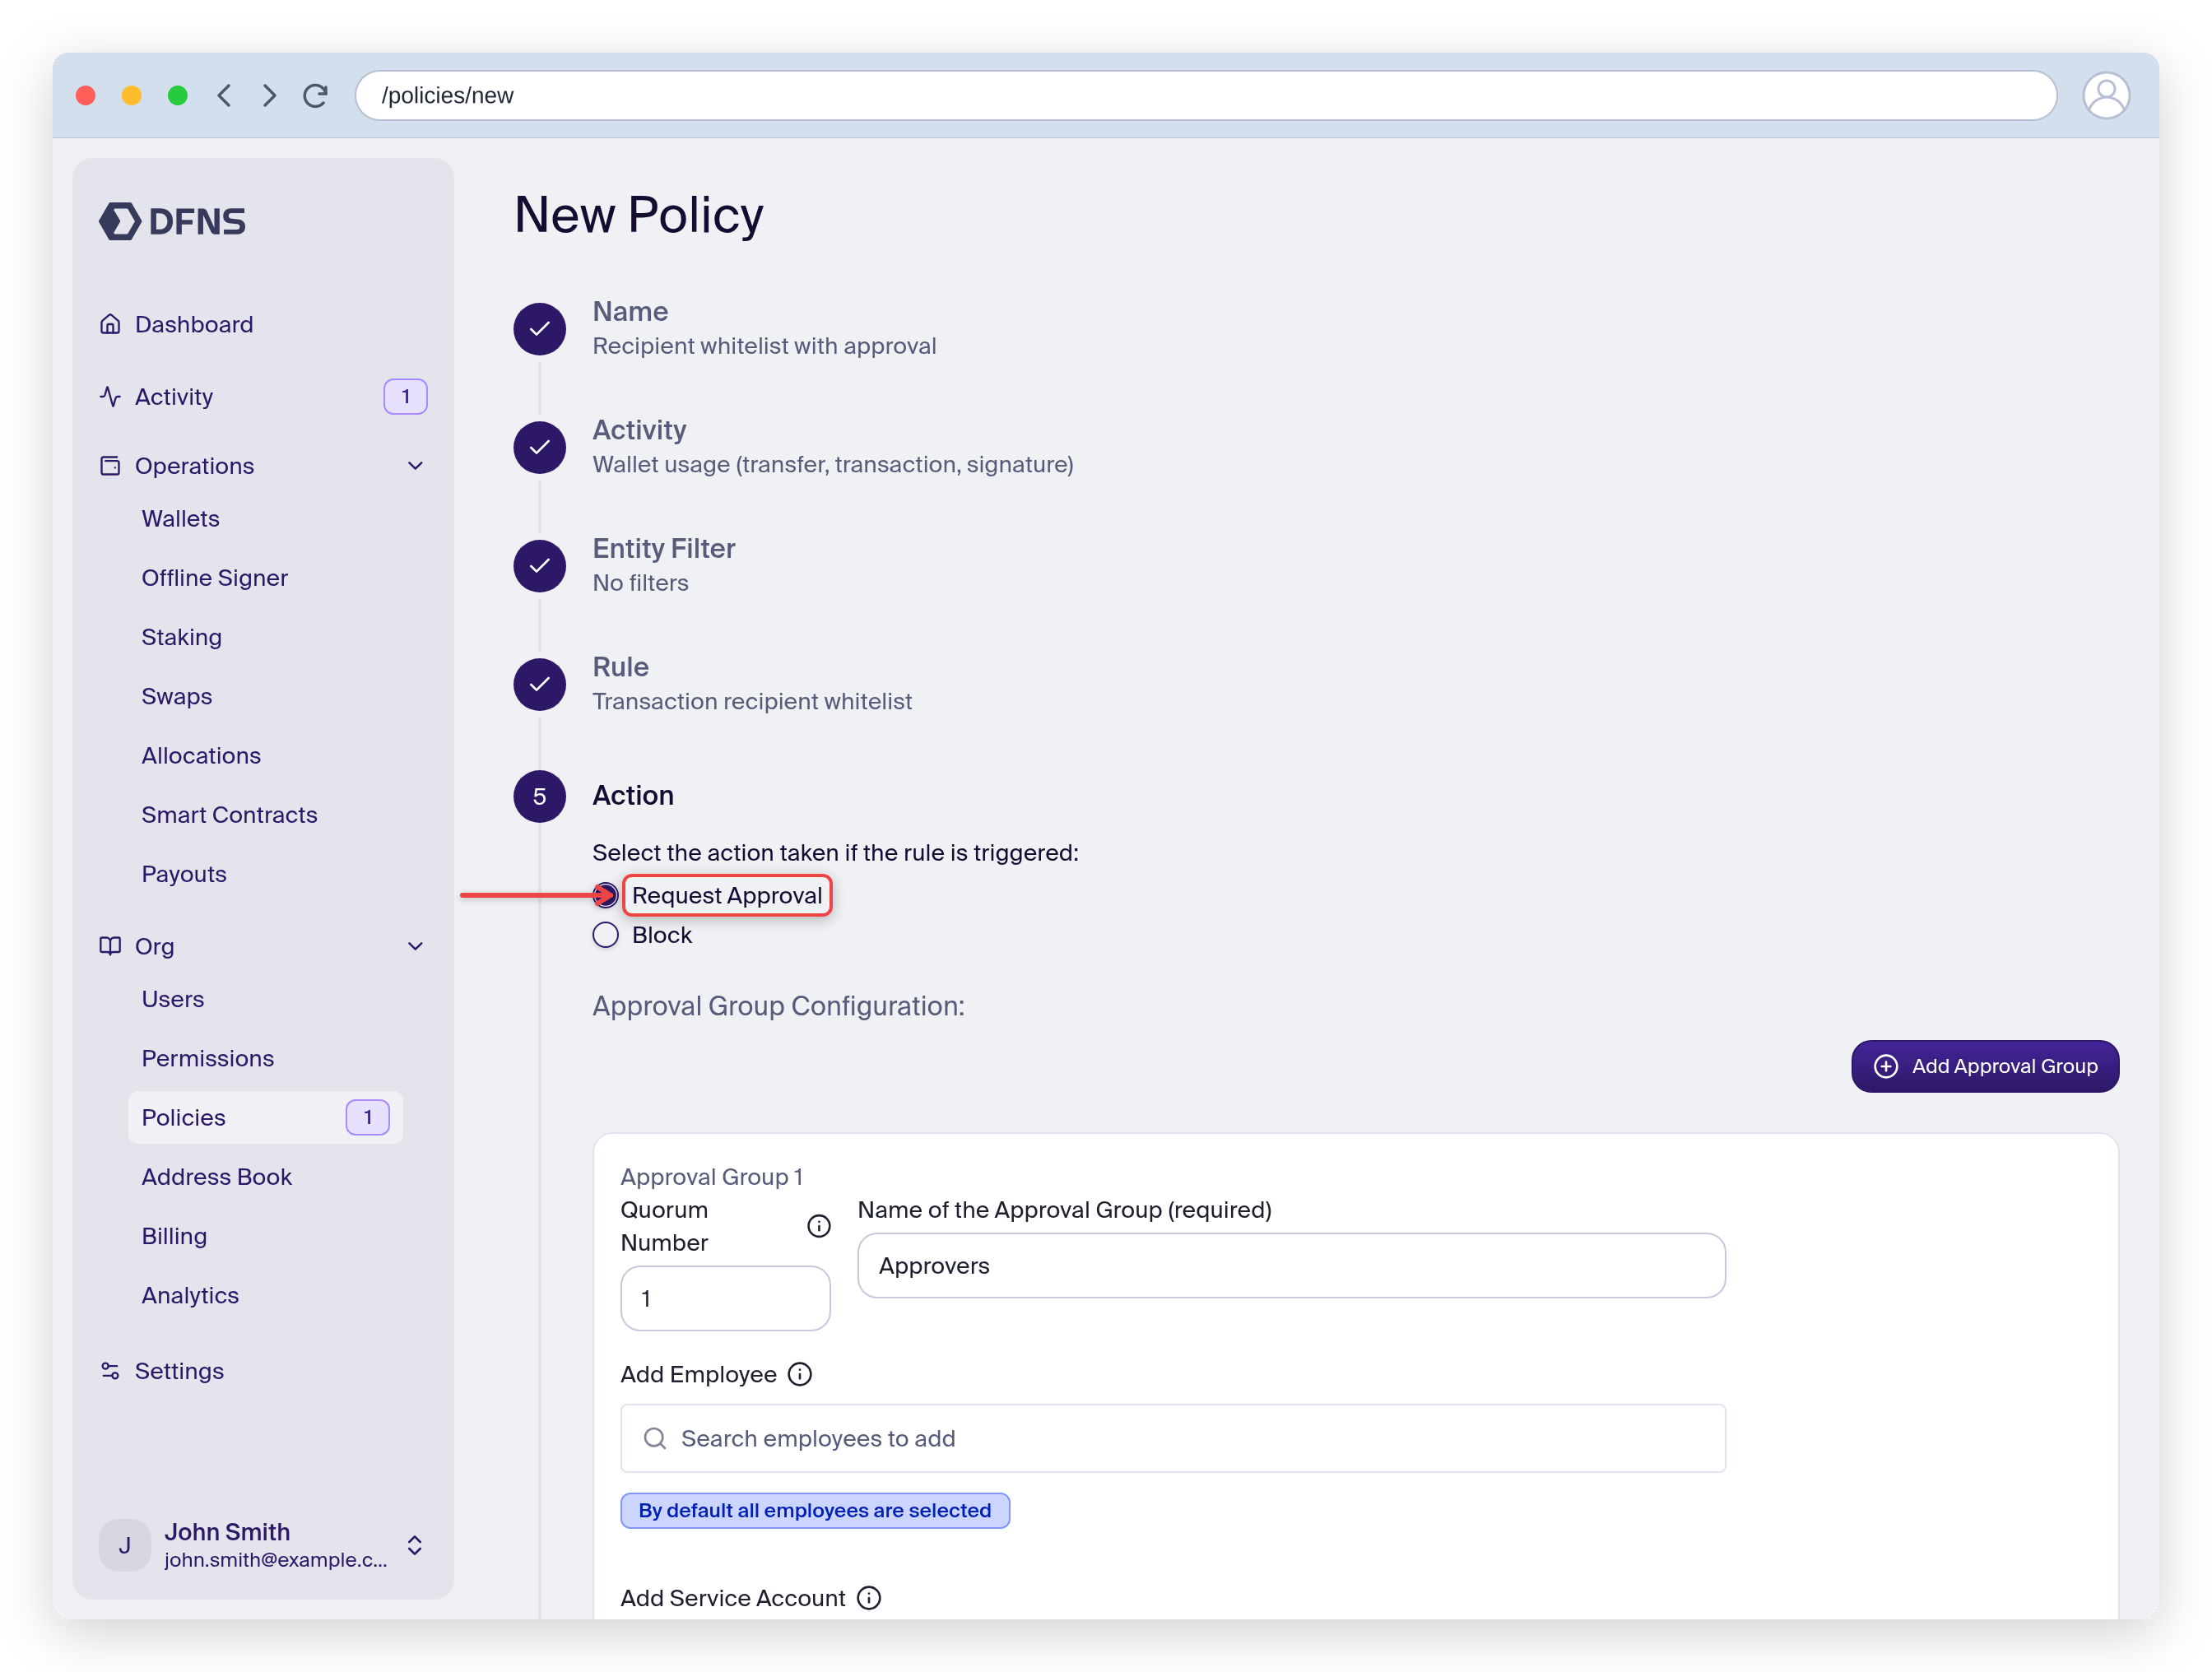
The user triggering the action can never approve it himself. Make sure the approvers are not the same users who will issue the requests!
5
Finish the configuration
Continue to the Summary step, review the policy, then click Save and 🔑 sign the request with your passkey.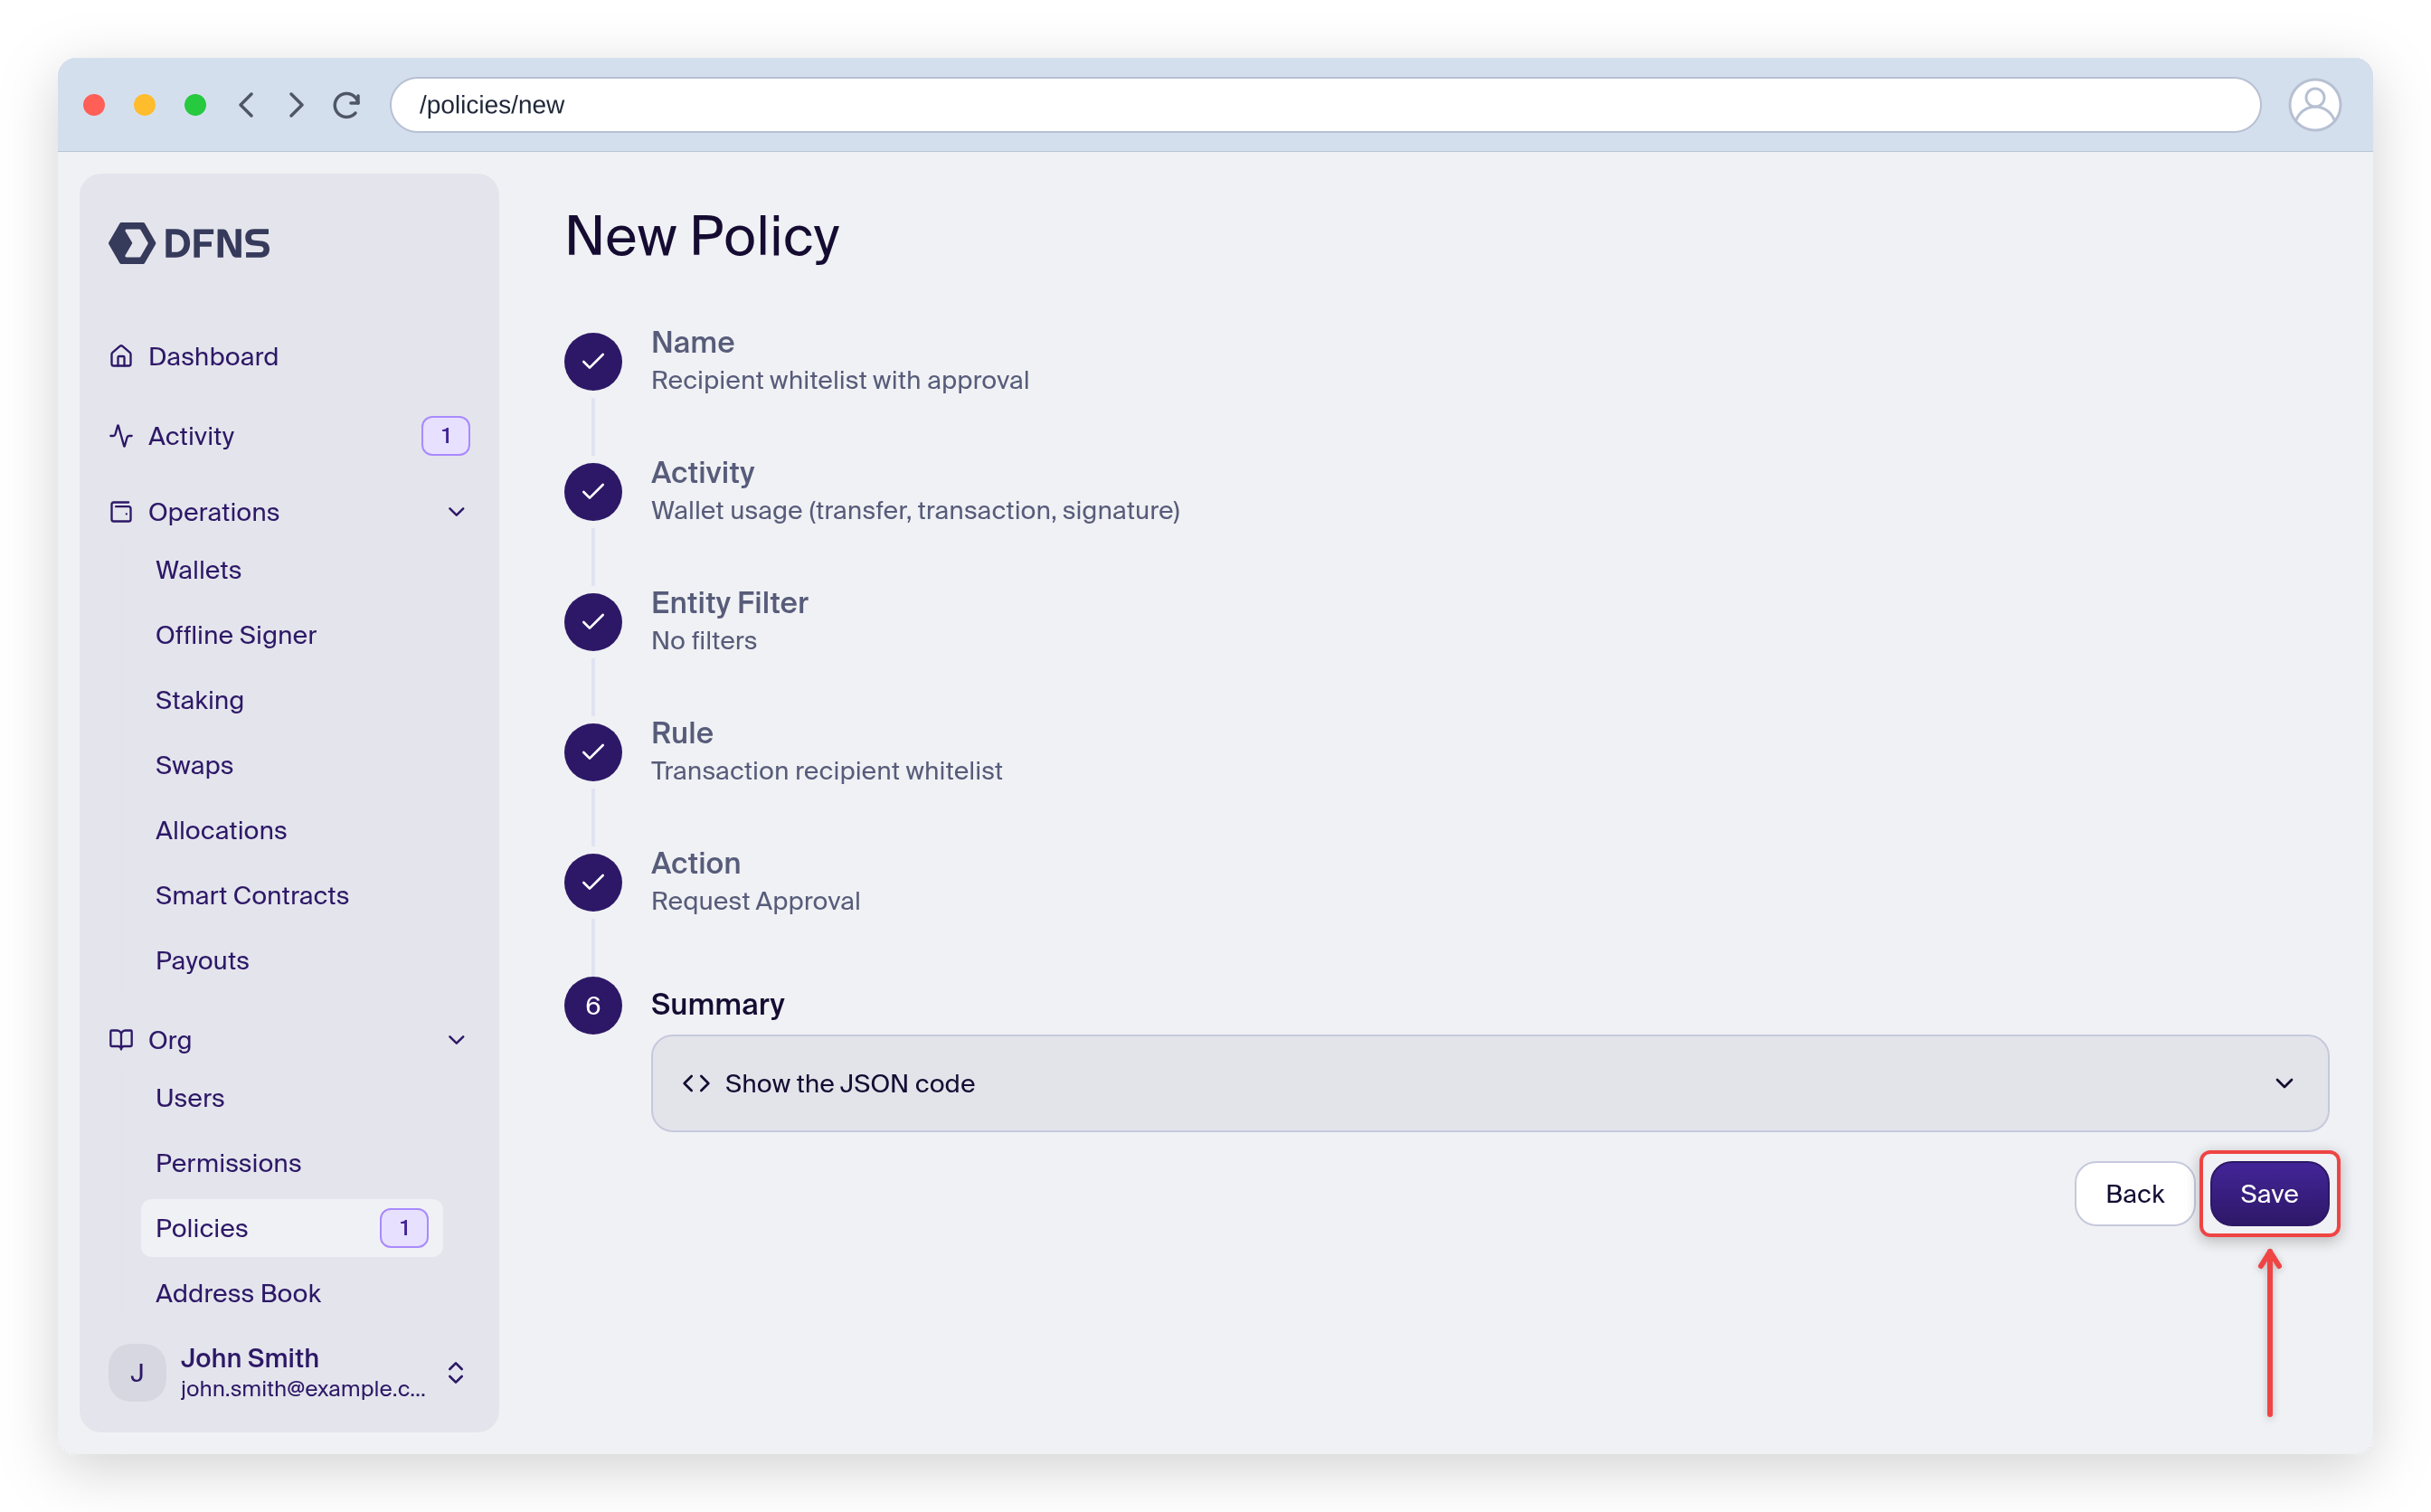
Congratulation! you have created a policy requesting approval from your coworker when a transaction is requested, unless it’s for transferring to the designated wallet. You can refine these rules and add as many as you need to match your internal policies and safeguards.
Keep using the dashboard
Create wallets that you (or your team) will manage manually.
Integrate DFNS into your application
Manage wallets and the DFNS platform programmatically.
Offer delegated wallets to your customers
Get started with delegated wallets.