Create an alias
1
Go to the Address Book page and click 'Create Alias'
Navigate to the Address Book section in your dashboard (1) and click Create Alias (2).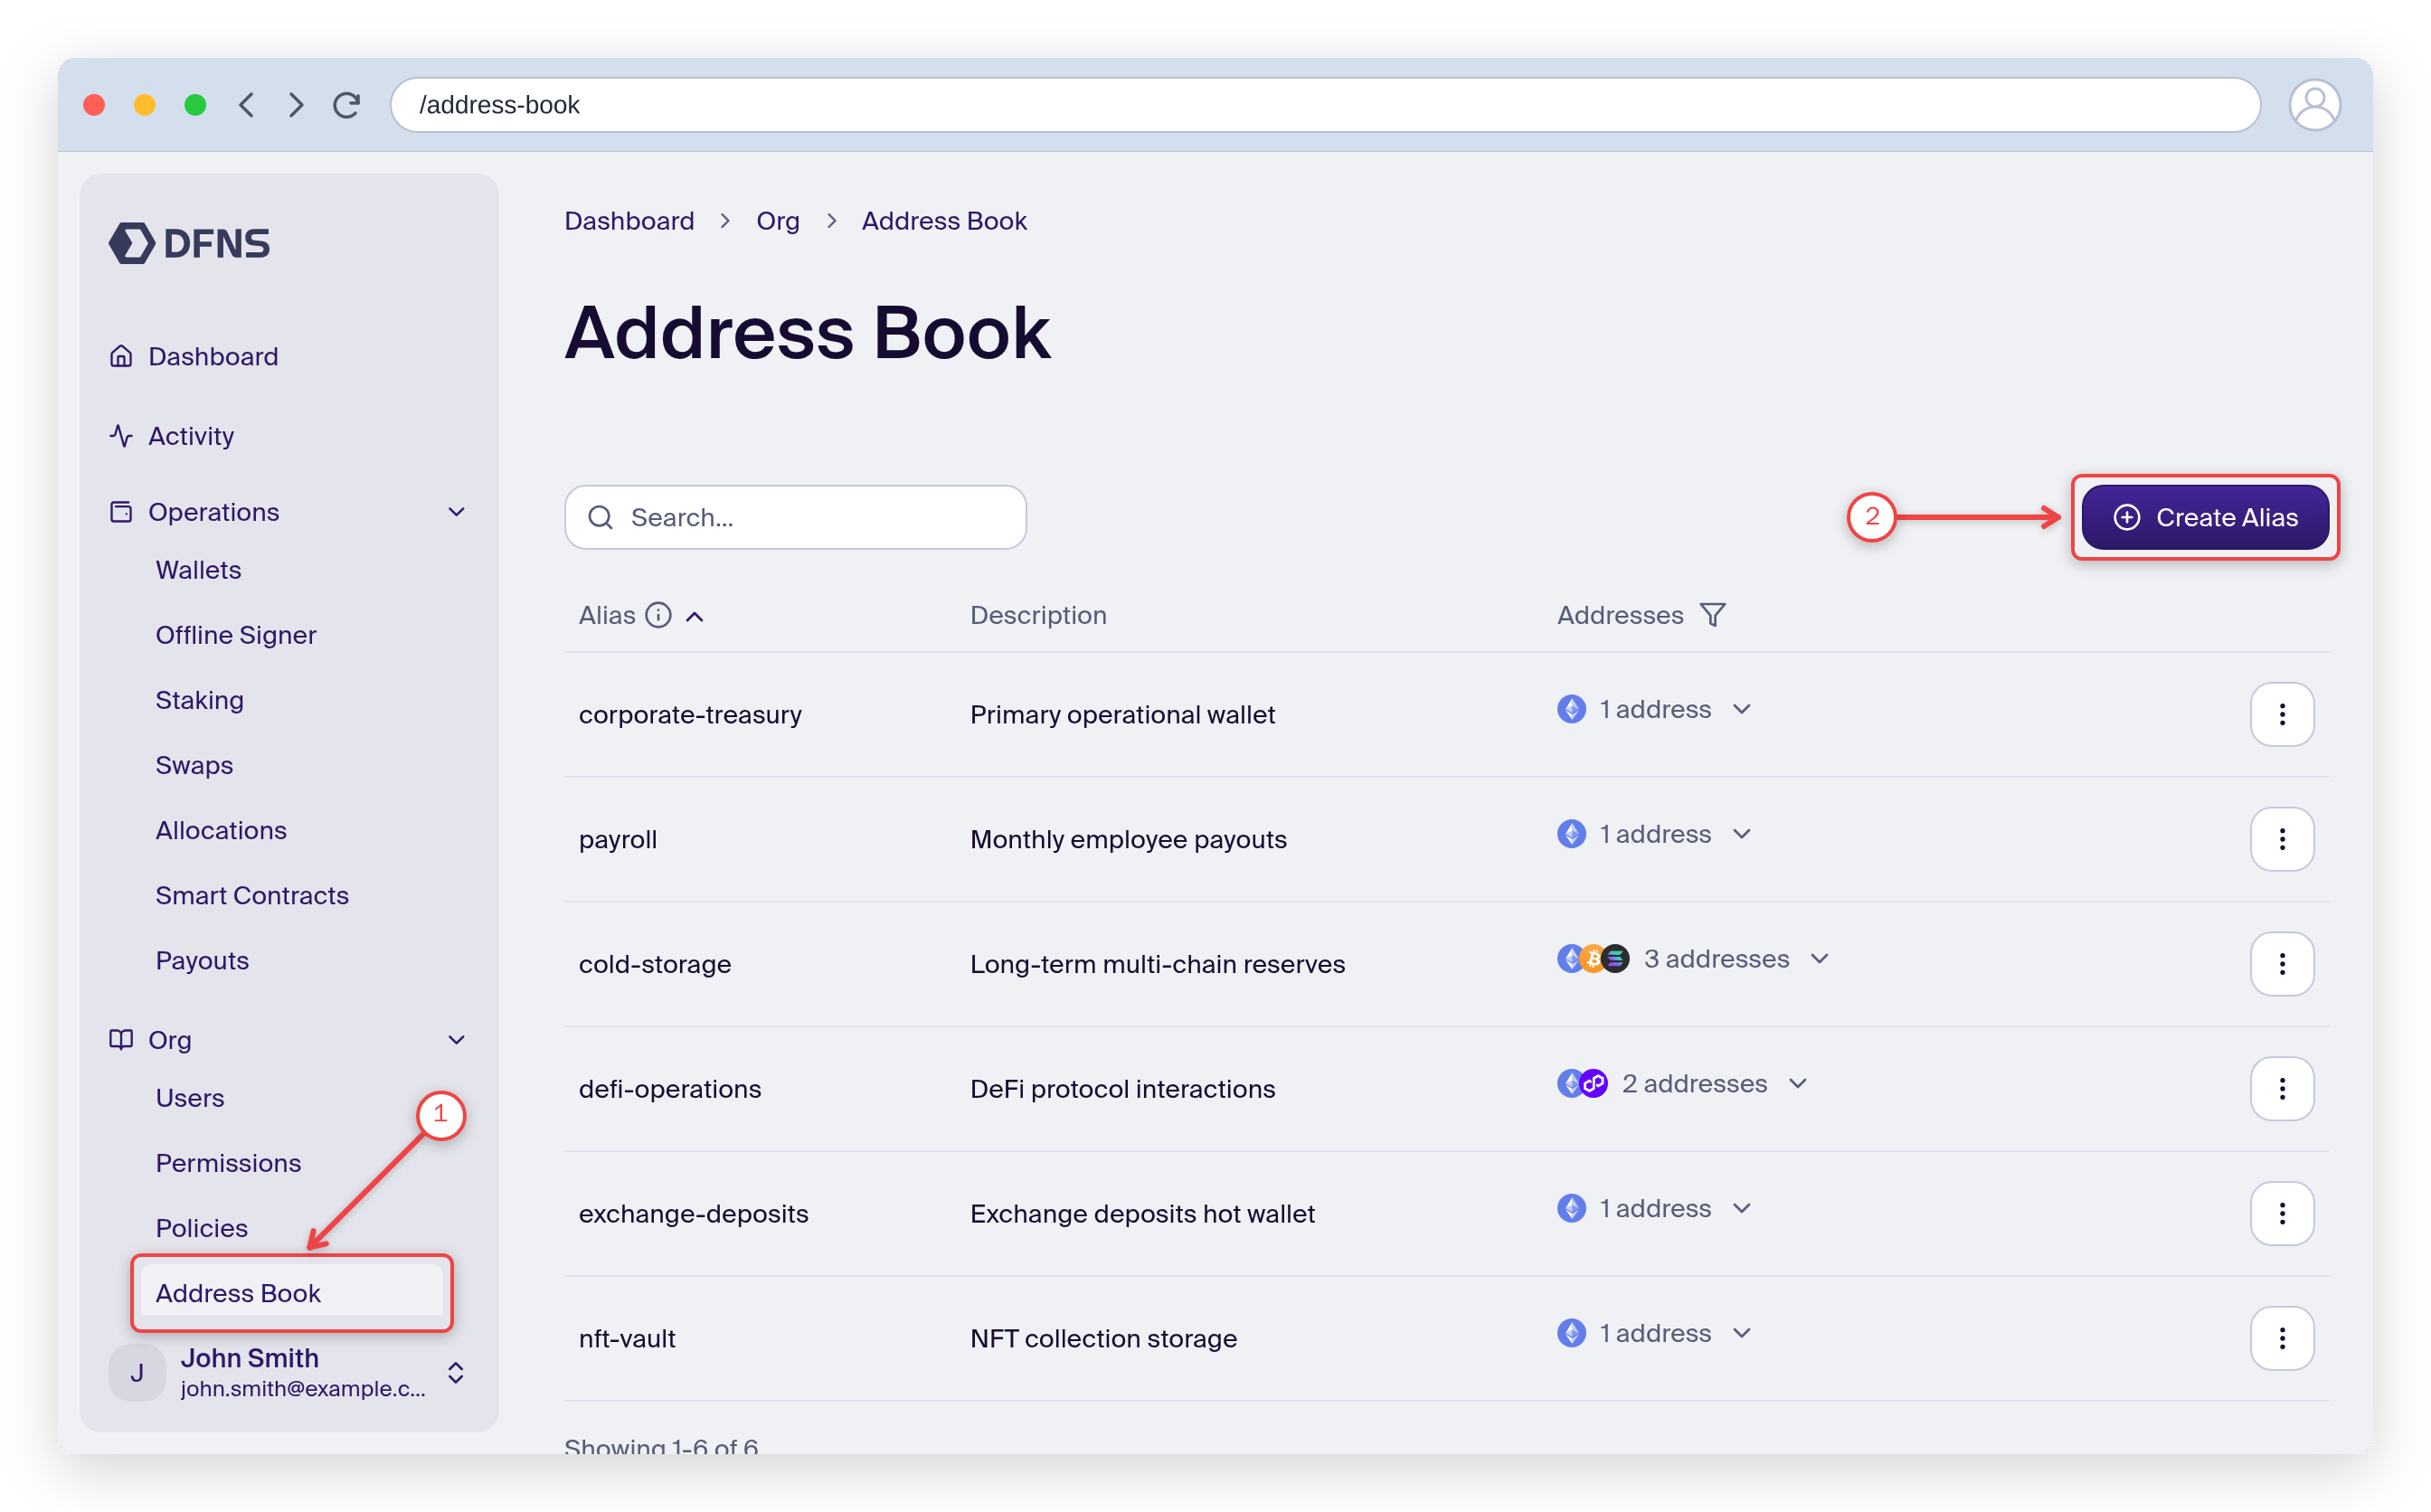
2
Fill in the form and create the alias
The creation form opens. Add a name, an optional description, and a network + address. You can attach multiple networks and addresses to one alias with Add network (1). When you’re done, click Create (2) and 🔑 sign the action with your passkey.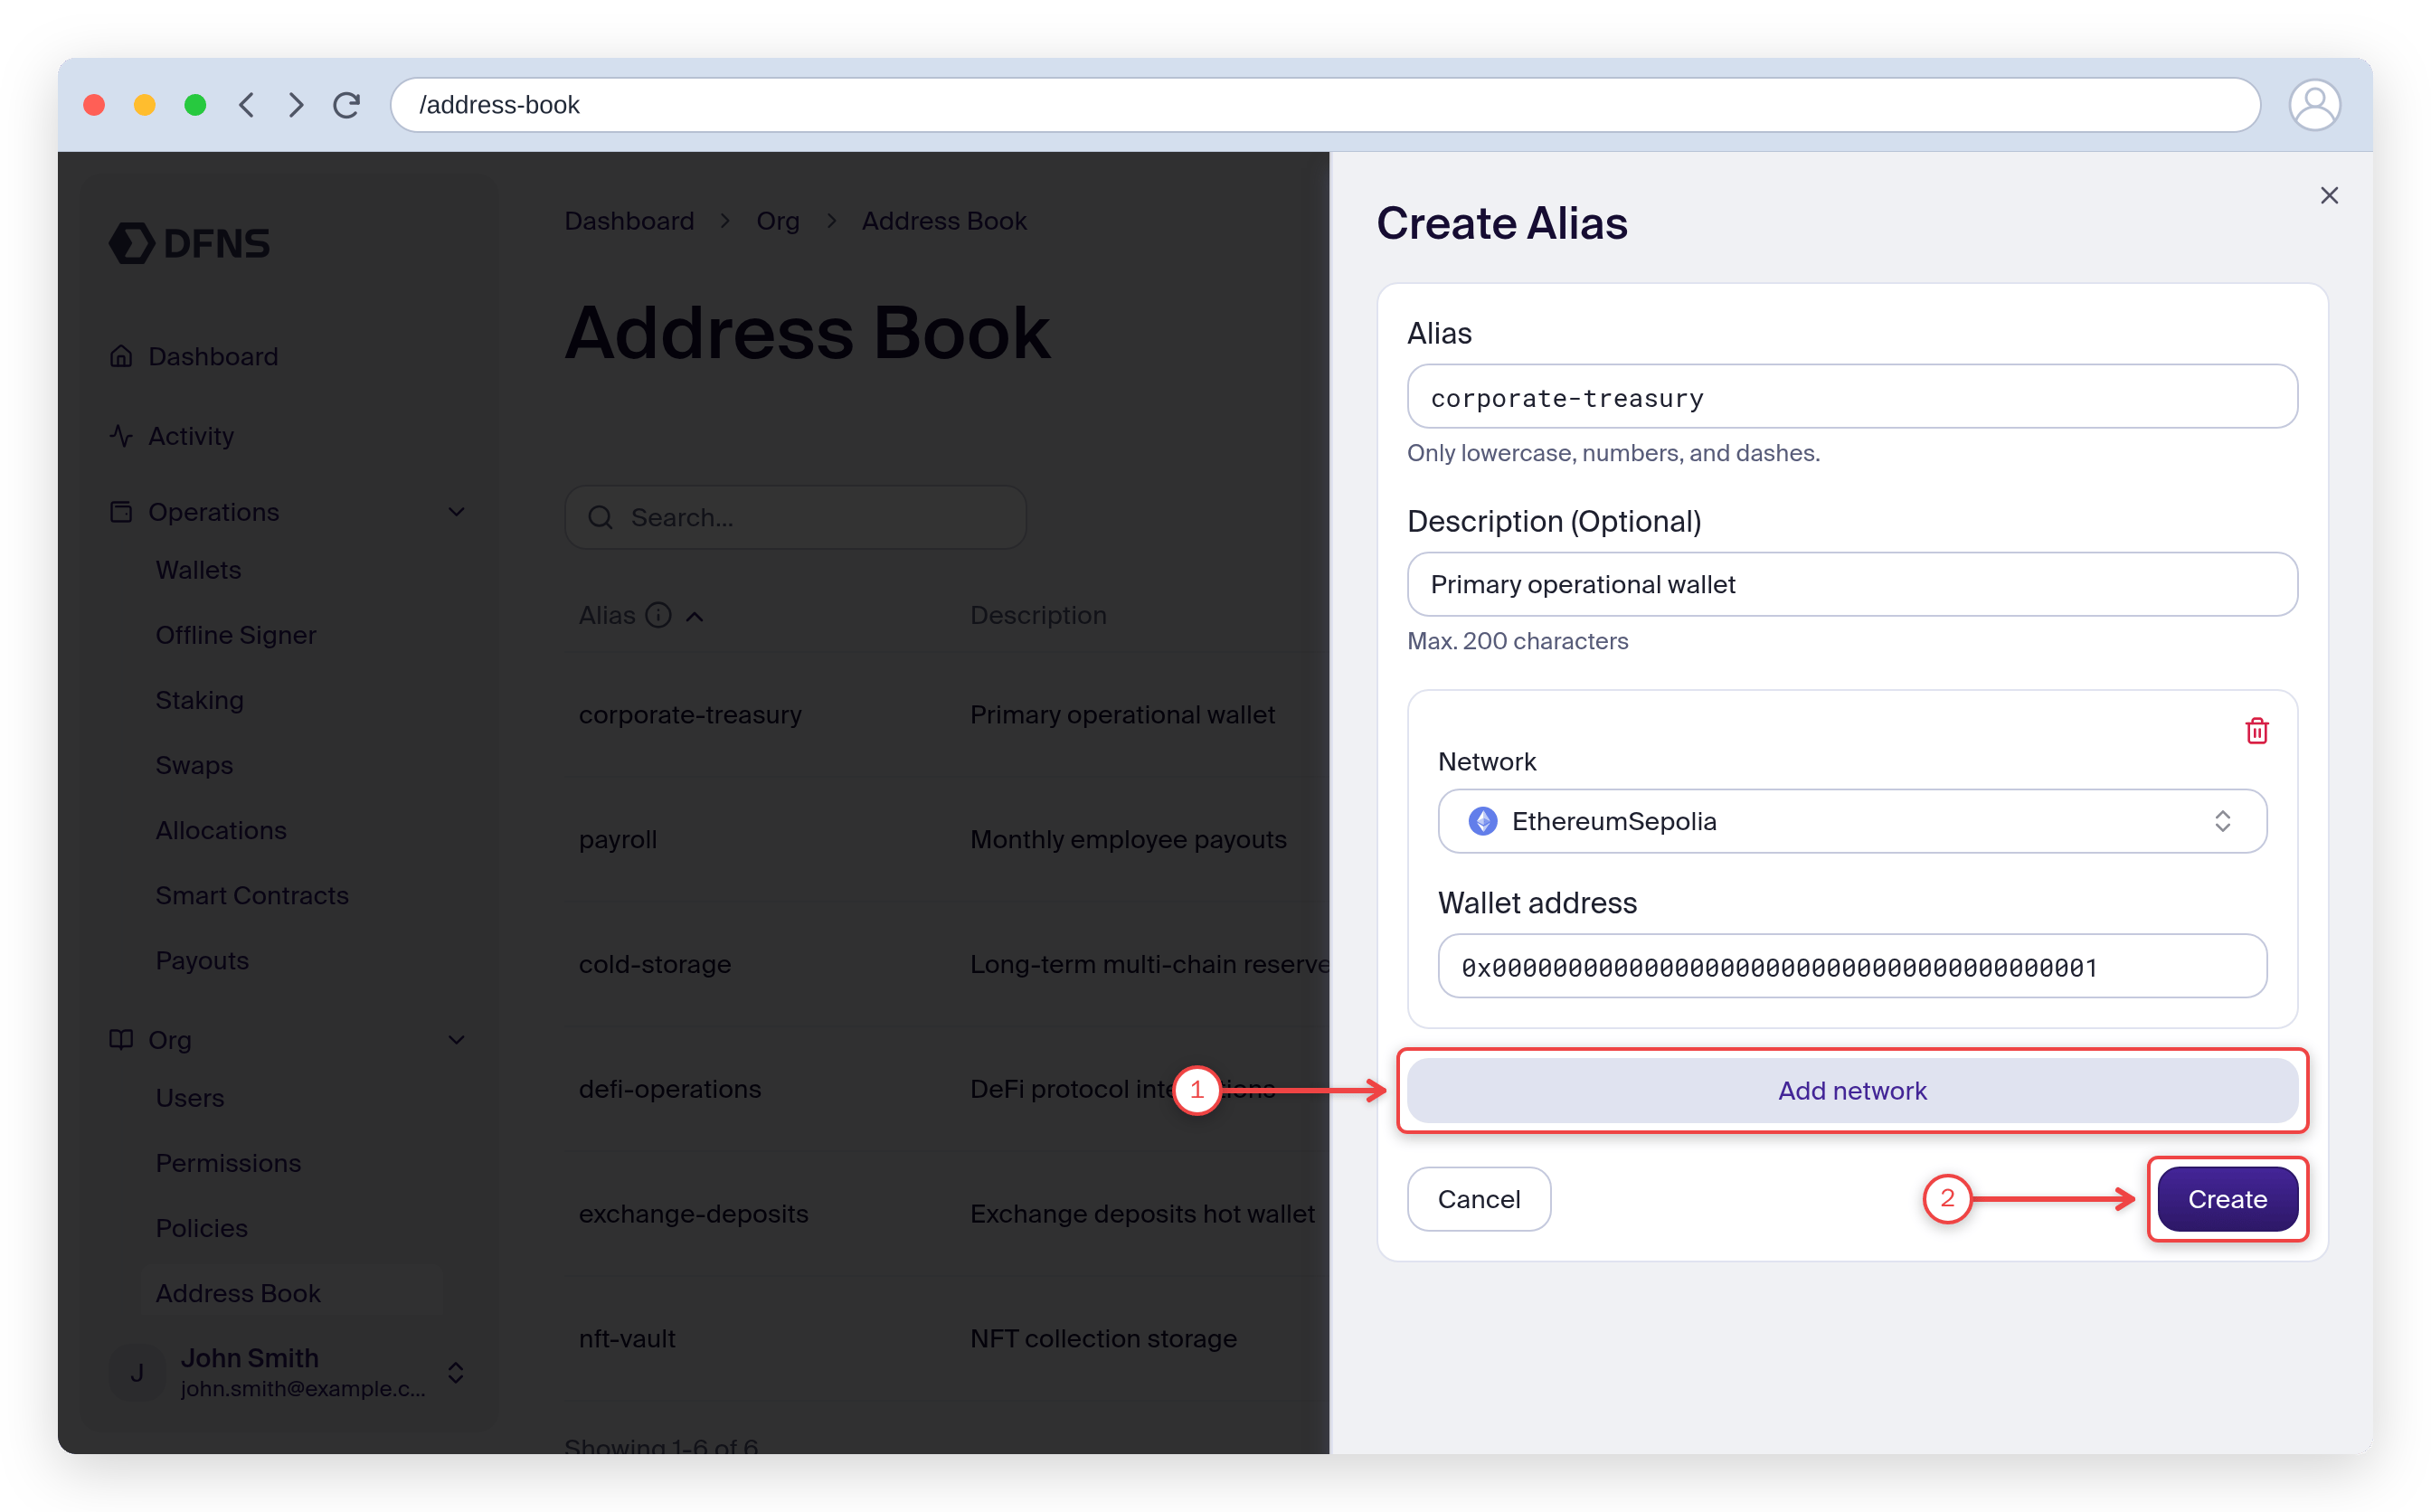
3
Use the alias in a transfer
Your new entry now appears in the Address Book. When you send funds, open the To field in the transfer modal and search the address book to pick a saved alias instead of pasting a raw address.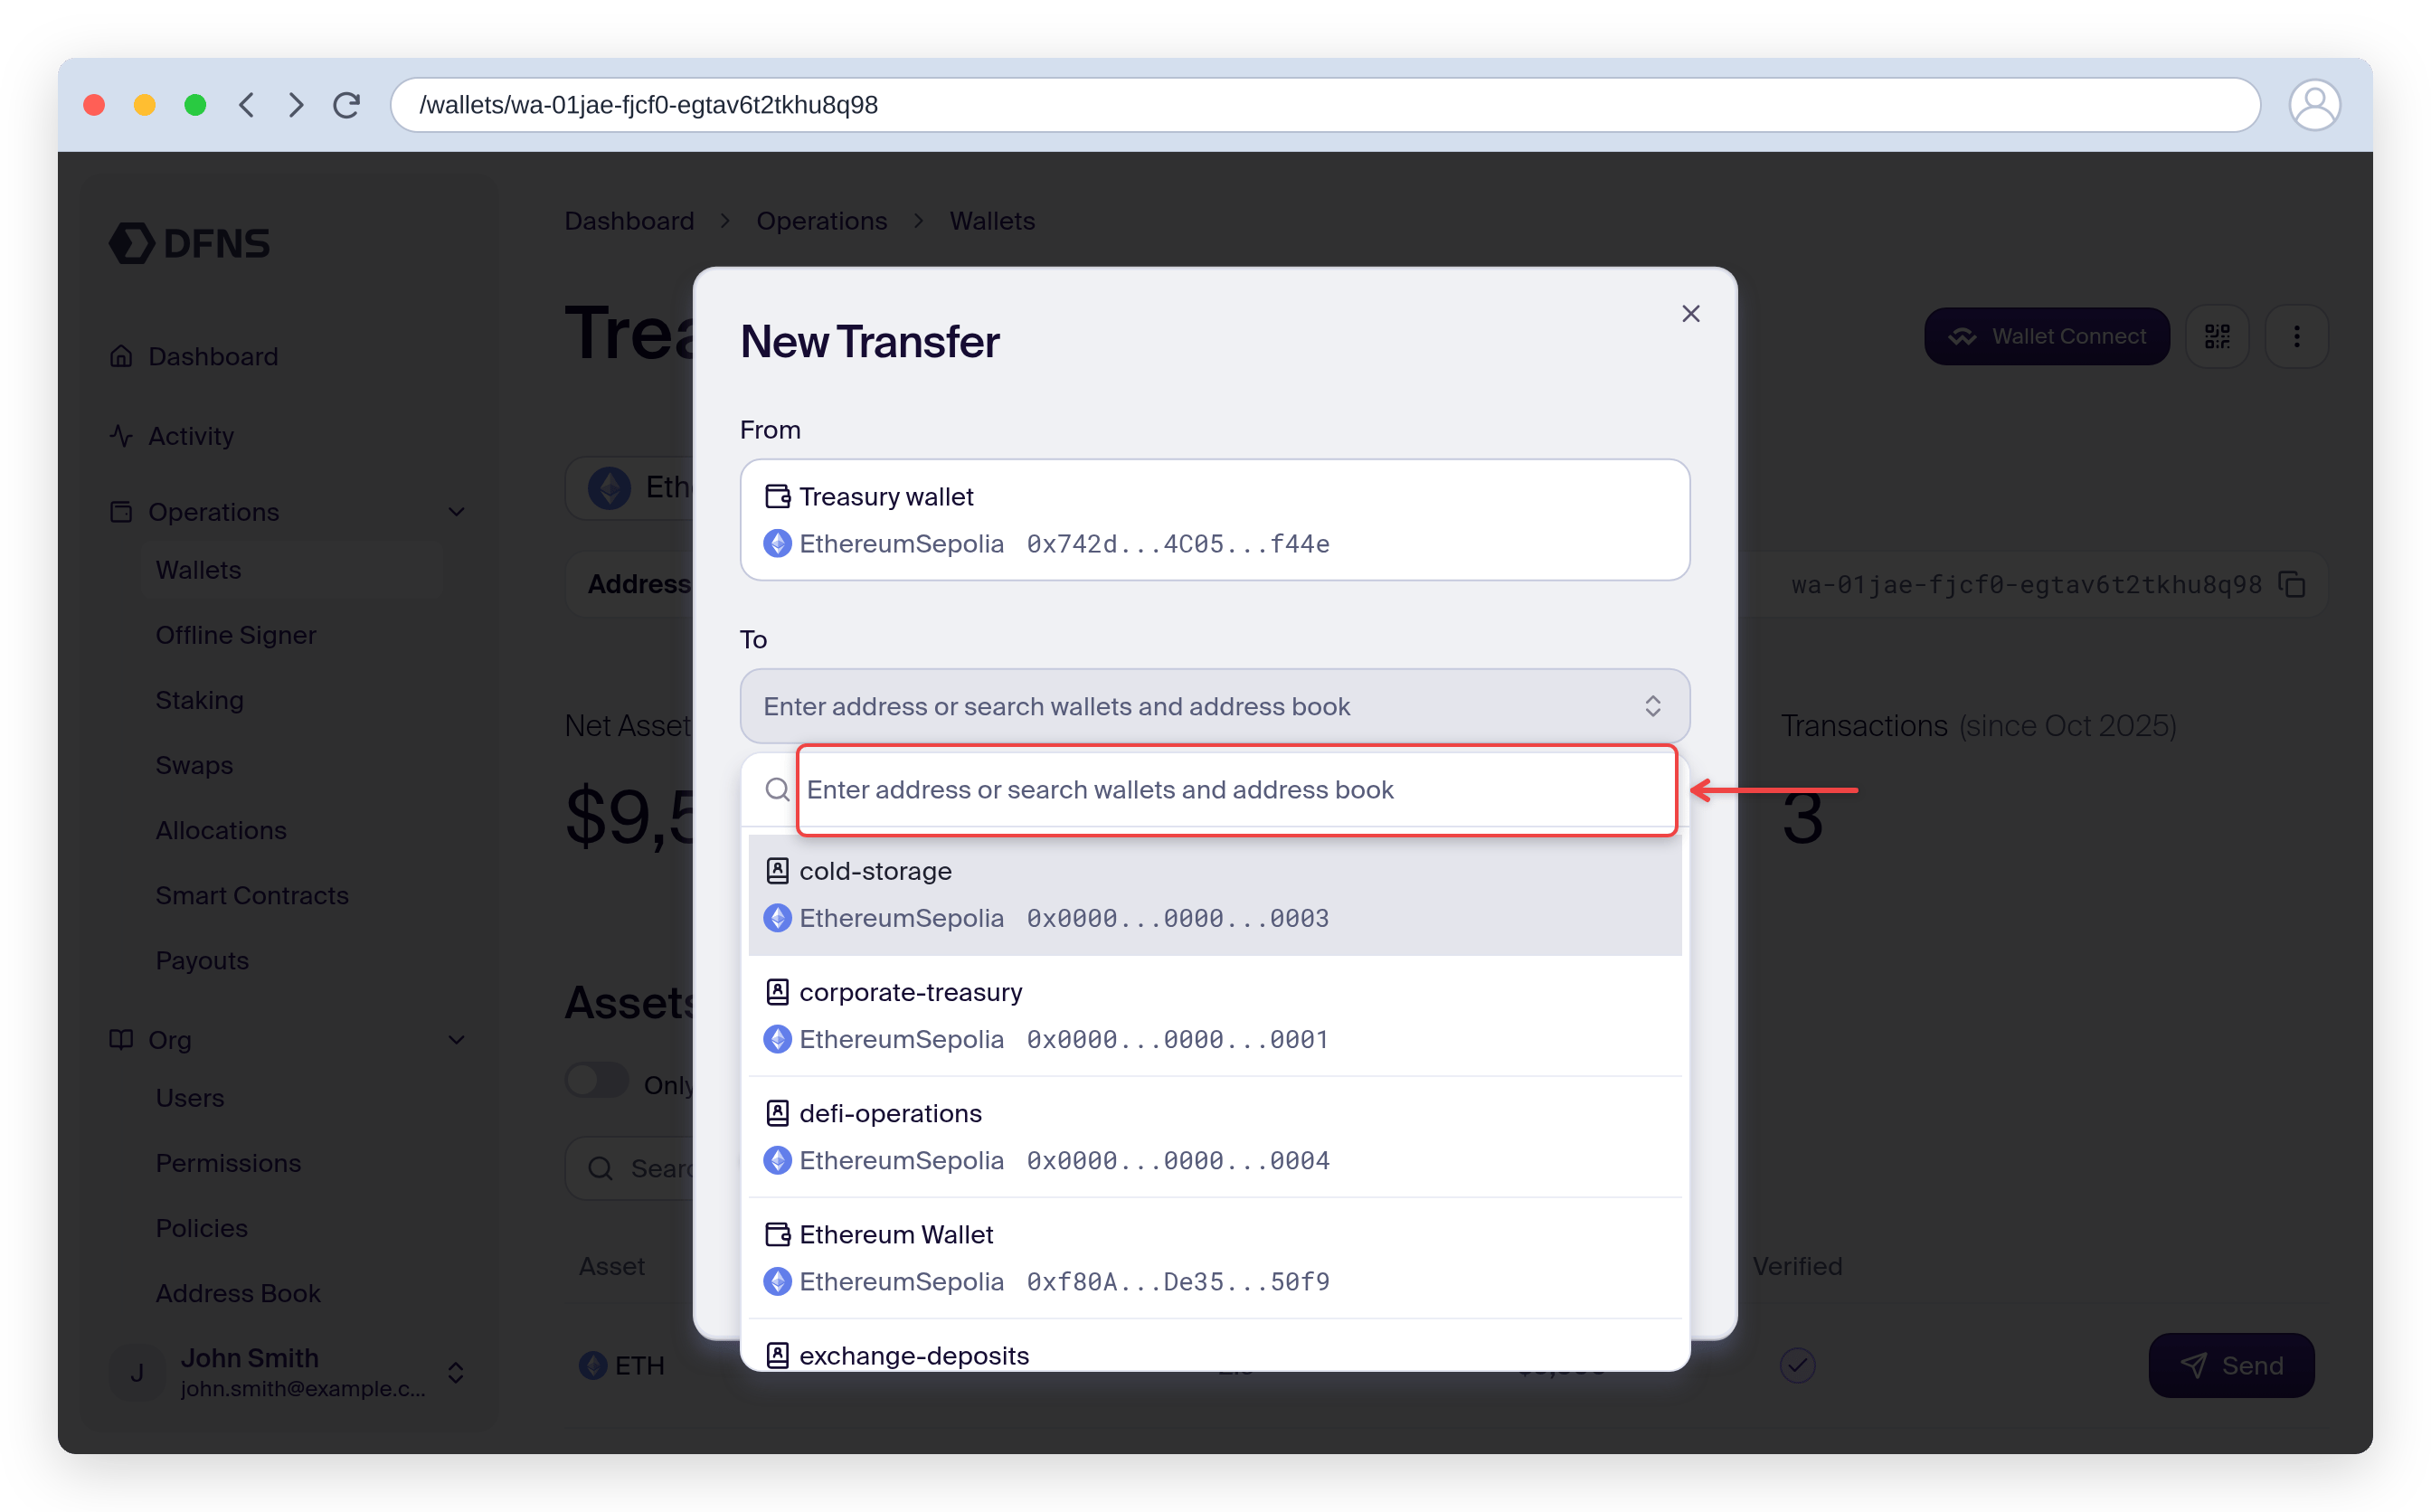
The alias is created. Use it to send funds to a human-readable address.