The Canton Network is a speciality chain that requires a dedicated activation by Dfns teams.Please raise a support request indicating your organization id so we can activate it for you.
1/ Setup a Canton validator
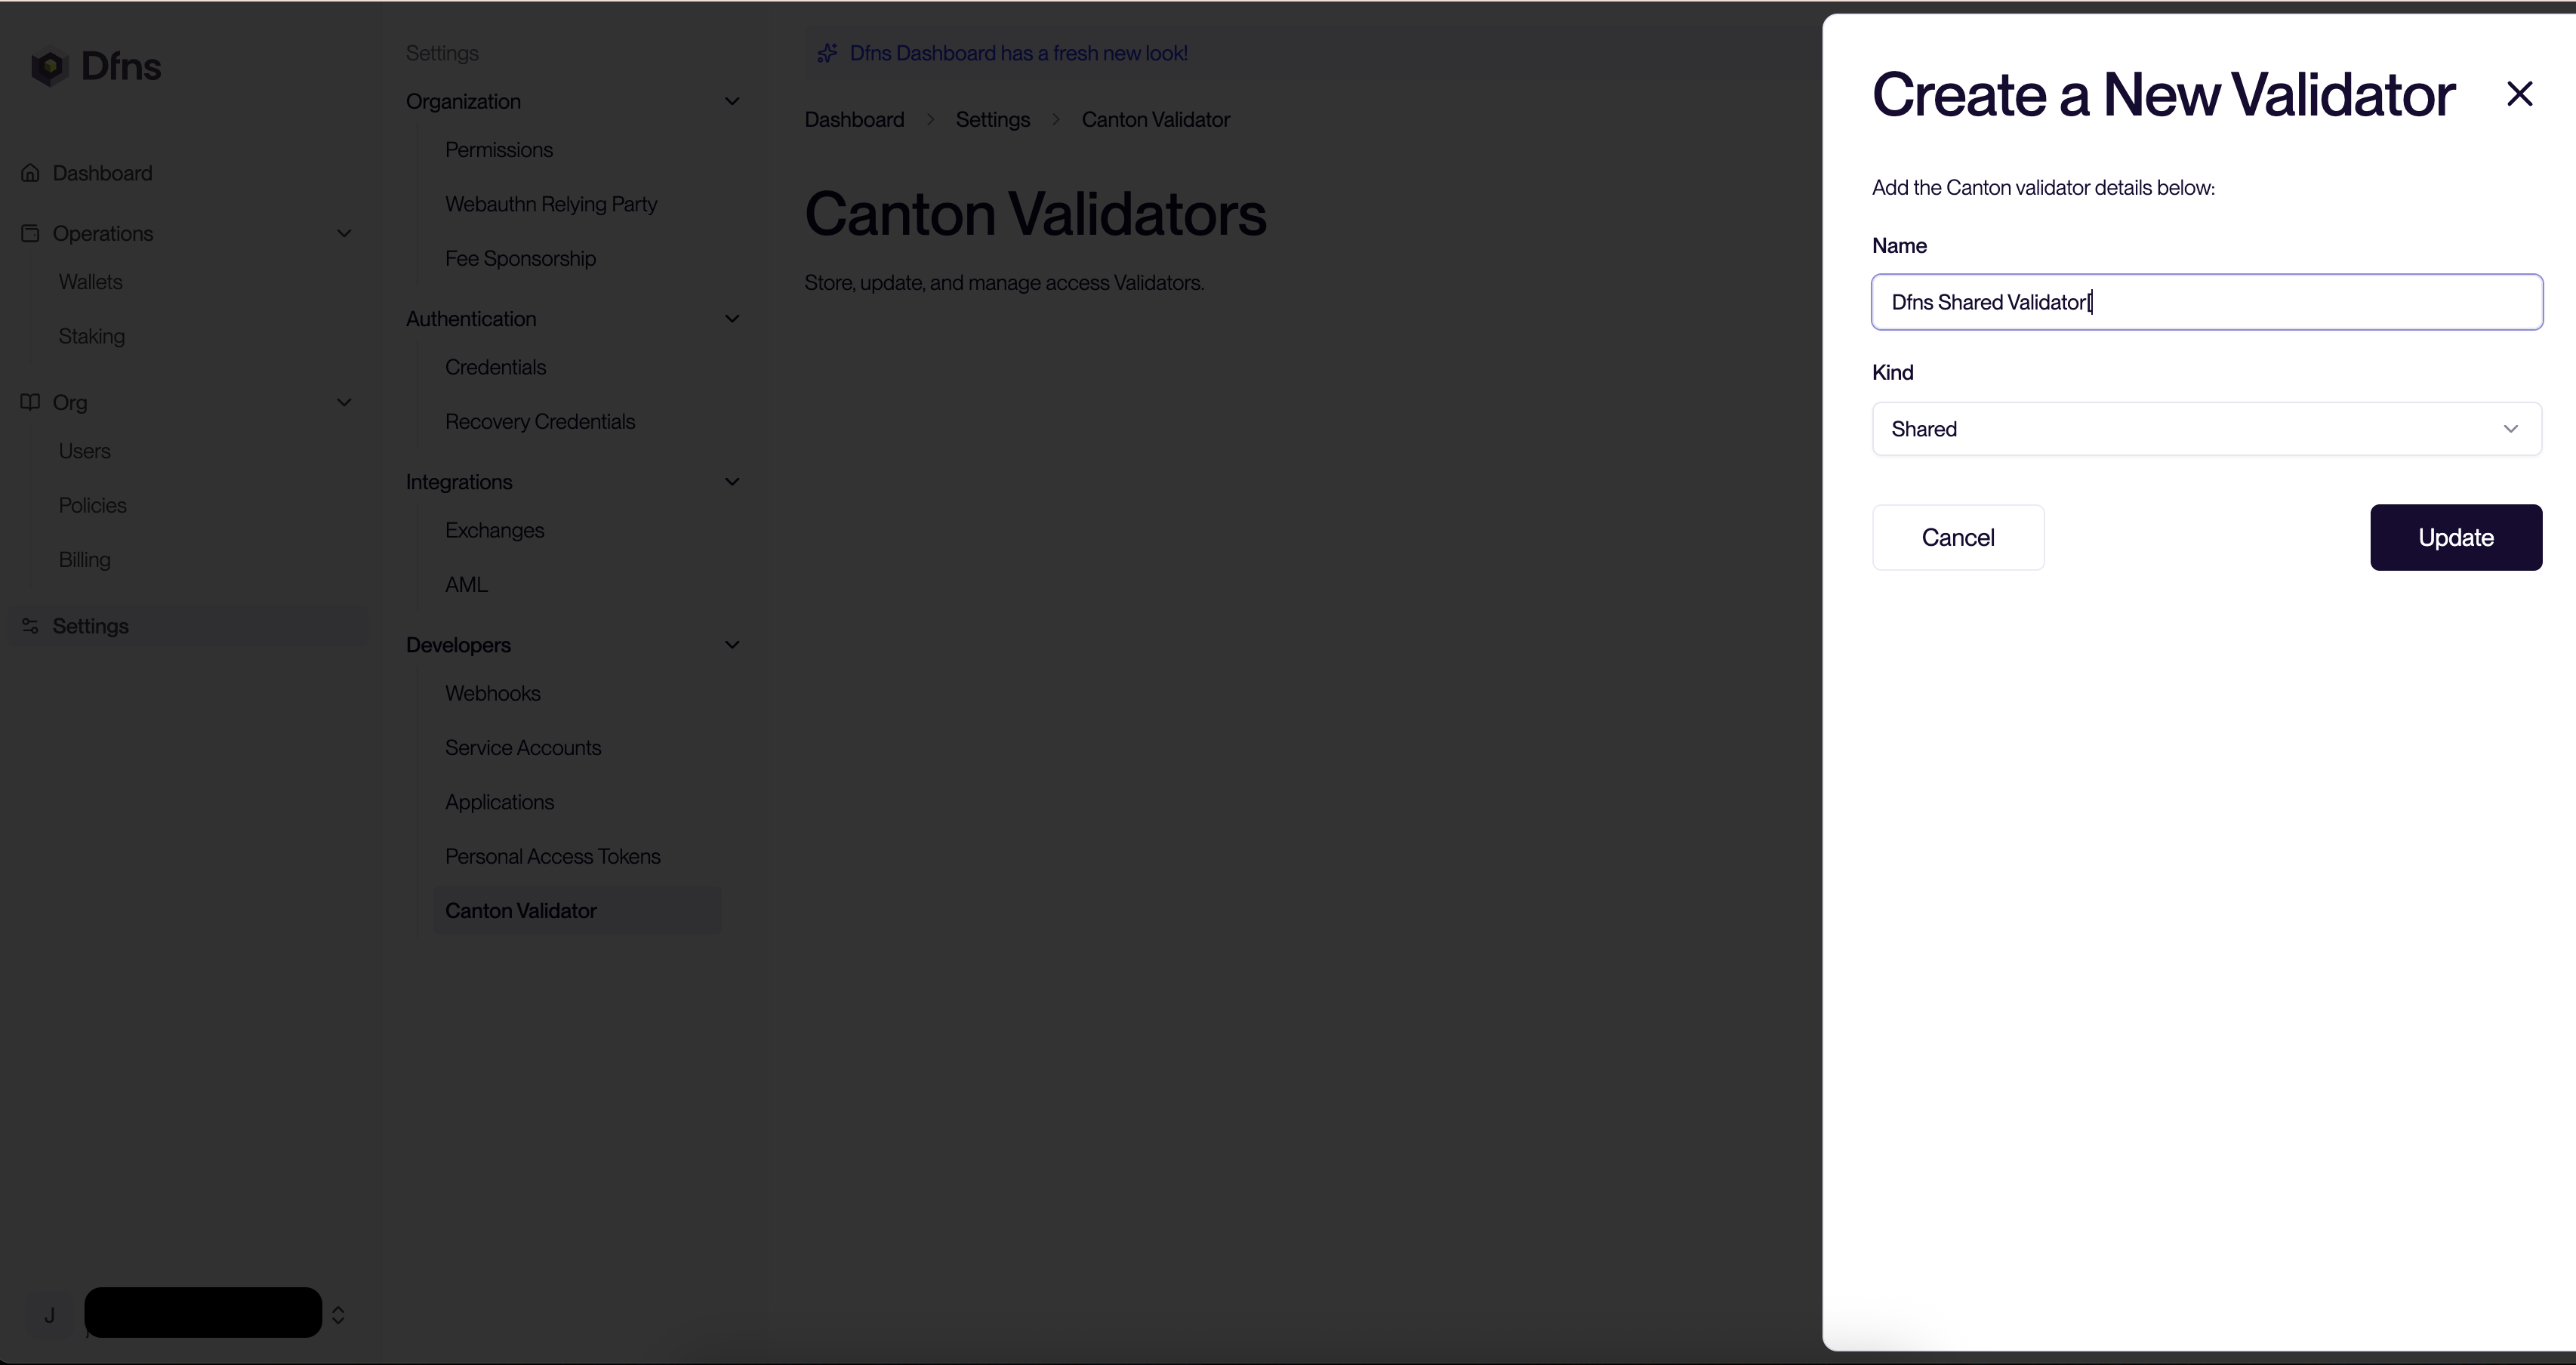
Dfns offers two options for interacting with the Canton Network:Option 1: Use Dfns’ shared validator
Option 1: Use Dfns’ shared validator
Option 2: Connect your own validator (BYOV)
Option 2: Connect your own validator (BYOV)
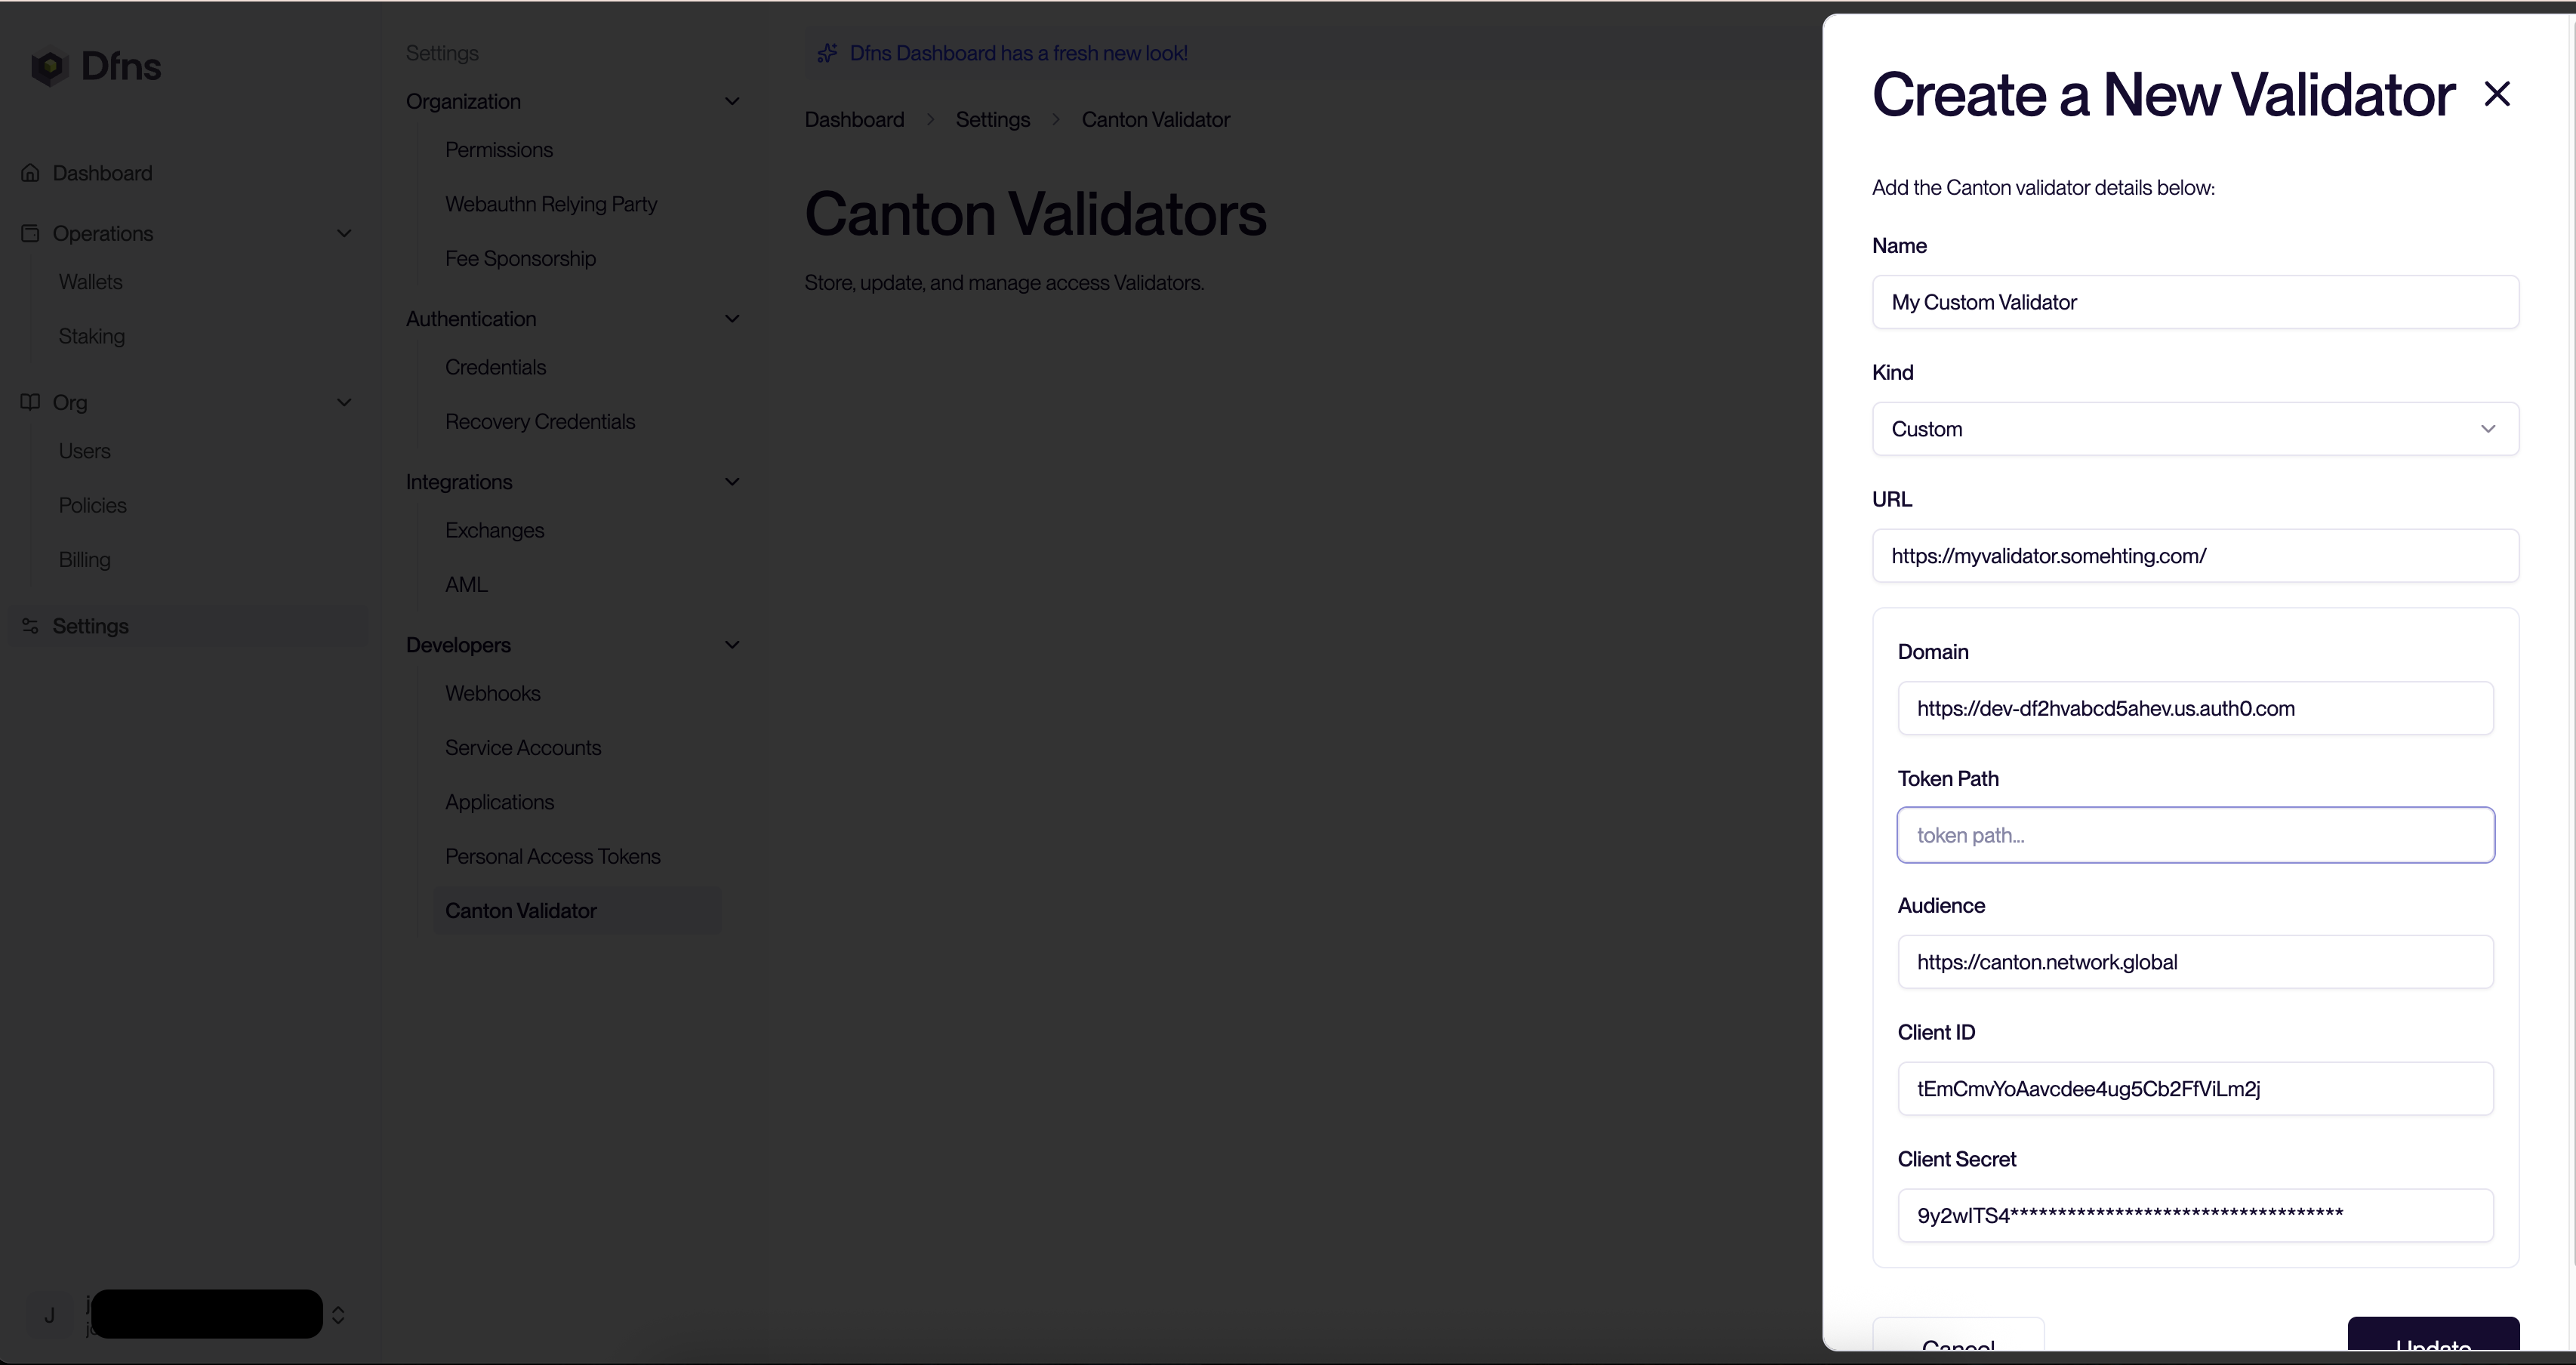
If you are running your own validator, then you can connect it to Dfns over API (see details here ) or via the Dashboard. Once connected, you can create secure wallets linked to your validator. There is no extra setup needed on your validator side.We need several information to be able to connect to your validator:
You will always earn the rewards associated with the validator in the native wallet on that validator.We recommend configuring a automated sweep into a separate Dfns-secured Canton wallet to ensure your coins are safe. See an example configuration here.
- The validator URL: we expect to be able to call the validator External Signing API, for instance
$URL/api/validator/v0/admin/external-party/topology/generate. See the underlying calls details here. The calls will be originating from our IP addresses (see dfns-environments) - The validator’s OAuth2 authentication parameters: this is how we will authenticate into your validator. You should have setup authentication already (see details here), you can reuse the same Application details. For convenience you can find some examples with some common providers on the API page
- Domain: your OAuth2 tenant domain. Provided by your auth provider.
- Token Path: token endpoint from your authorization provider. We will call this endpoint on your tenant domain (i.e.:
<domain>/<token path>) - Audience: the audience your configured on your auth provider. It is suggested to start with
https://canton.network.global. - Client ID: The client id from your auth provider for this application.
- Client Secret: The client secret from your auth provider for this application.
- The Ledger API URL: URL to access the Ledger JSON API and call endpoints such as
/v2/state/ledger-end,/v2/state/active-contracts,/v2/parties/participant-id,/v2/interactive-submission/prepare,/v2/interactive-submission/execute,/v2/commands/completions. See the underlying details here. The calls will be originating from our IP addresses (see Dfns Environments) - The Ledger OAuth2 authentication parameters: this is how we will authenticate to your ledger API. This will usually use the same parameters as for the validator.

Canton validators support a limited number of wallets. You can connect several validators to your Dfns account.
2/ Setup a Canton Wallet
1
Create a Canton Wallet
Once setup using the shared or your own validator, you can create wallets via the dashboard Wallets page or via the Wallets API. You will be requested to select the validator you want to leverage.Should you need help to create a wallet, you can watch the video above, or follow the tutorial: using-the-dashboard-create-your-first-wallet or use our dedicated API doc: create-wallet
2
Pre-approve assets reception
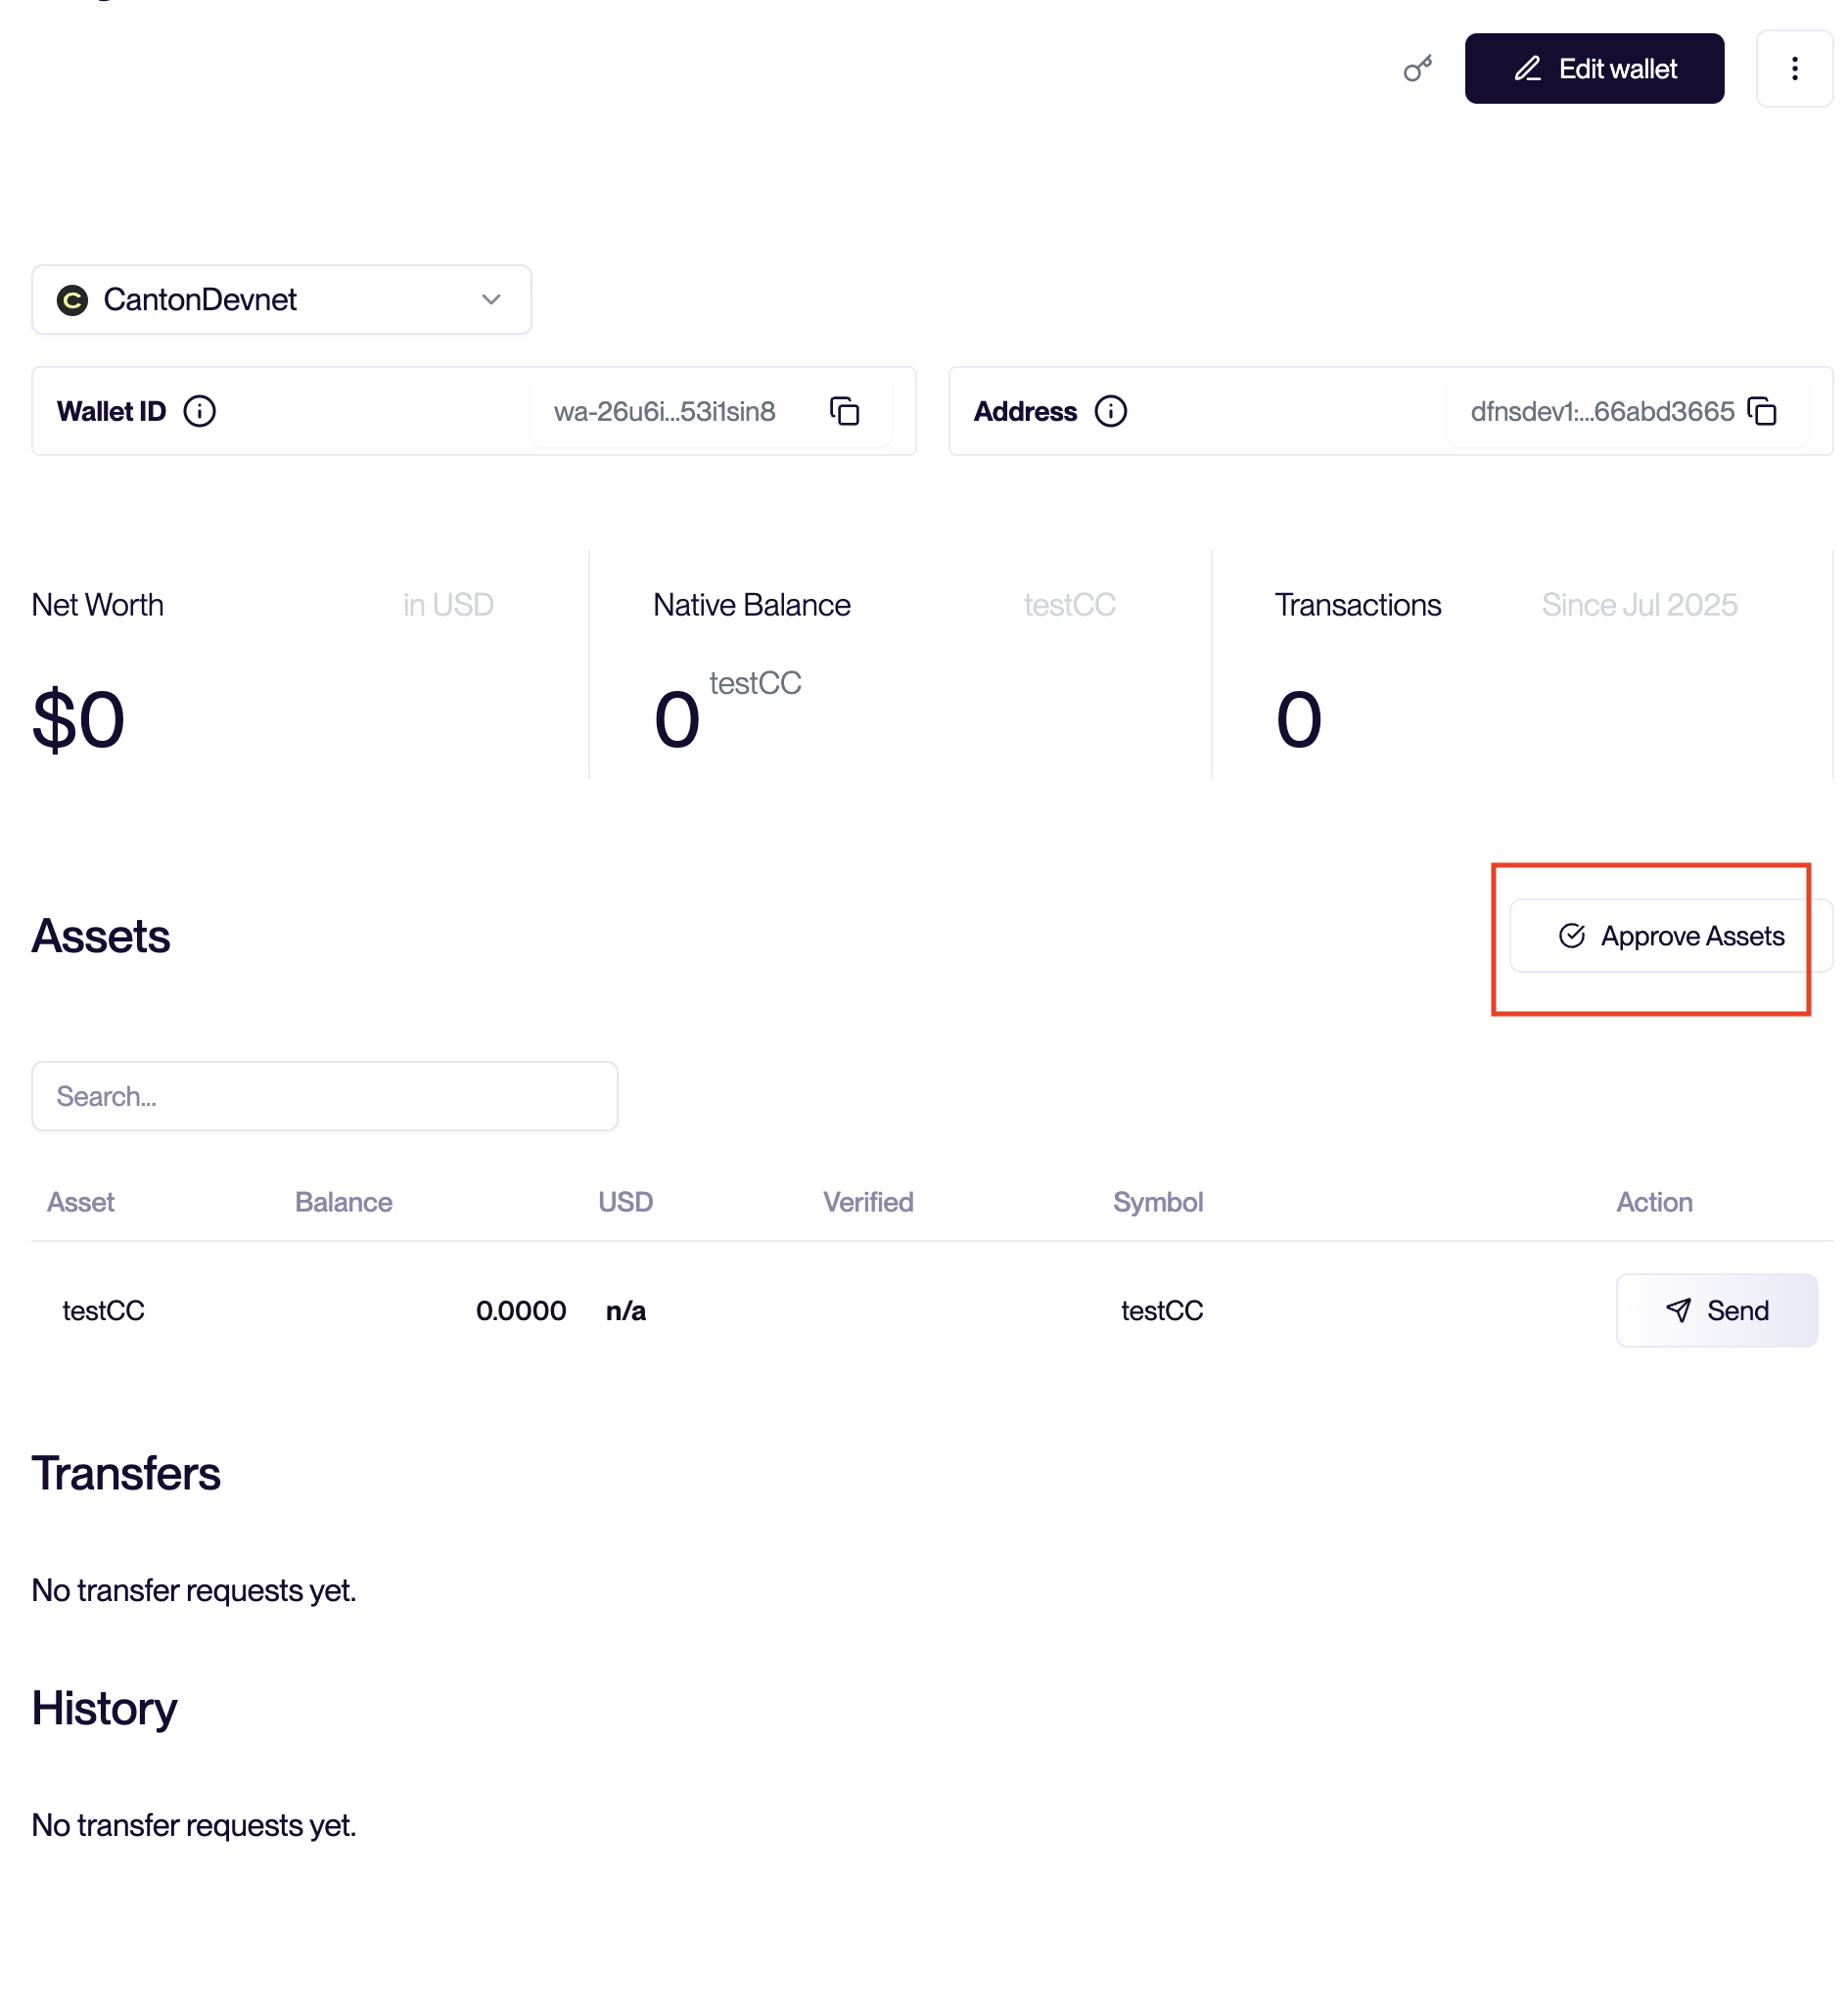
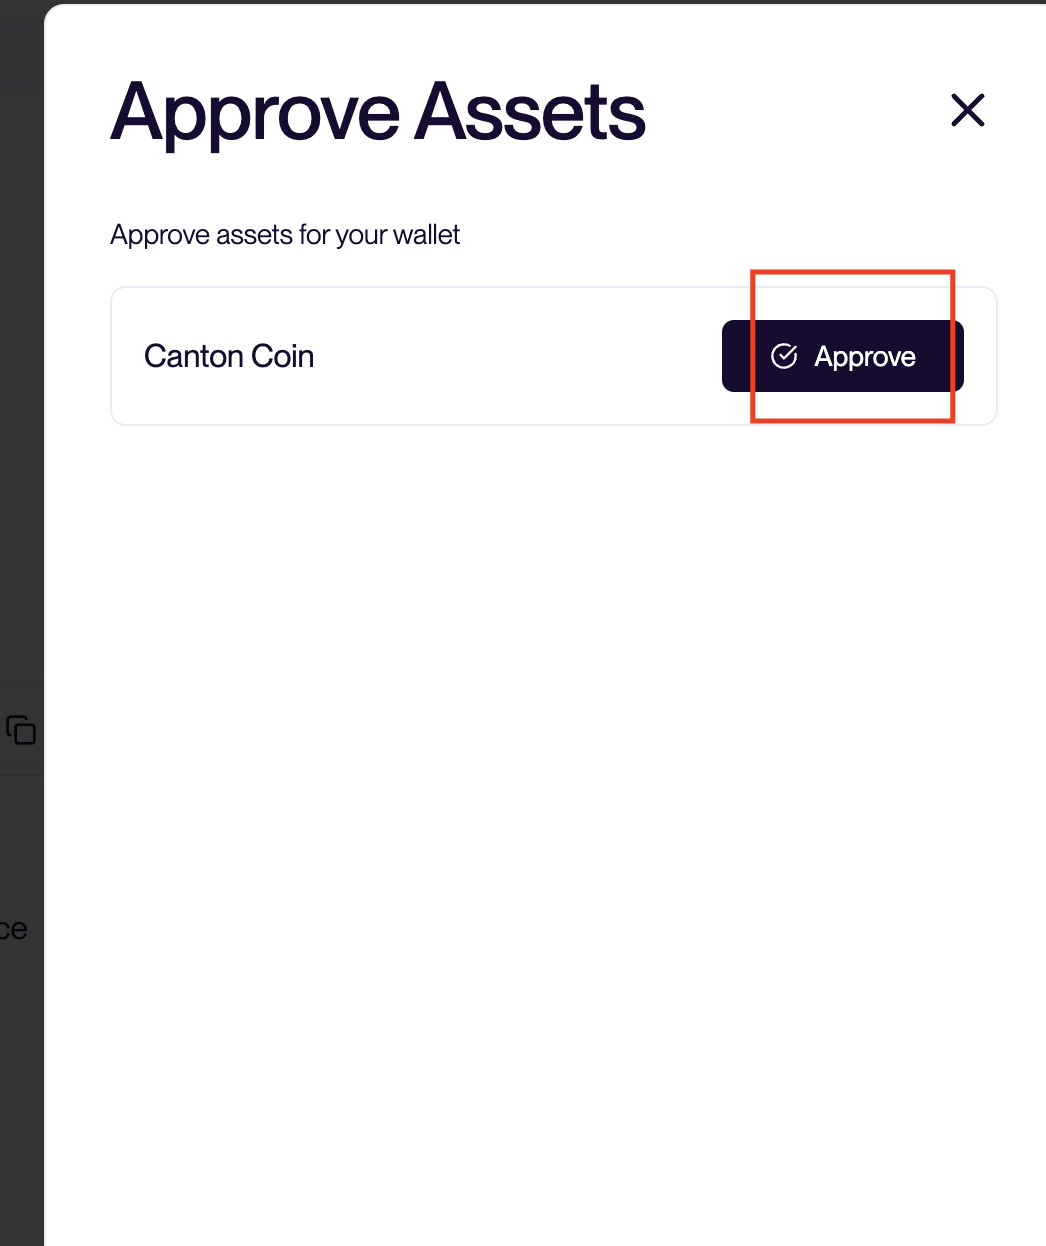
Pre-approve receiving assets into your Canton Wallet from the Dashboard Wallet page.Click ” Approve Assets” button on the dashboard, then ” Approve” for the assets needed.


API reference
POST/networks/{network}/validators Register a Canton validator
PUT/networks/{network}/validators Update a Canton validator
GET/networks/{network}/validators/{validatorId} List your Canton validators
DEL/networks/{network}/validators/{validatorId} Delete a Canton validator
