1
Prepare a key pair
Your service account will need its own key pair to sign its requests. The easiest way to create a Public / Private Key pair is from the command line. You can use the commands shown below or see our documentation on key generation:
2
Create the Service Account
Navigate to Settings > Developers > Service Accounts and click “New Service Account”. Name the Service Account, copy in the public key (including begin/end lines like 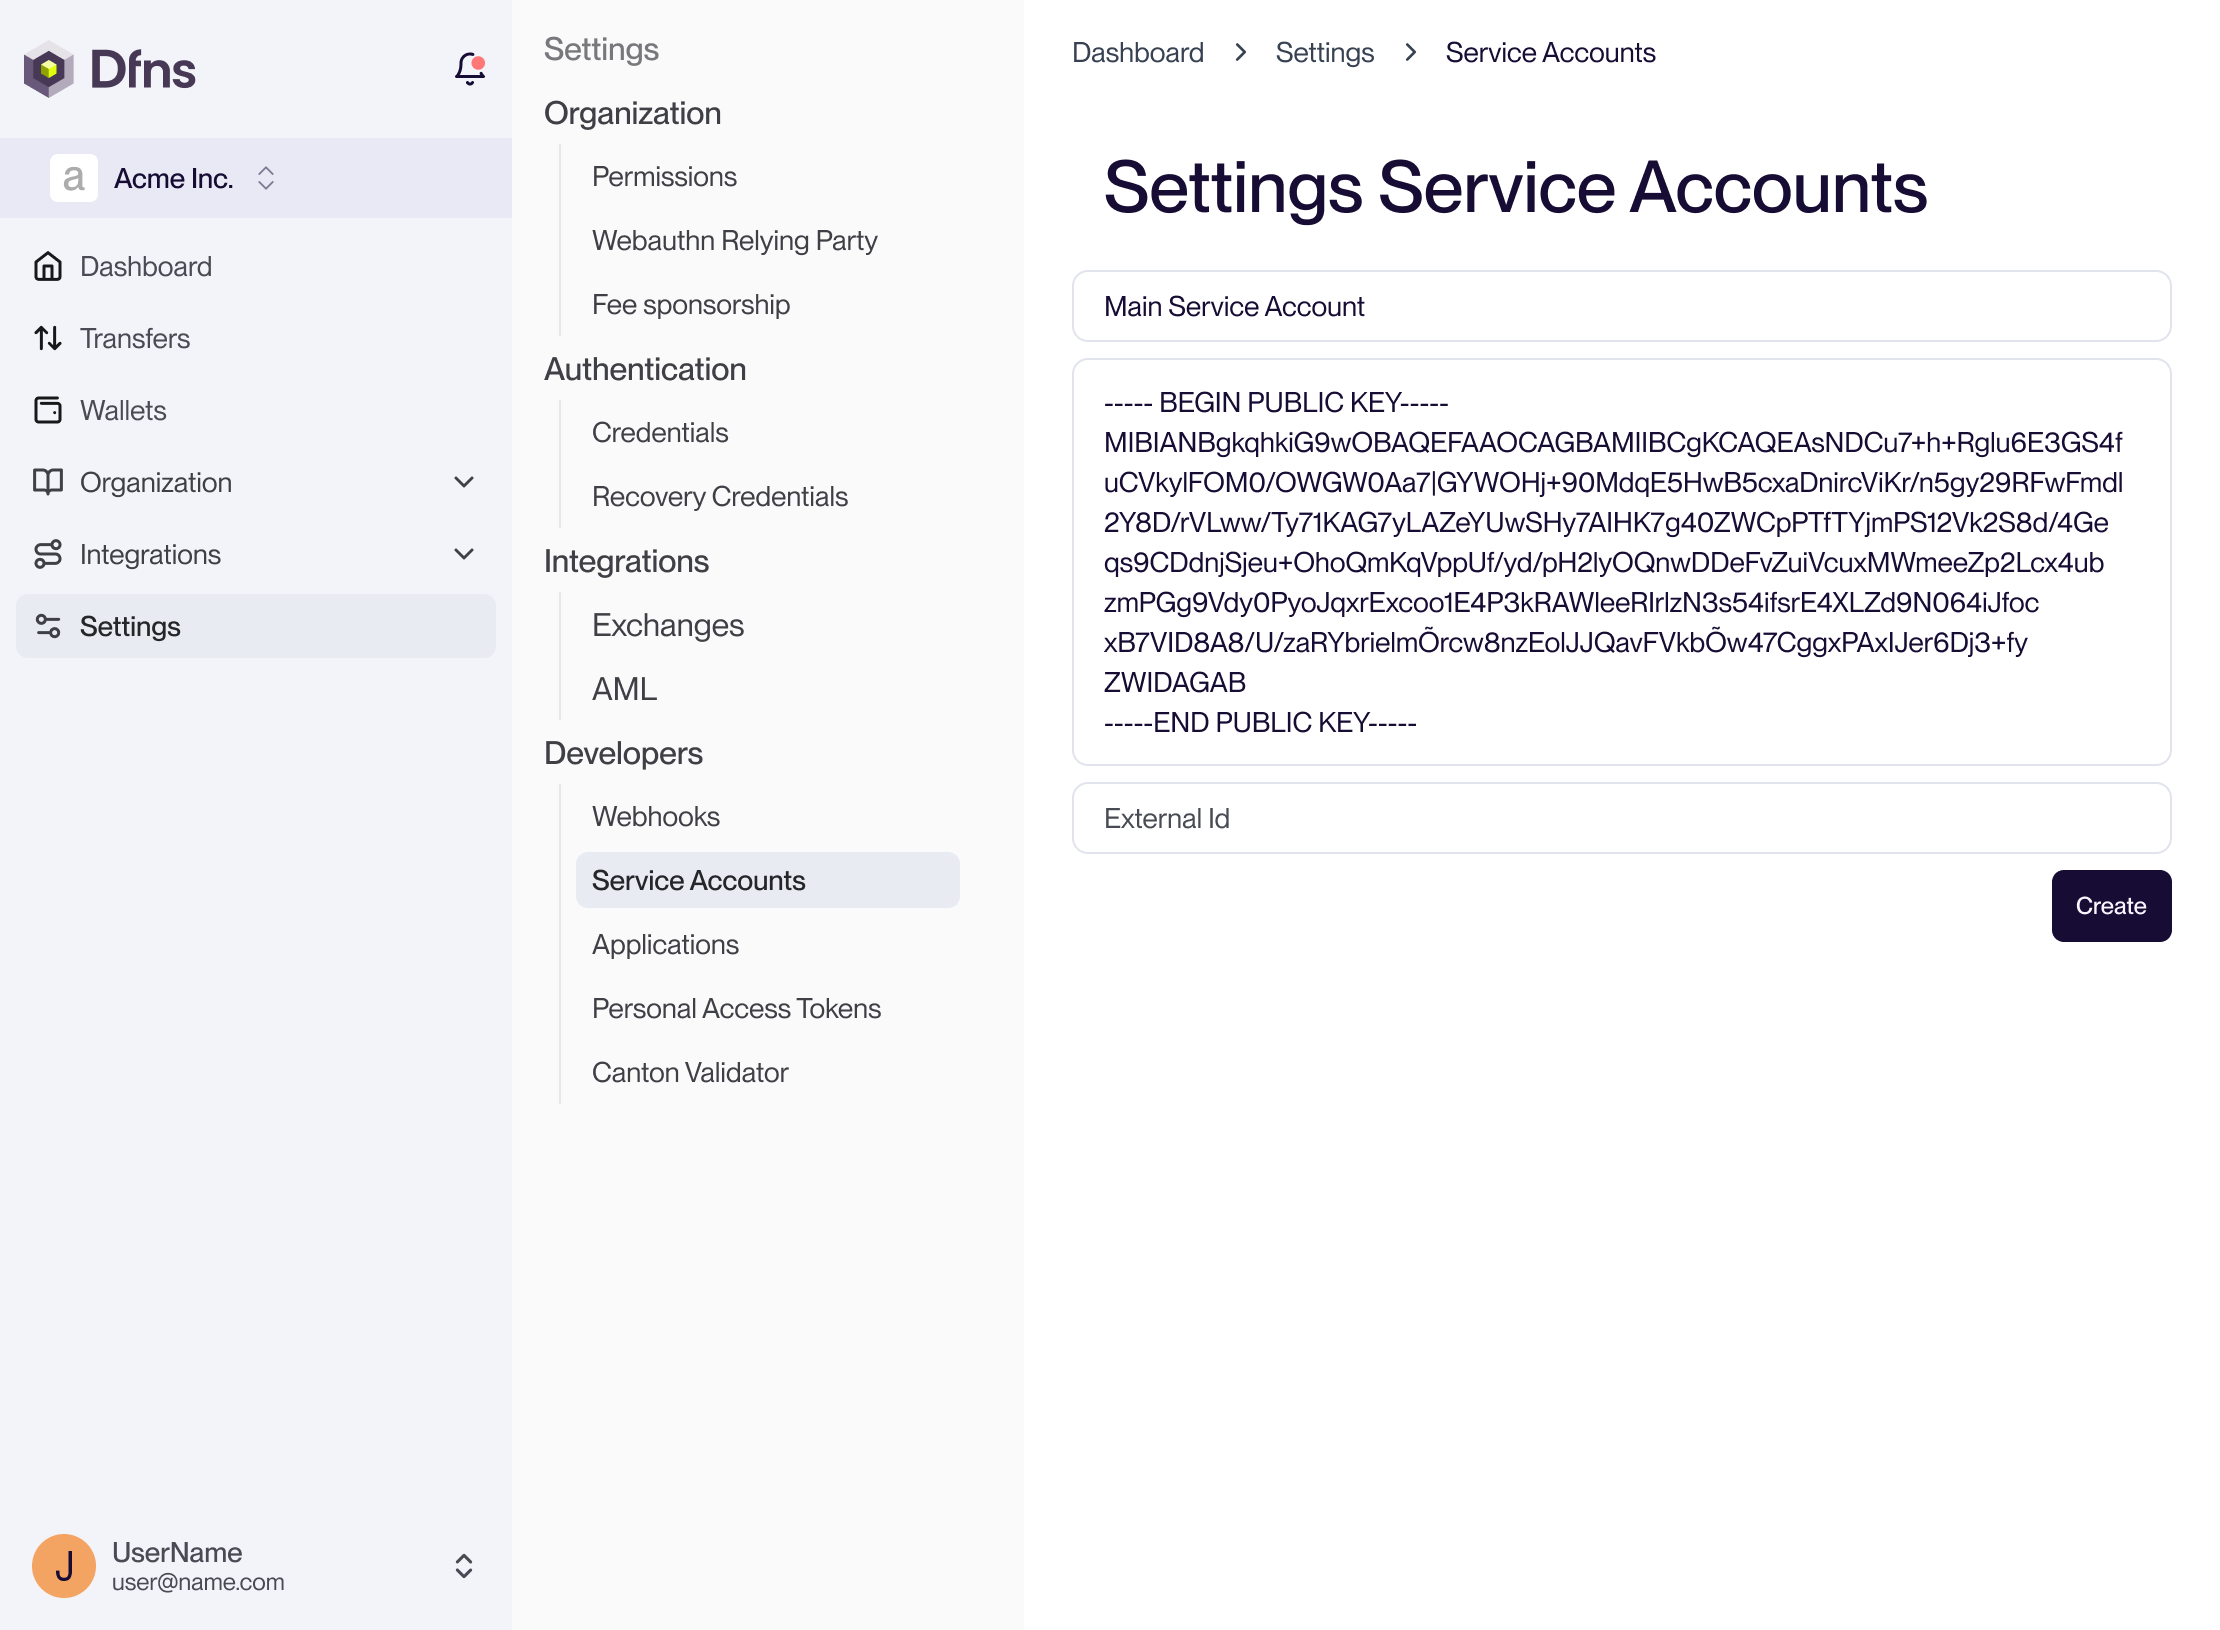
-----BEGIN PUBLIC KEY-----), click “Create” and 🔑 sign the action with your passkey.3
Store your Service Account authentication token
The last page shows the masked Service Account JWT. Copy it to a secure location before leaving the page.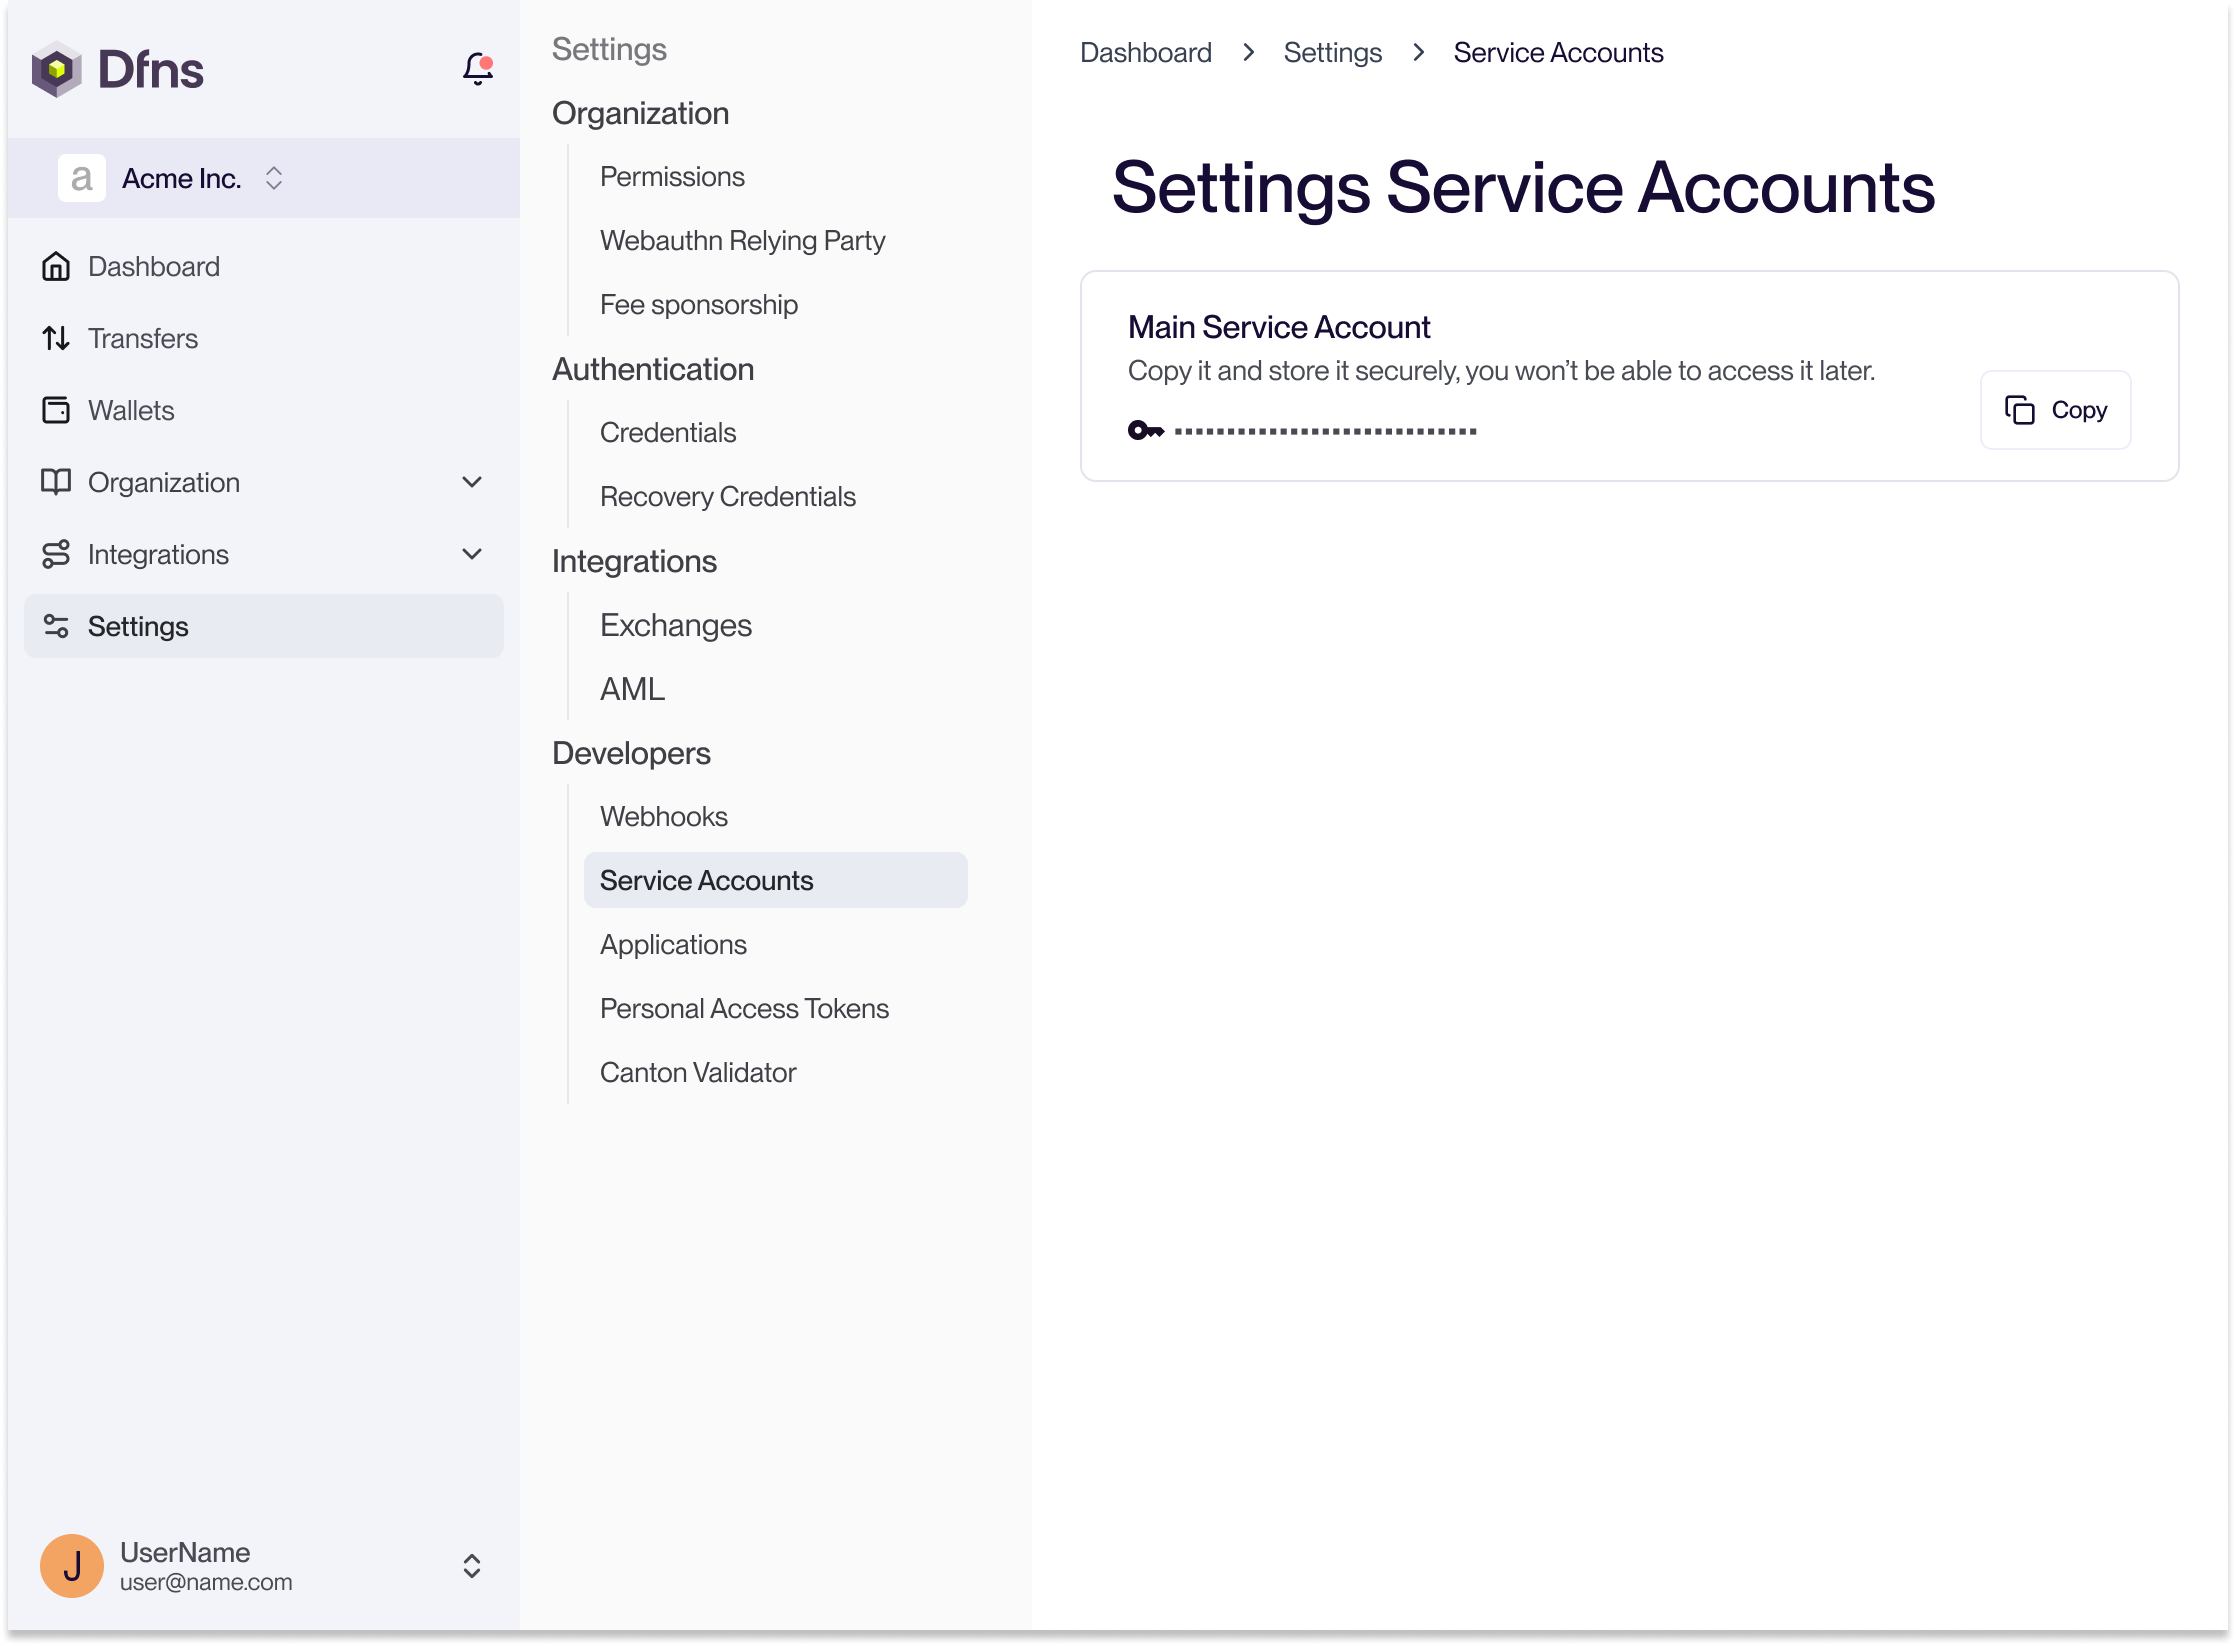
4
Use the Service Account
You now have:
- A Service Account Token: use it for authentication in all your API requests.
- A Private/Public key pair: use it to sign your action requests.
Congratulations! You can now make server-side API calls using your service account. Now start building your app using our Typescript SDK and specifically the Service Account sample app.