Create a new wallet
On the dashboard, head to 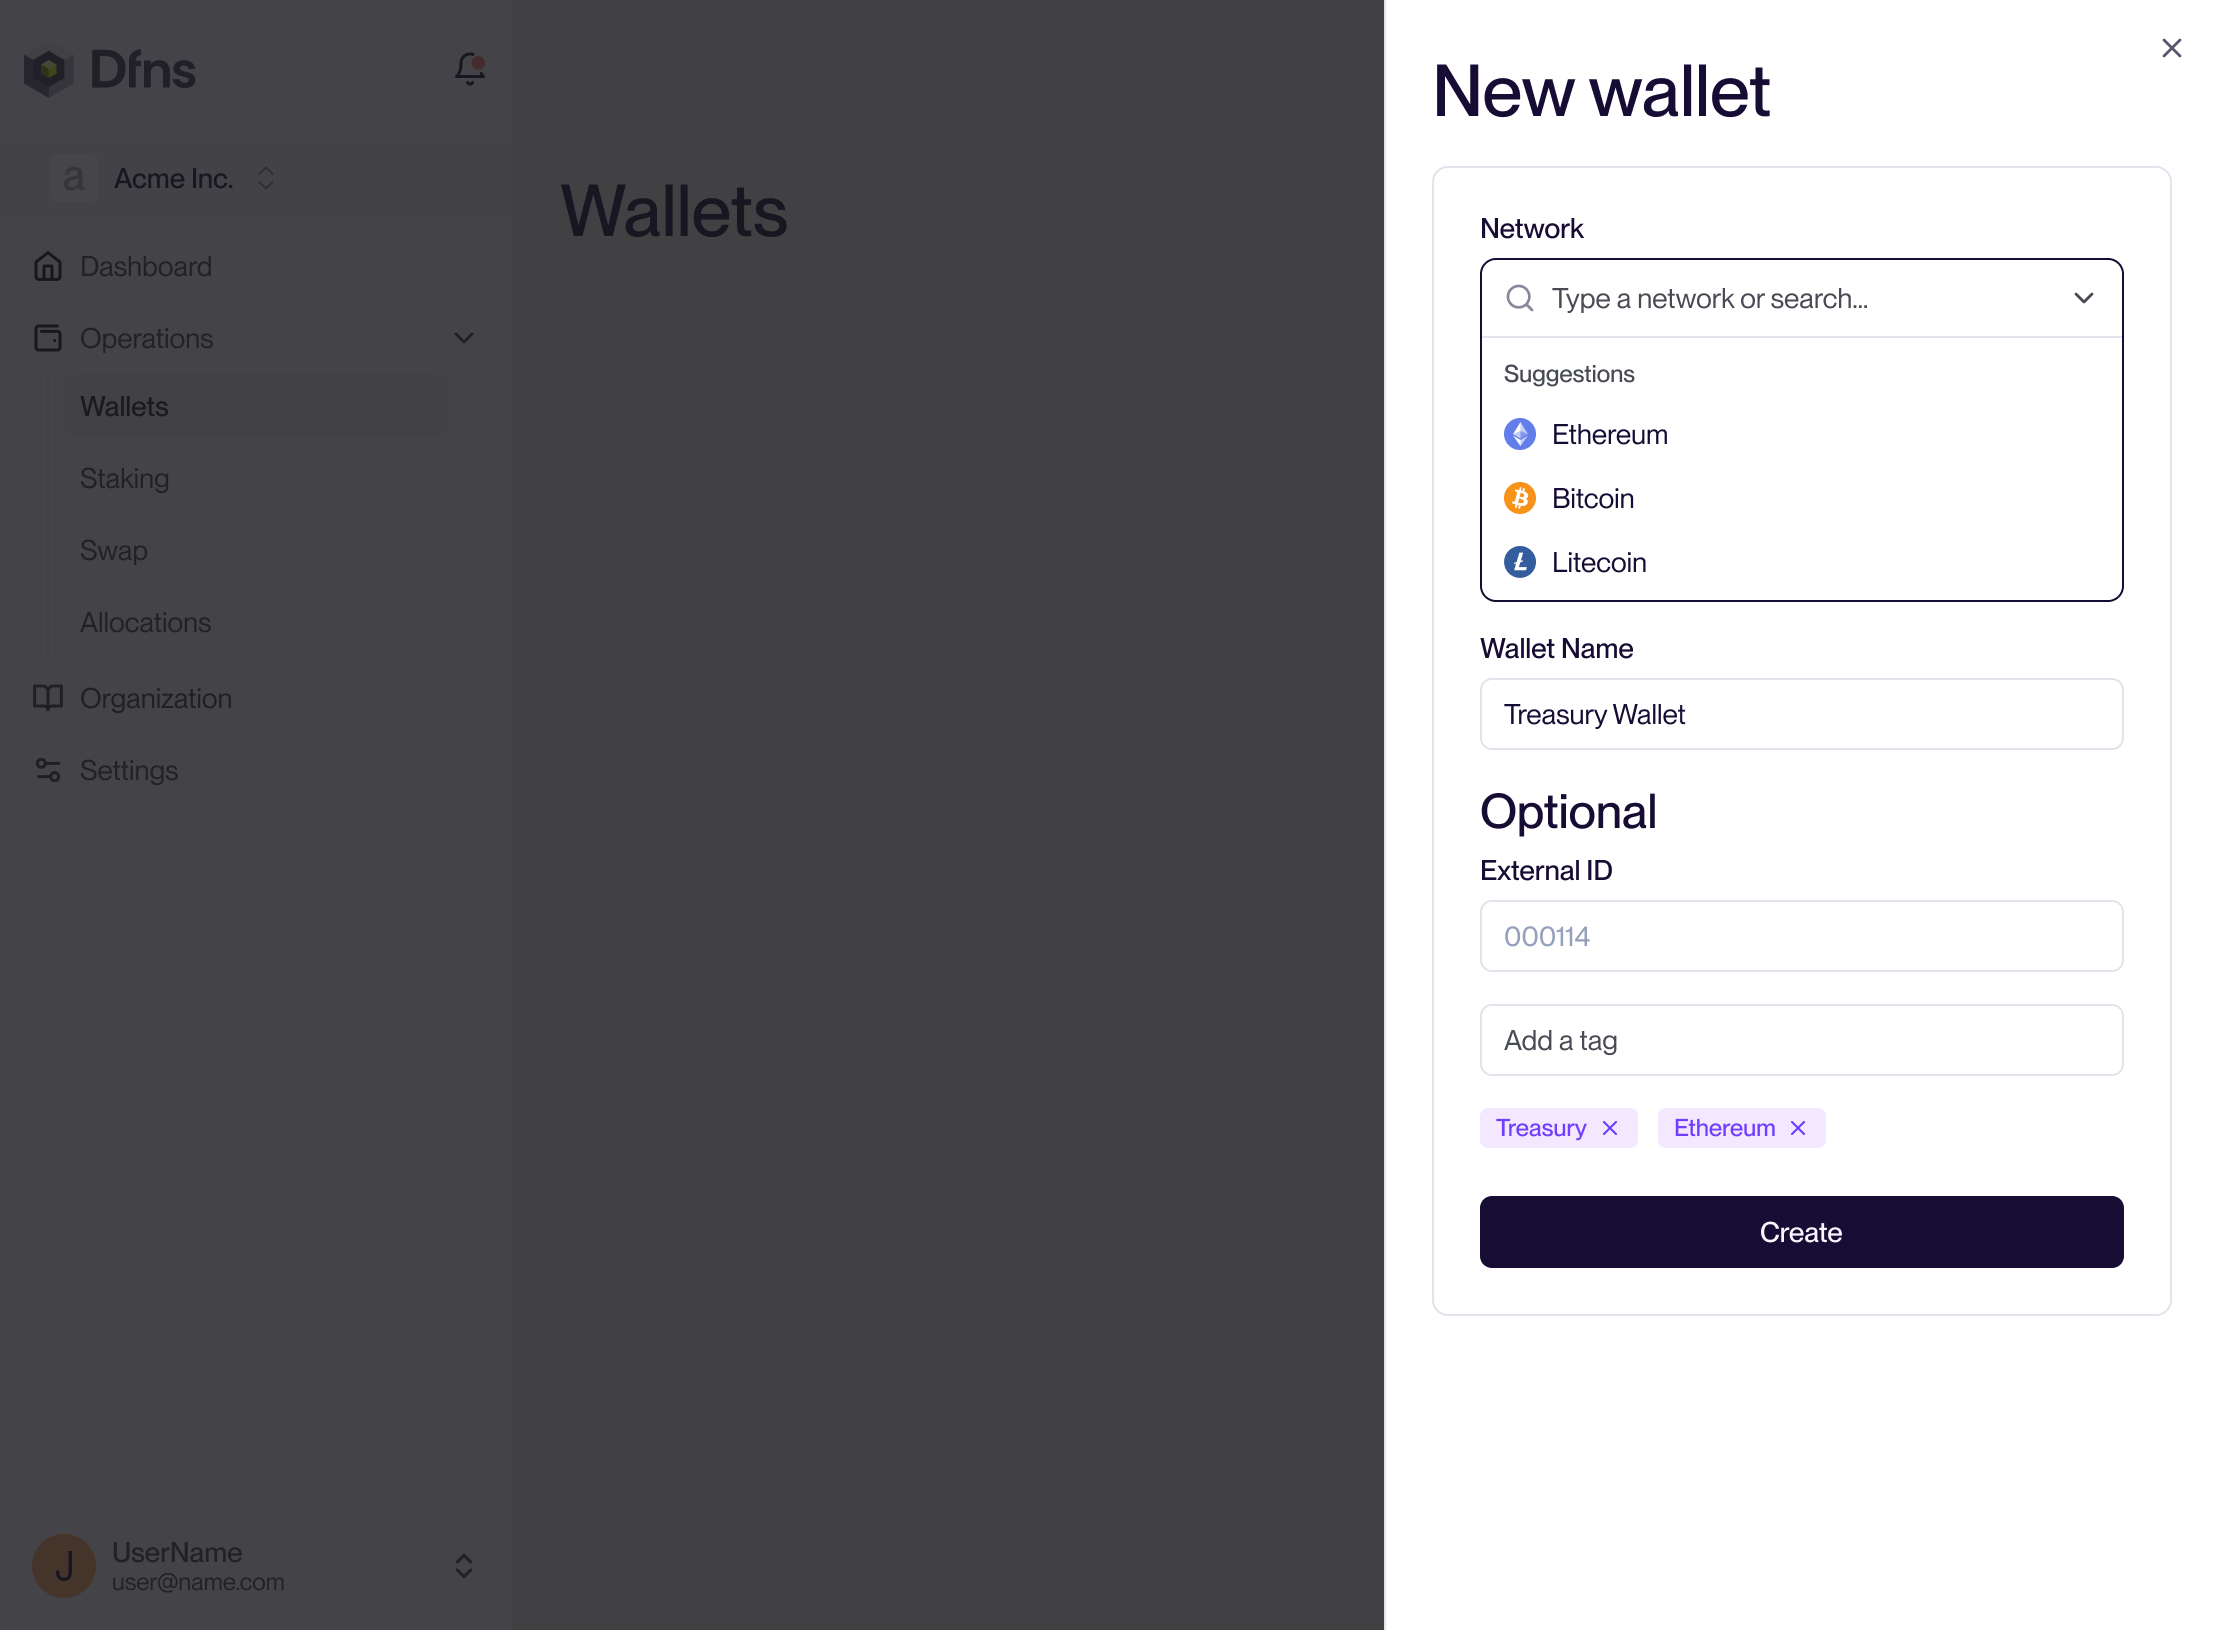
Operations > Wallets (direct link: https://app.dfns.io/v3/operations/wallets), and click “Create Wallet”. In the panel you can select the network out of the list of all supported ones. Give your wallet a name, and optionally add tags for easier recognition (for instance policies can target specific tags). Hit “Create” and 🔑 sign the action with your passkey.Use your wallets
A private key is created for you and secured in the Dfns key infrastructure. Your wallet can be used for transactions, using its address displayed on the detailed page. Dfns also starts monitoring transactions on the blockchain to index and display them on the wallet page along with the final balances.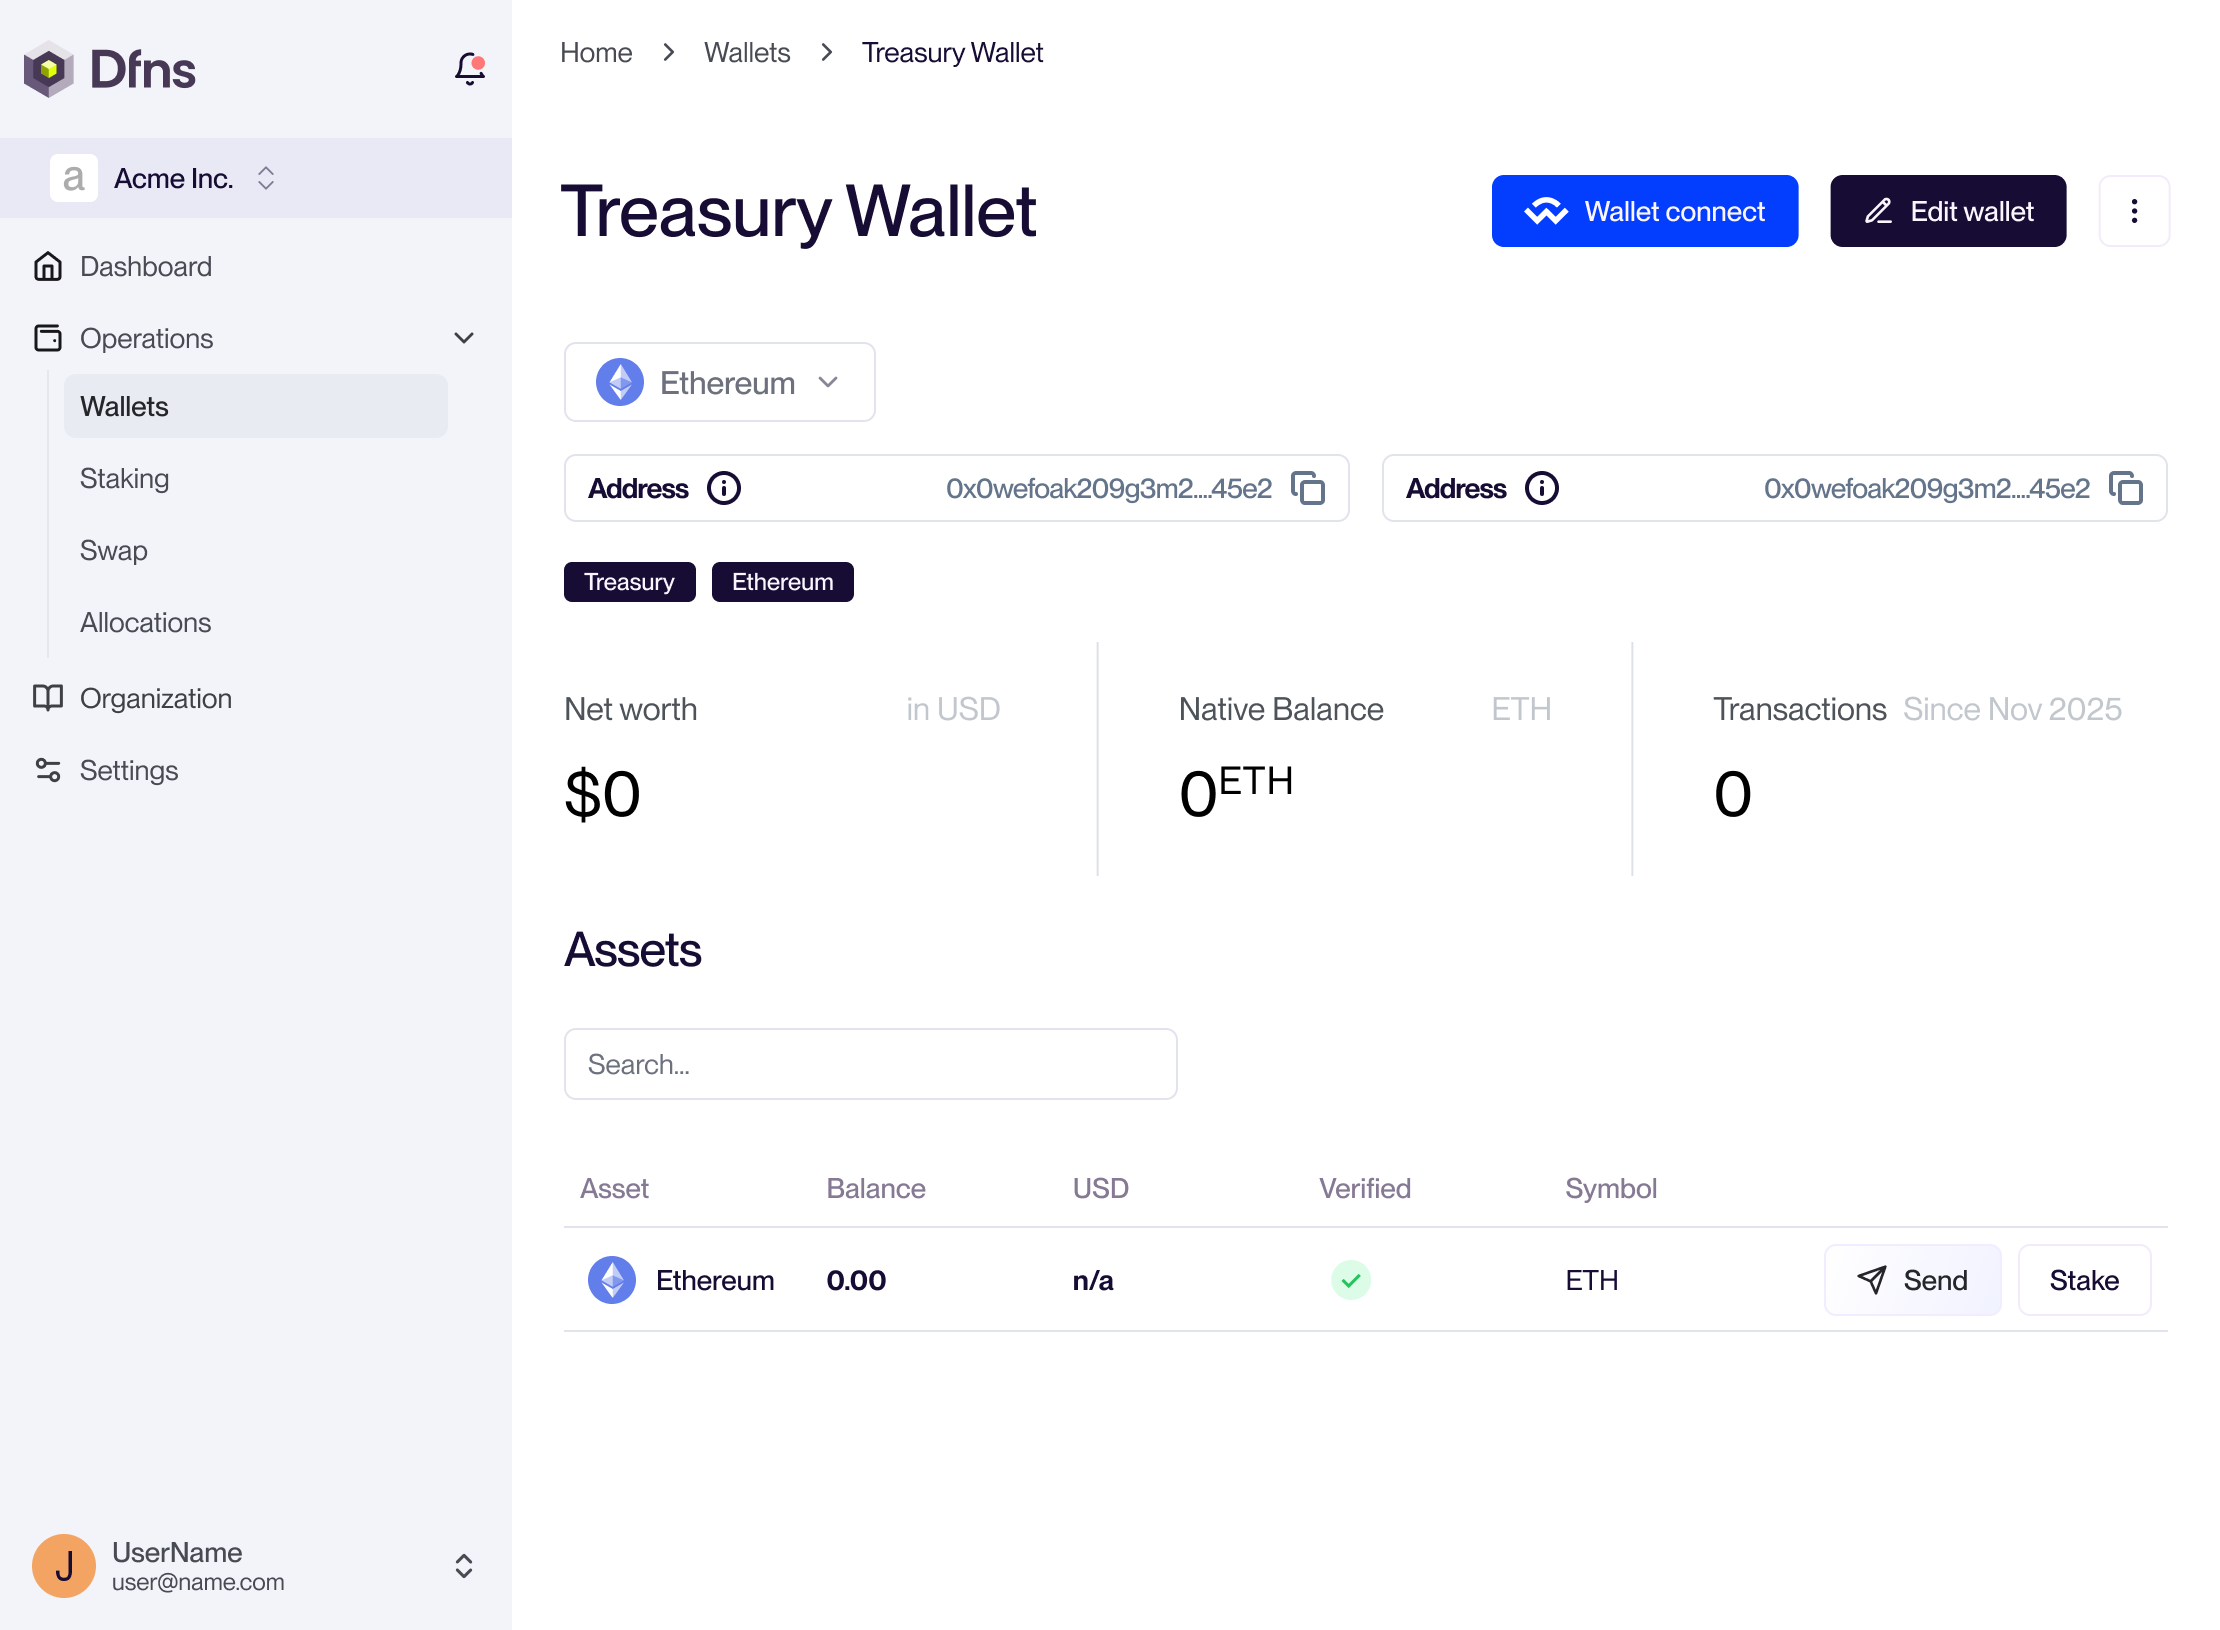
Tokens are only tracked for Tier-1 blockchain networks. More details here.
Monitor your transactions
Once you have initiated a transfer, it will be displayed on the wallet page. Look for the transfer Status to understand what is happening to your transaction. See details about the statuses here.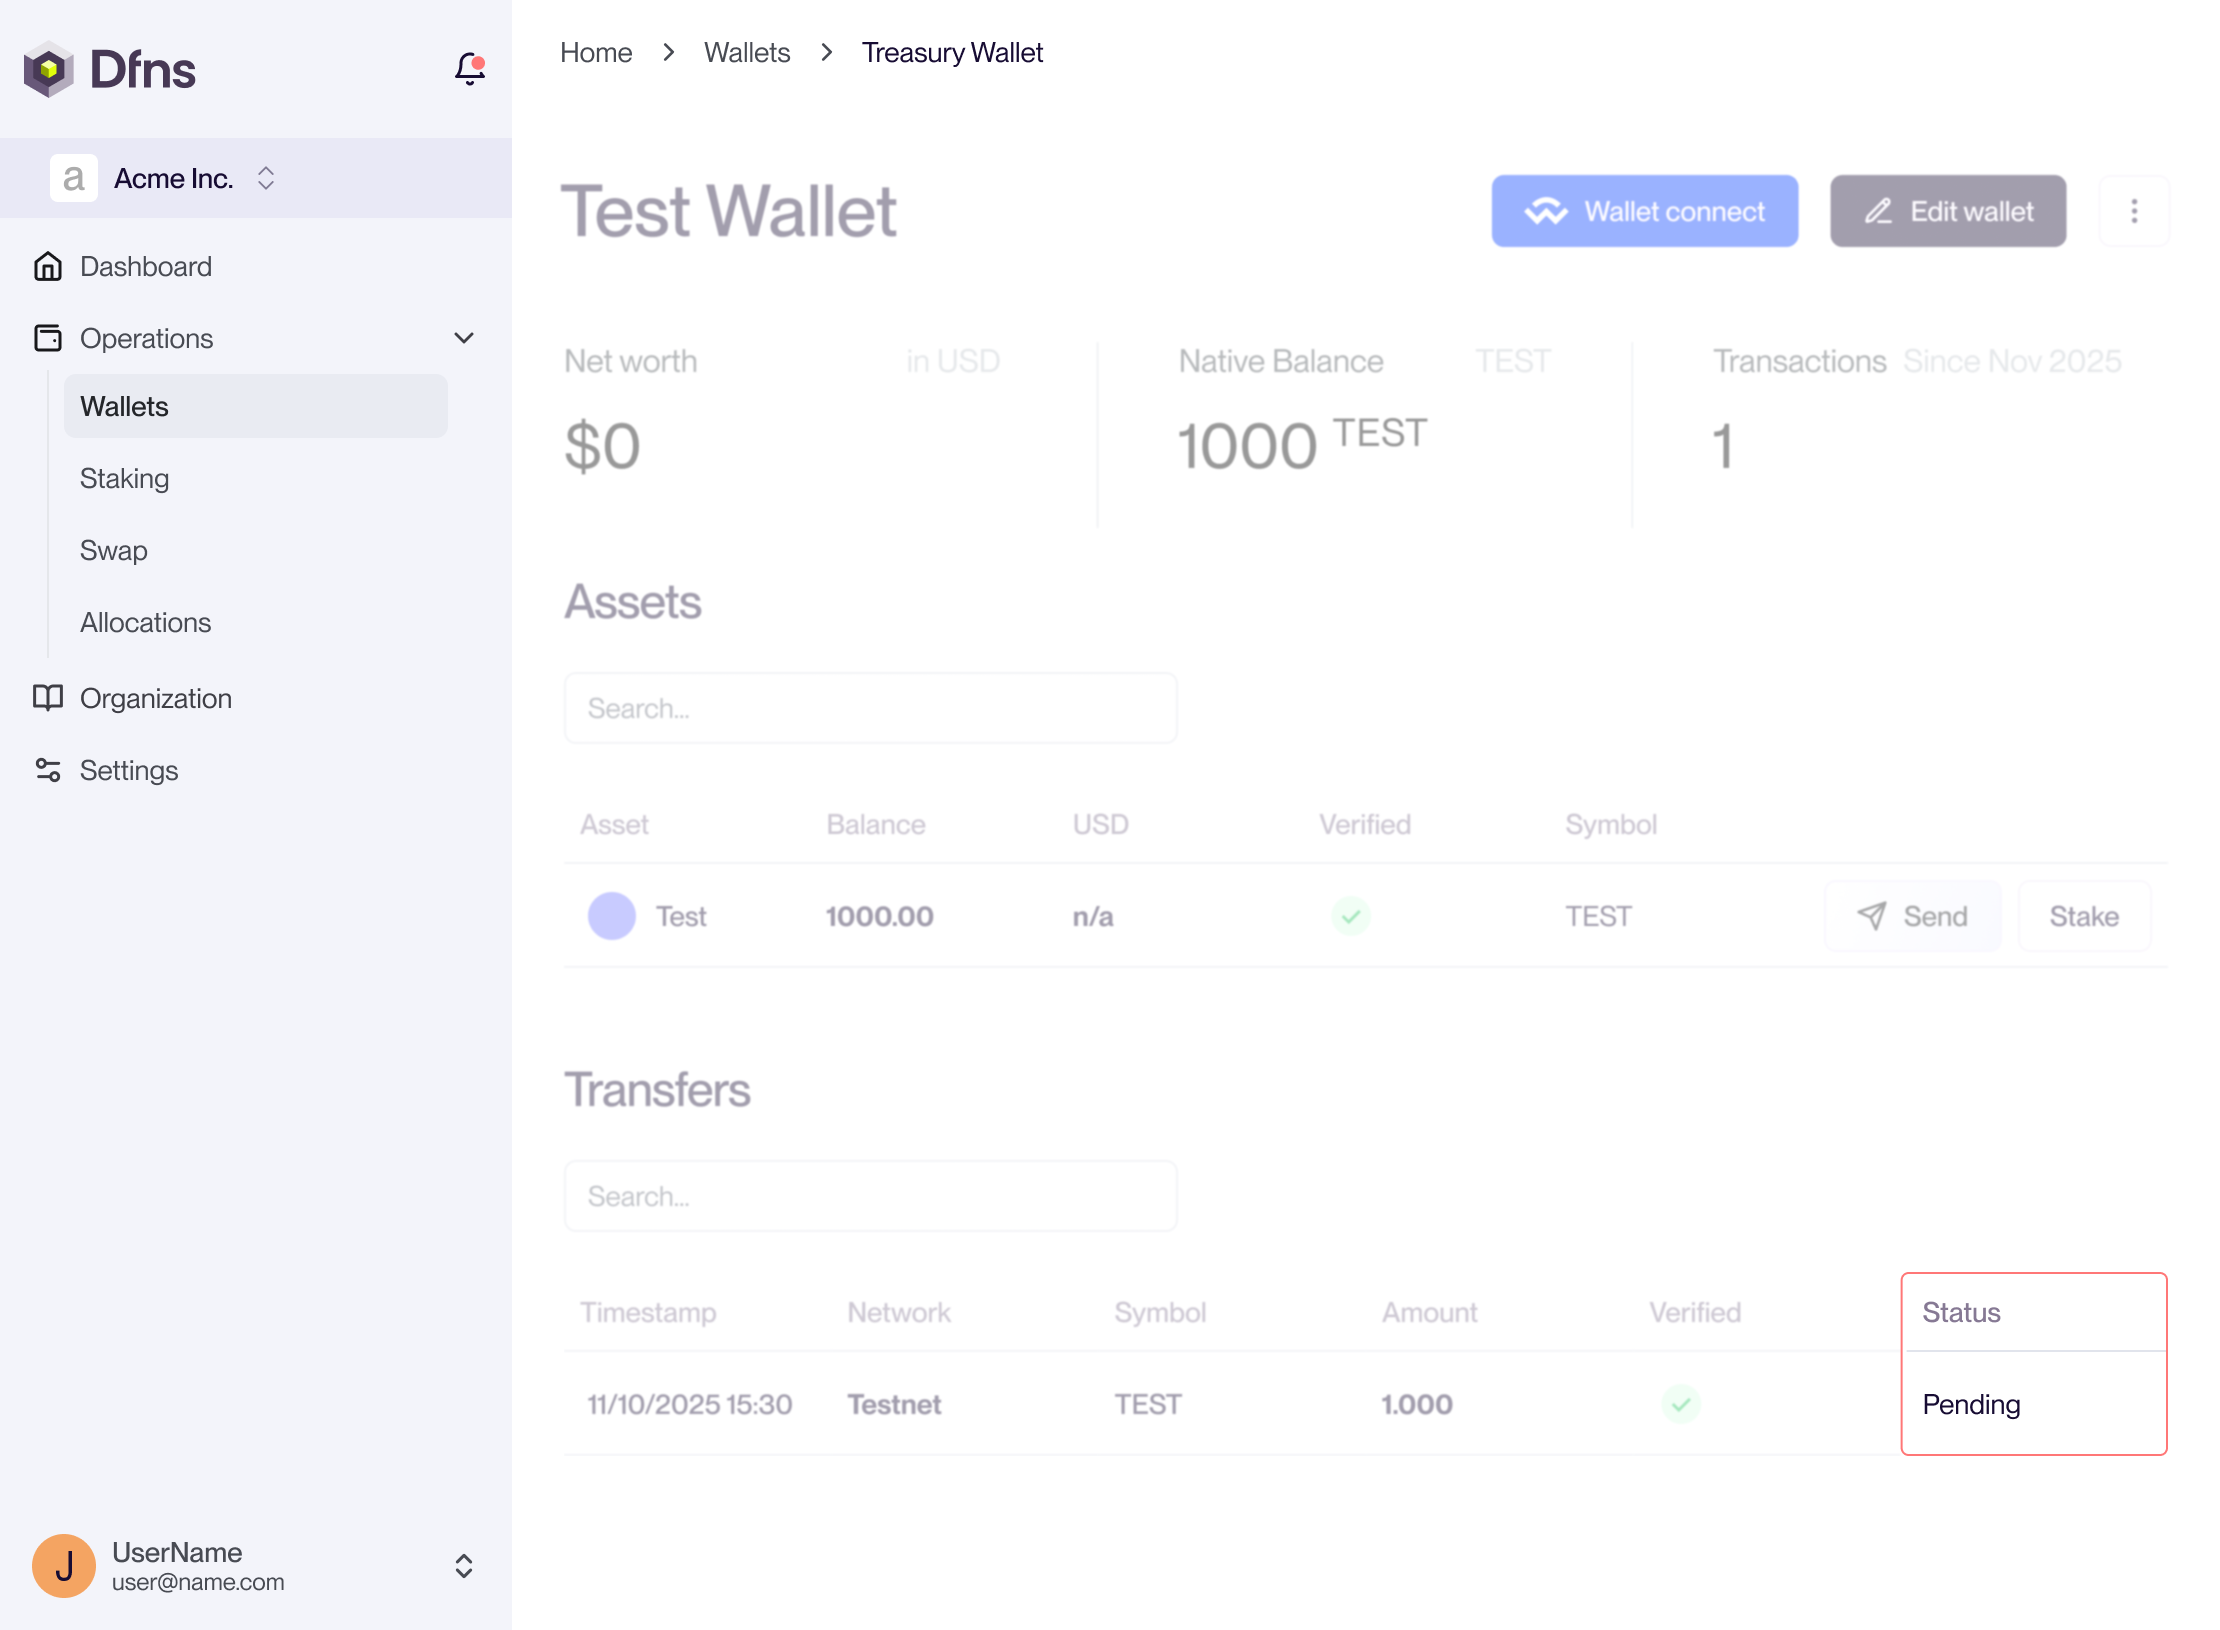
The “Pending” status means that an approval has been requested by a policy. Ask the approver to go to the Approvals section on the dashboard to accept your transaction!
Congratulation! you now have a wallet that you can use for holding, receiving and sending assets!