

- Wallet balances: your wallets’ balances of the token are marked verified, including balances that existed before you registered it, so wallet search and asset filters treat it as a legitimate asset.
- KYT screening: transfers of the token are screened when your Chainalysis or Elliptic integration is set to screen Verified tokens only.
Prerequisites
- Token management enabled for your organization. If Manage Tokens shows that custom token management is not enabled, contact DFNS.
- The
Registry: Verified Assetspermissions:Readto view the list,Createto add a token,Deleteto remove one (see Roles and permissions).
Add a token
1
Open Manage Tokens
Navigate to Settings and open Manage Tokens.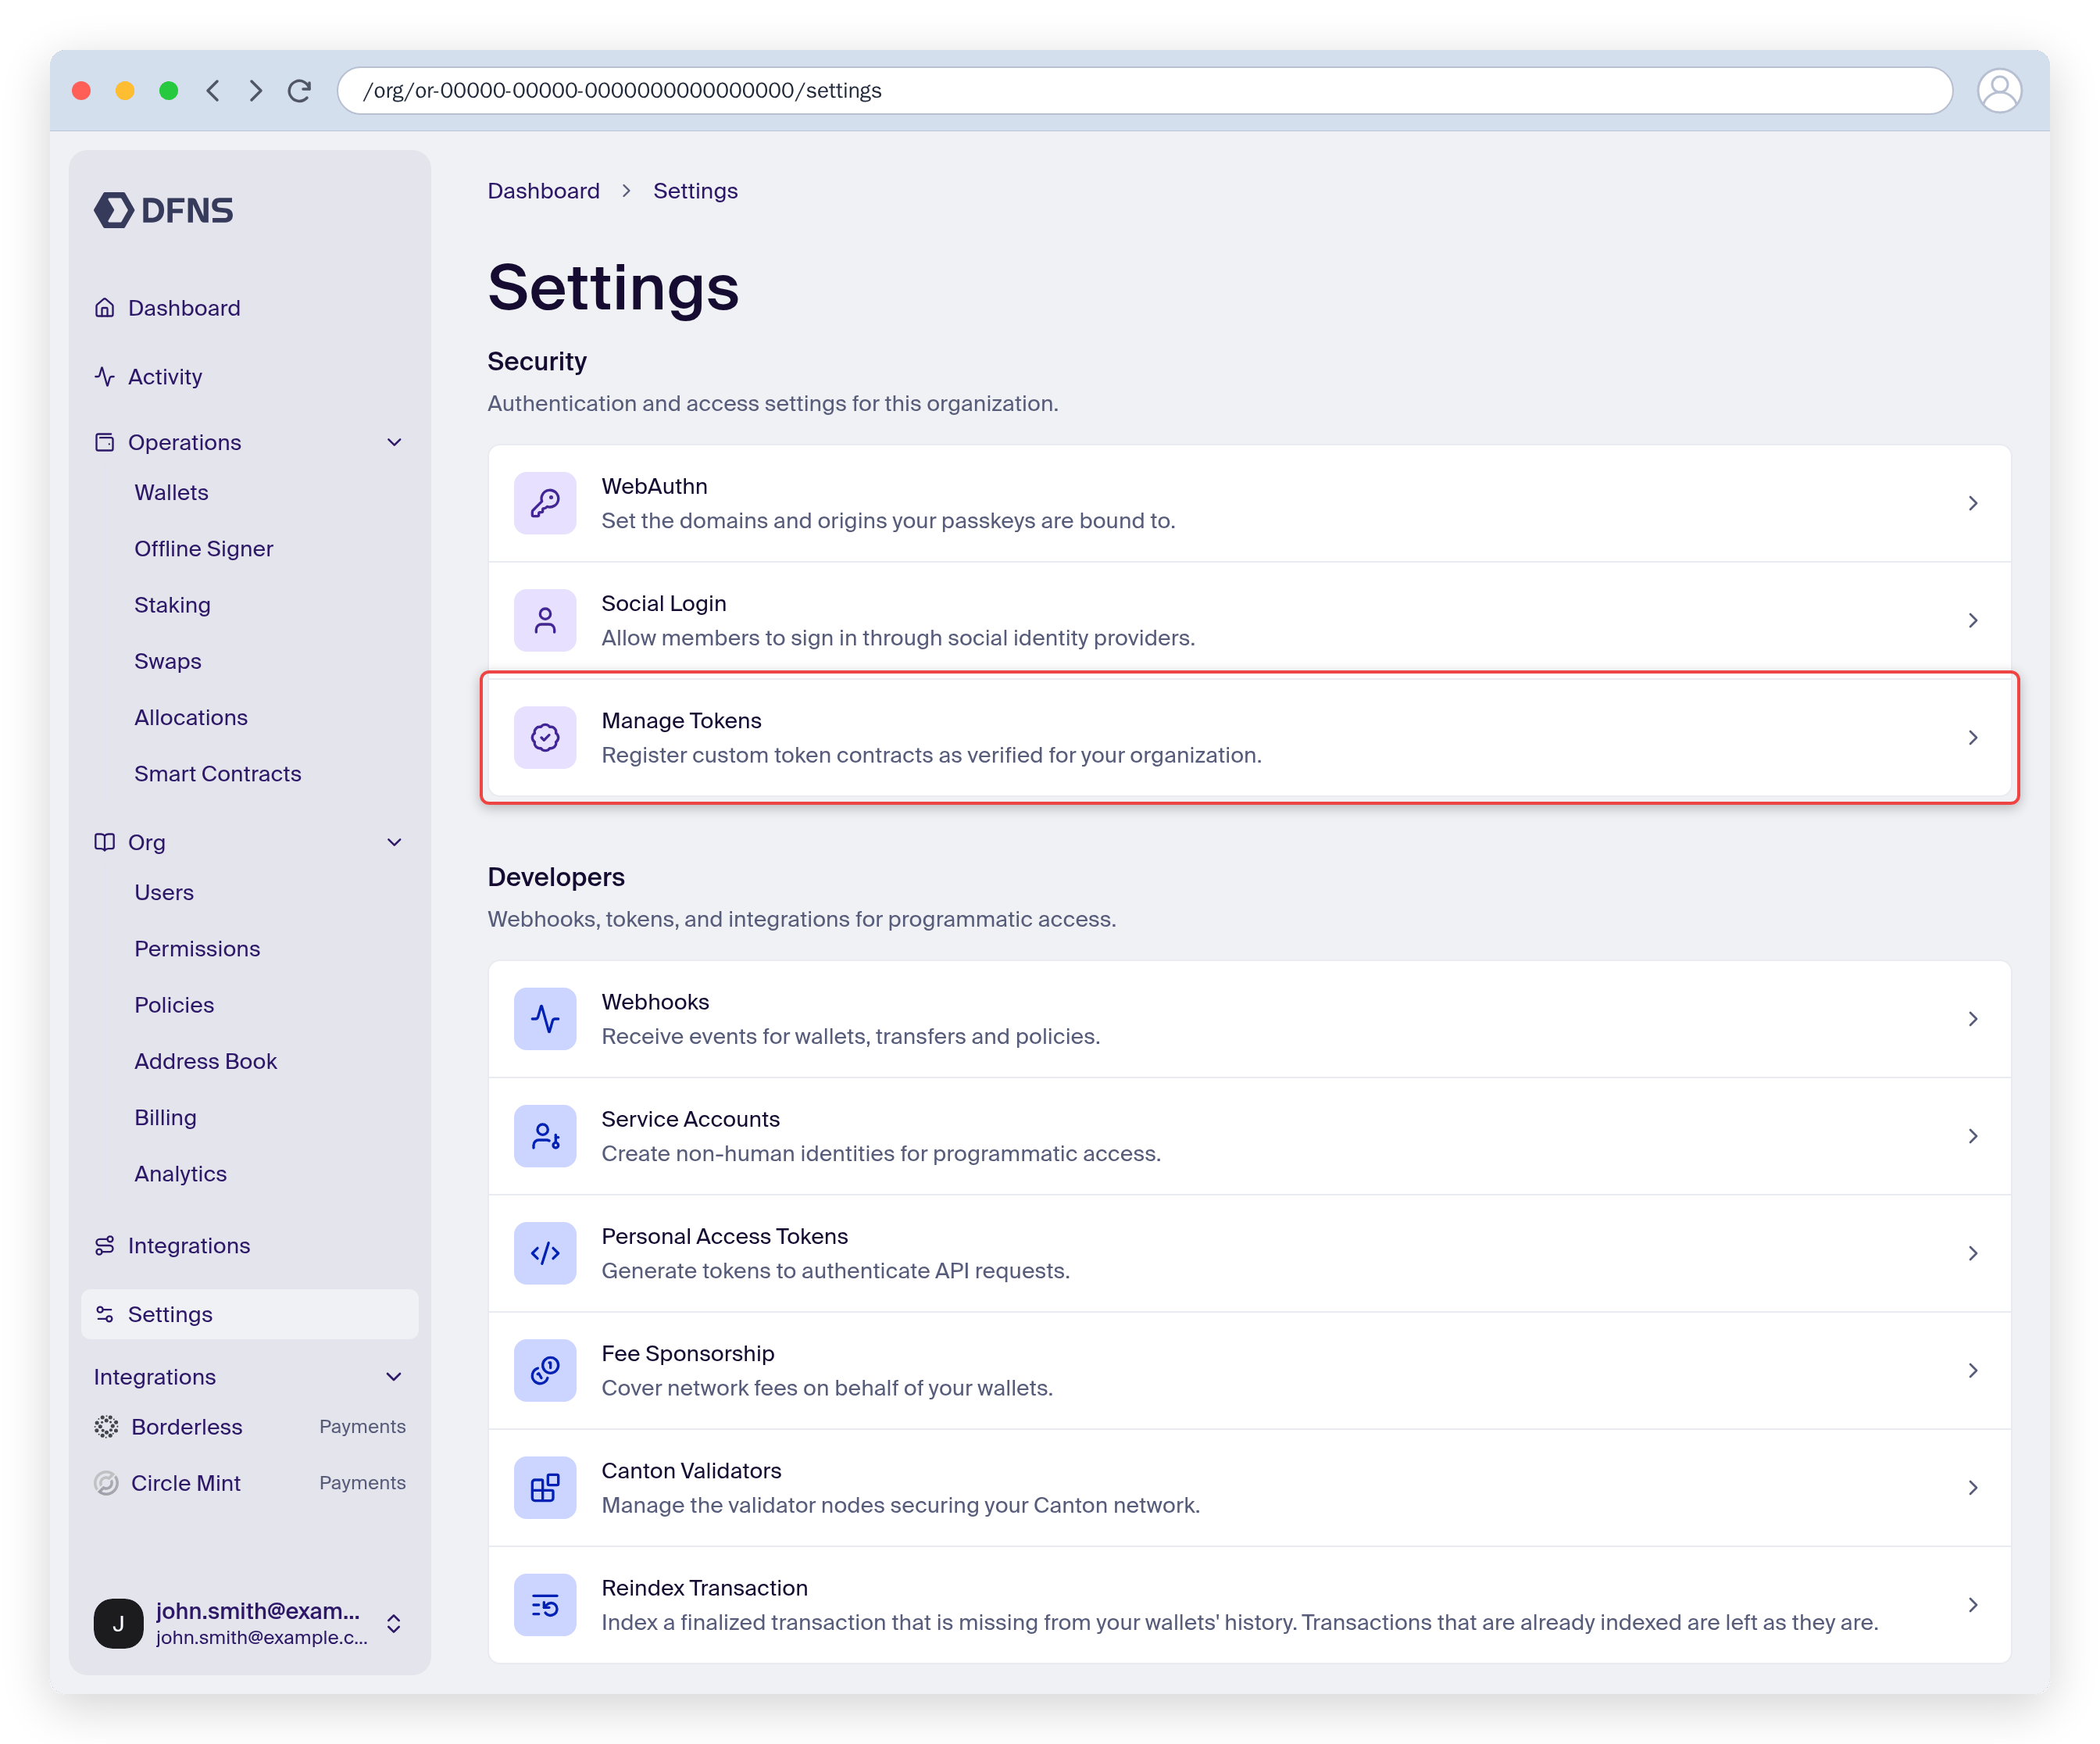
2
Add the token
The page lists the tokens your organization registered. Click Add Token.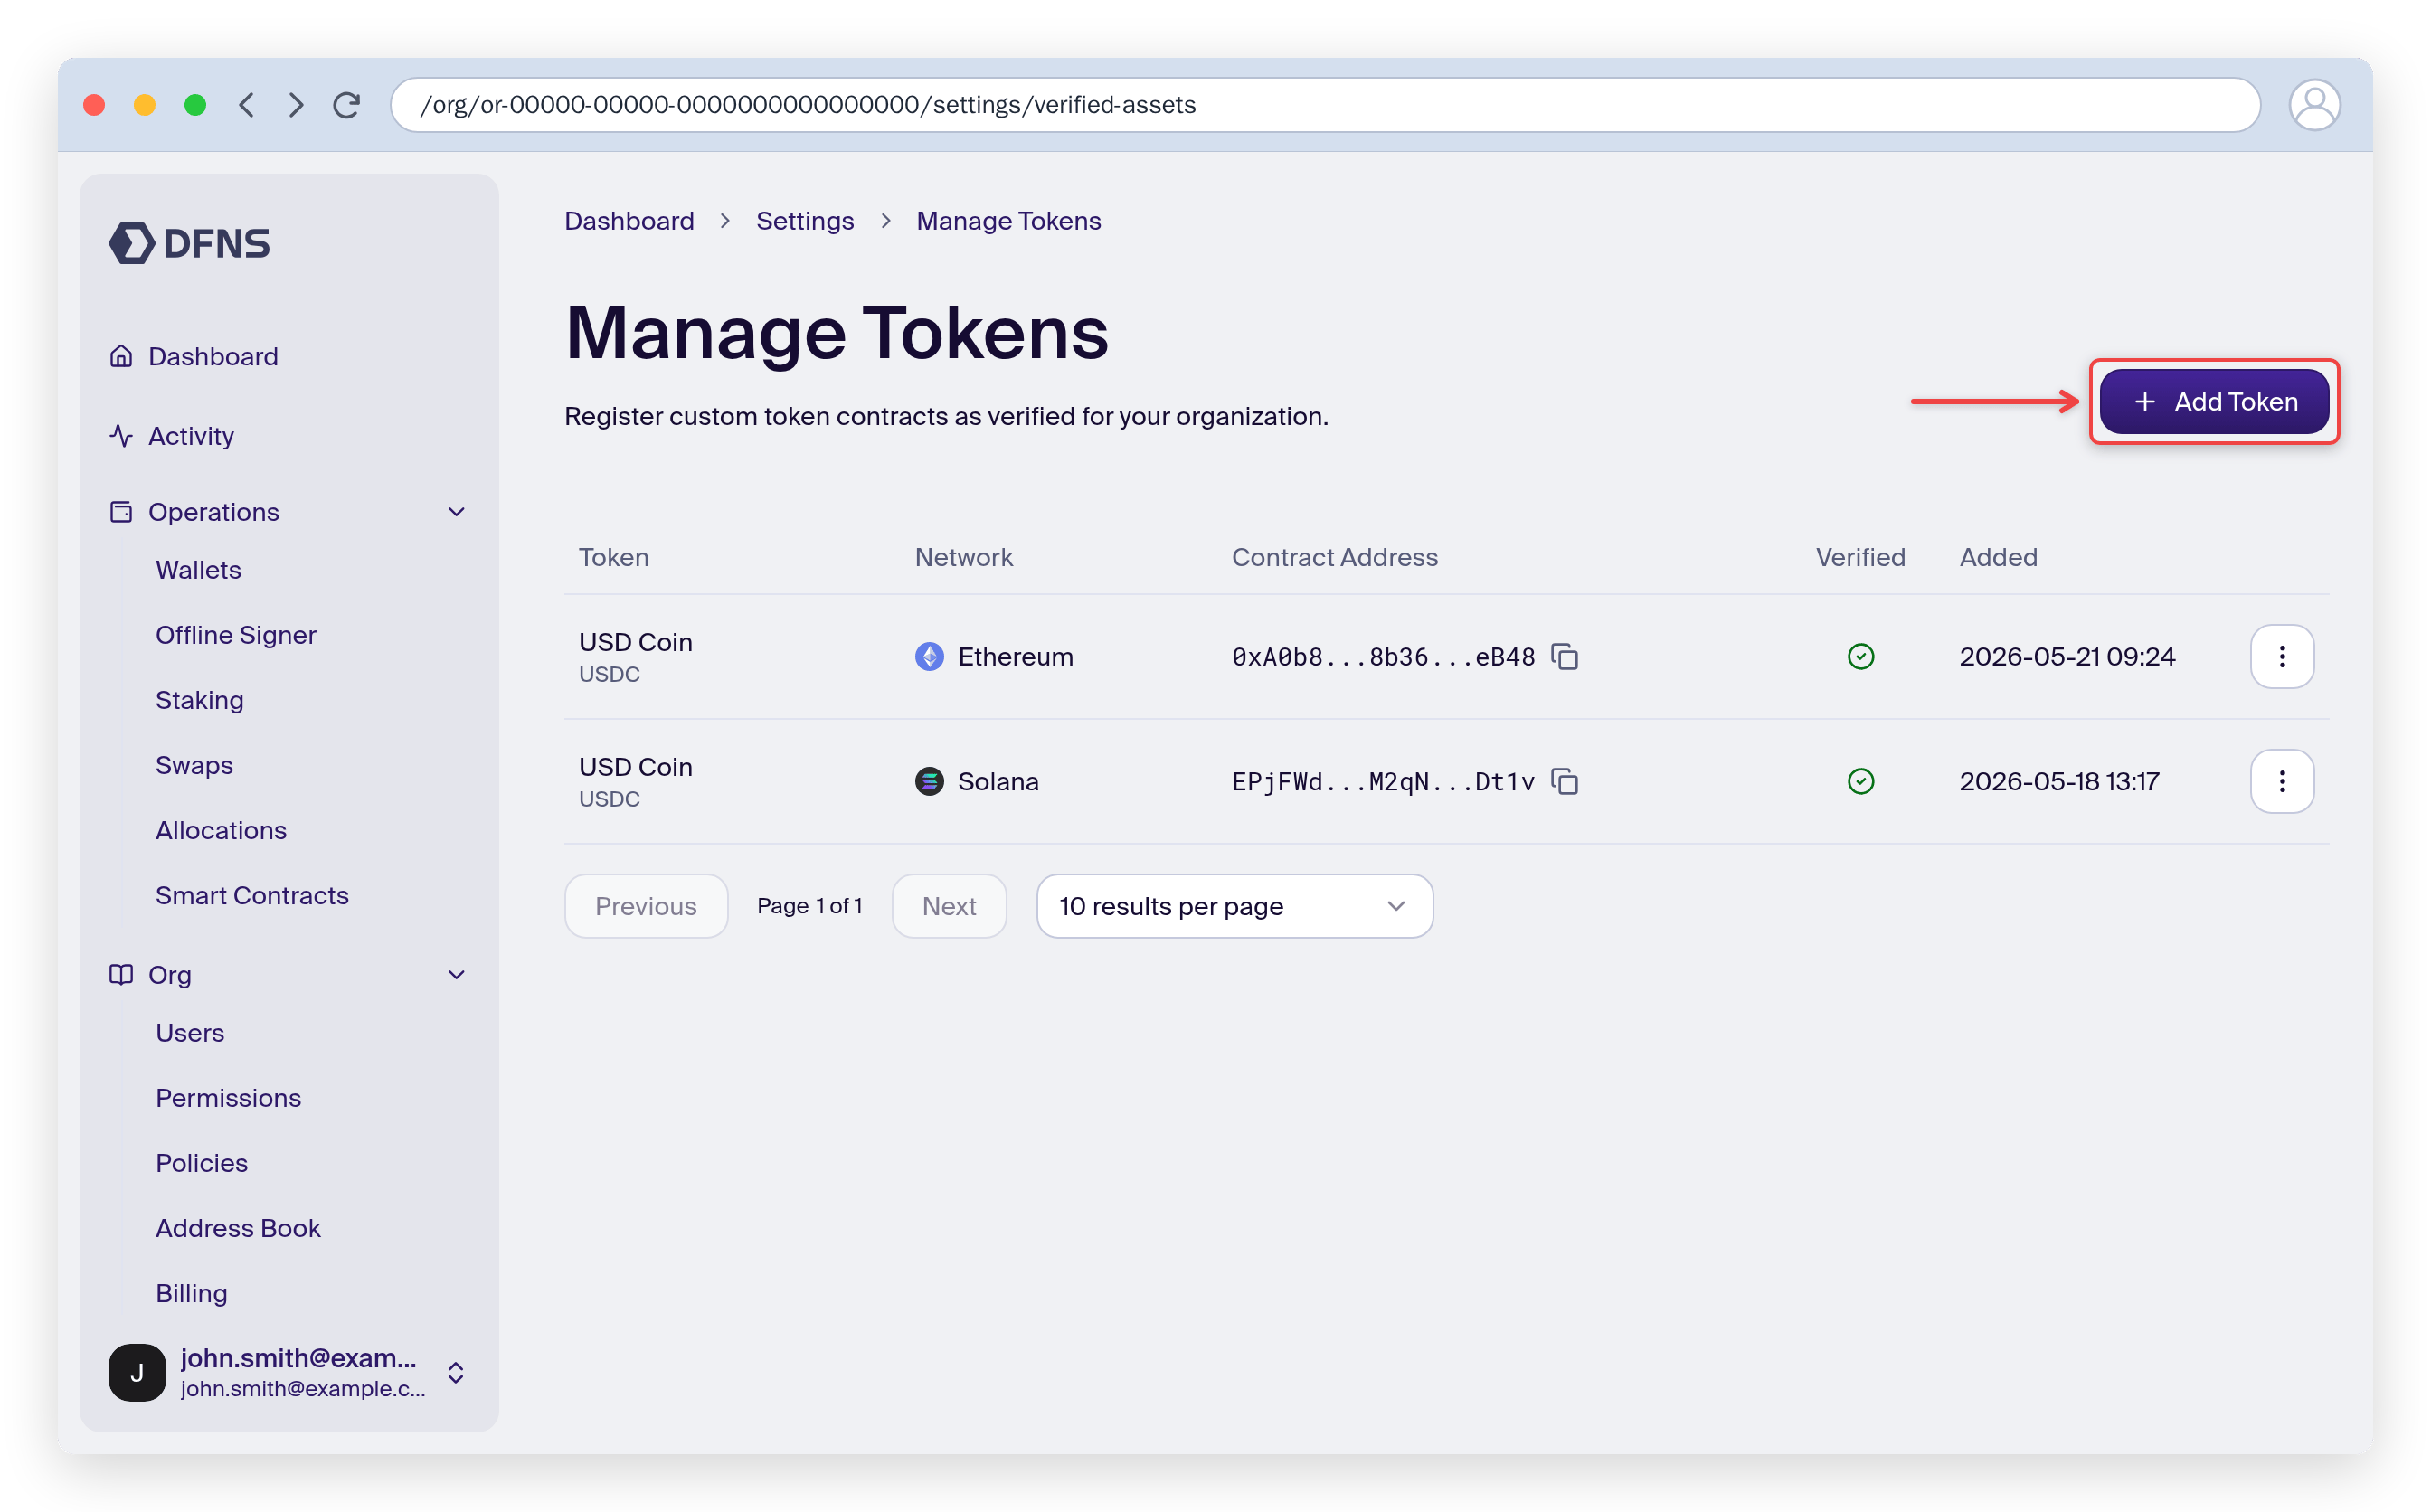
3
Enter the network and contract address
In the Add Token panel, select the Network and paste the token’s Contract Address (the mint address on Solana). Click Add Token and 🔑 sign the request.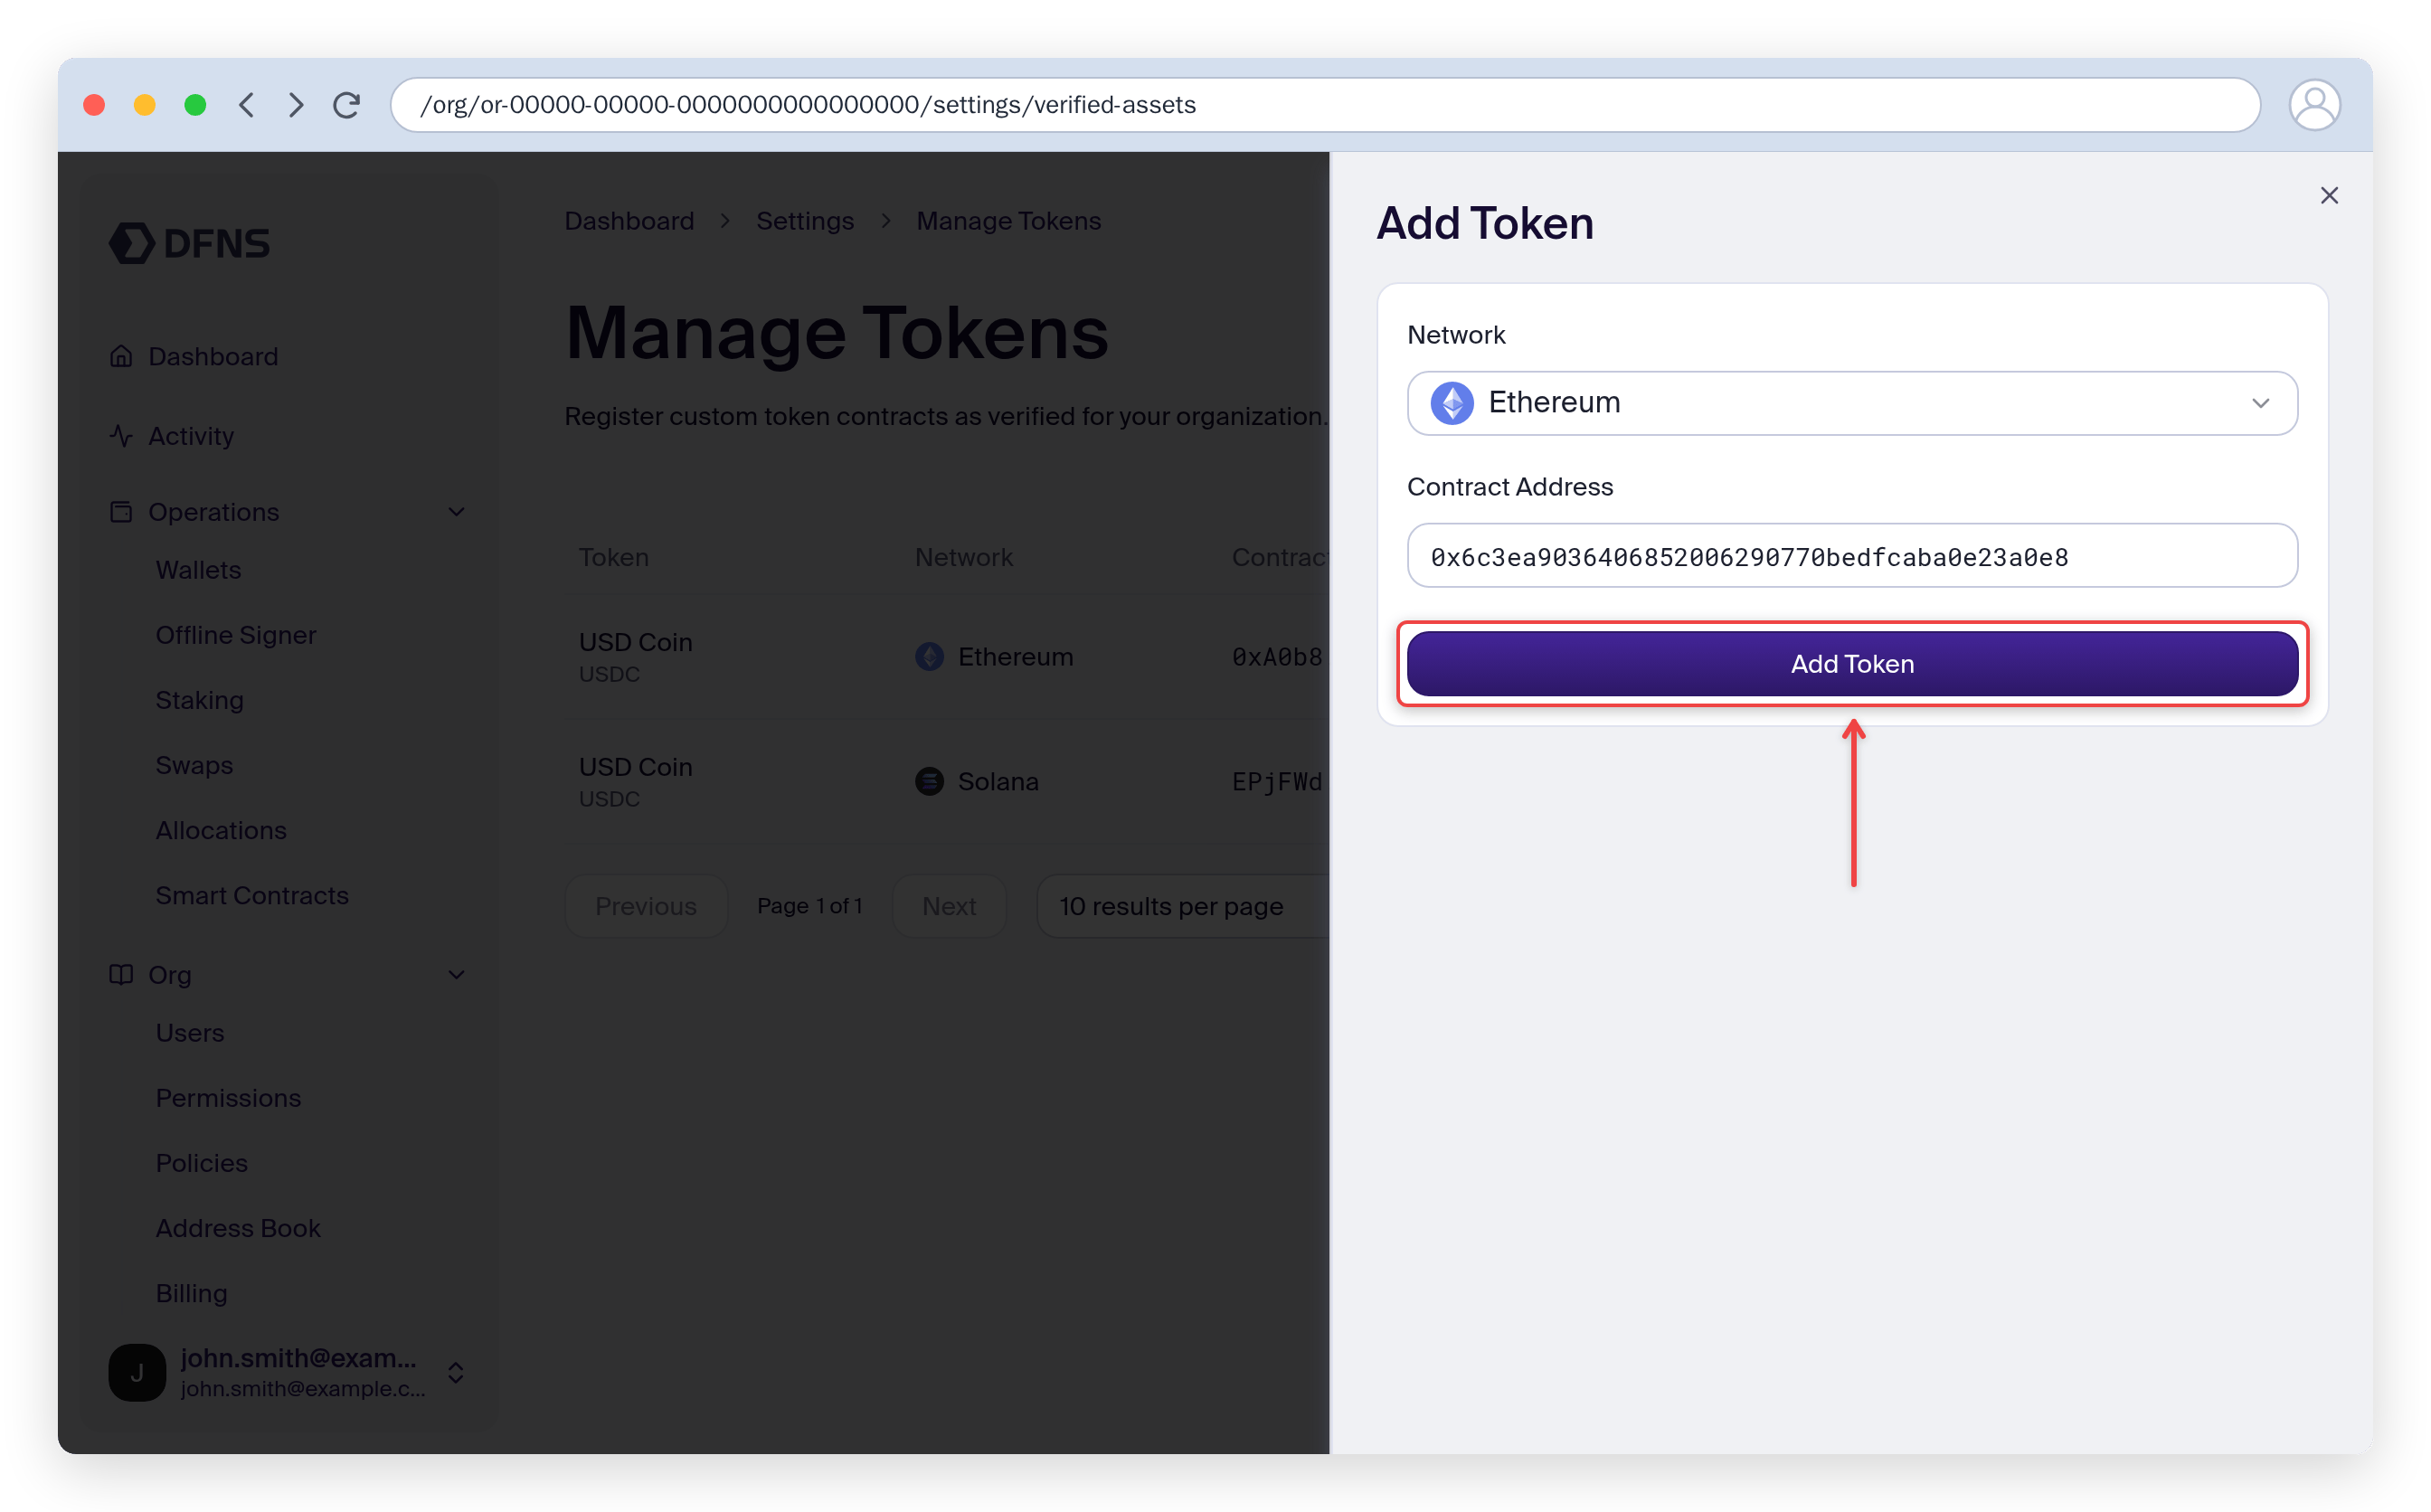
- DFNS already verifies it. There is nothing to register.
- your organization already registered it on this network.
- the contract does not declare a name on chain.
The token now appears in the list with its name, symbol, network, contract address, and the date it was added.
Remove a token
Open the token’s action menu in the list, click Delete, and confirm. The token falls back to the DFNS verification status: it stays verified only if DFNS verifies it.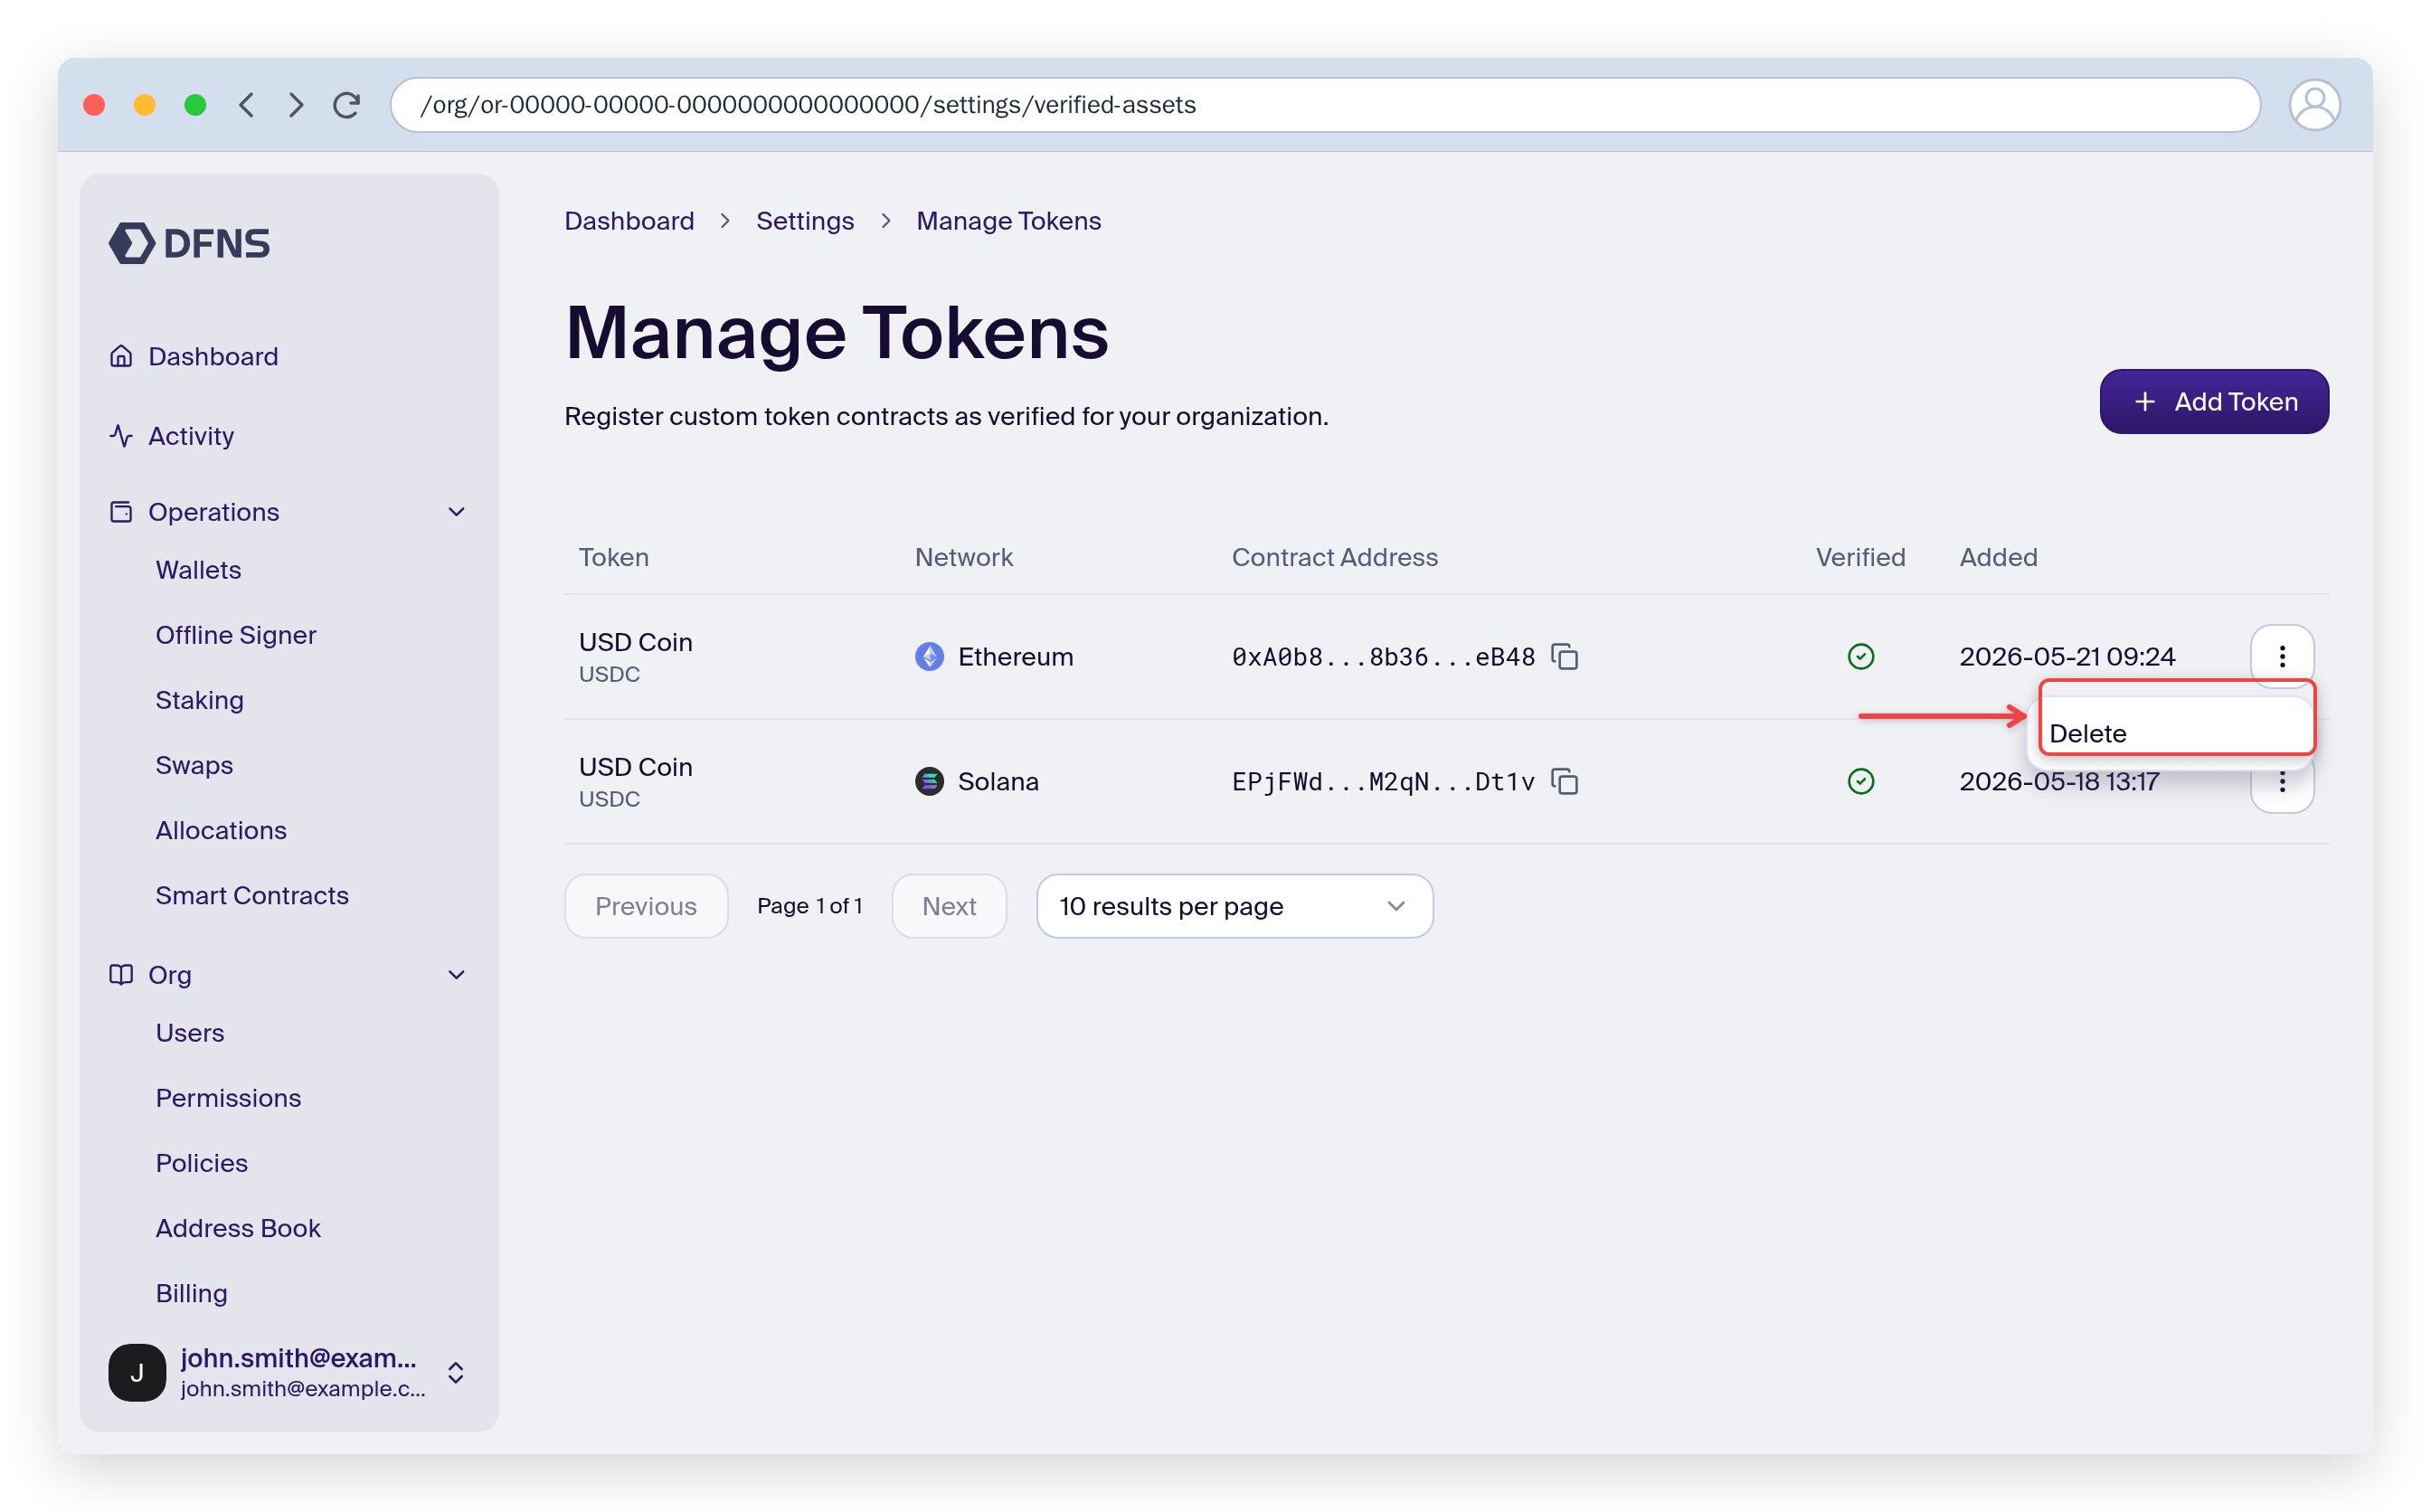
Require approval for token changes
Registering a token decides which assets your organization and your screening treat as legitimate. To require approval, or to block changes, create user-action policies onCreateVerifiedAsset and DeleteVerifiedAsset. A change held by a policy applies once the approval completes.
Related guides
Security best practices
How verified assets protect you from spam tokens
Manage wallets
Browse wallet assets and history